
Cut the legs off one pair of adult jeans and you get four flat panels of heavyweight cotton, each wide enough for a wedge of a tree skirt and already the right weight to lie flat under a tree. That is the useful part: a 48-inch skirt needs a 24-inch radius of fabric, more width than most bolts give you in a single piece, so a material that arrives in small sturdy panels is working with you instead of against you. Below are twelve ways to turn a pile of dead jeans into a skirt, sorted so the wash and the construction do most of the design, starting with how you actually hold the thing together and ending with the versions that pick a look and commit.

Start with the construction
1. Rag-quilt frayed-edge denim tree skirt
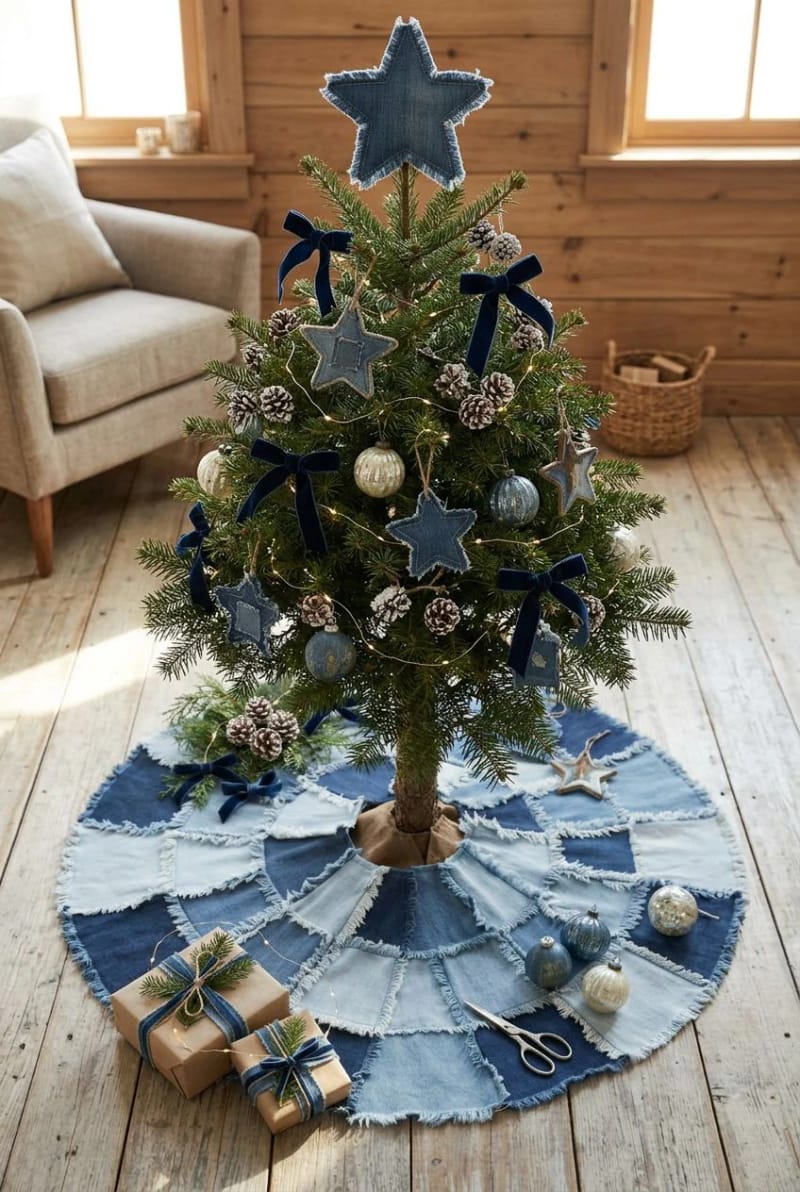
This is the version most people picture, and it earns the spot: you cut squares, sew them with the wrong sides together so the seam allowance ends up on the front, clip each allowance at roughly quarter-inch intervals, then wash and dry the whole thing until the cut edges bloom into soft ridges. The part that trips people up is the direction of the sewing. You stitch linings facing, seams deliberately exposed, which feels backward the first three seams and then makes sense.
Two specifics save you grief. Use a size 16 denim needle and a walking foot, because you are feeding four layers at every seam and a standard foot will let the top layer slide; and do not back denim with more denim. An all-denim skirt this size comes out heavier than you expect and fights you when you try to make it lie flat, so use a flannel middle or backing layer instead, which still frays and drops the weight. When it is done, run the first wash at a laundromat rather than at home, since the fraying sheds a startling amount of lint into the trap.
2. No-sew fused-panel denim tree skirt
Skip the machine entirely and this becomes the version to start on if you have never made a skirt. Cut your wedges, lay paper-backed fusible web between a denim top and a backing, and press with a hot iron to bond the layers; then bind the outer edge with iron-on hem tape so nothing needs stitching at all. It will not develop the soft rag fringe that clipped seams give you, so you trade that texture for an afternoon instead of a weekend. For a tabletop tree in the 2-to-3-foot range, scale the whole thing down to a 20-inch circle and you can cut the entire skirt from two pairs of jeans.
3. Pie-wedge skirt cut from jean legs
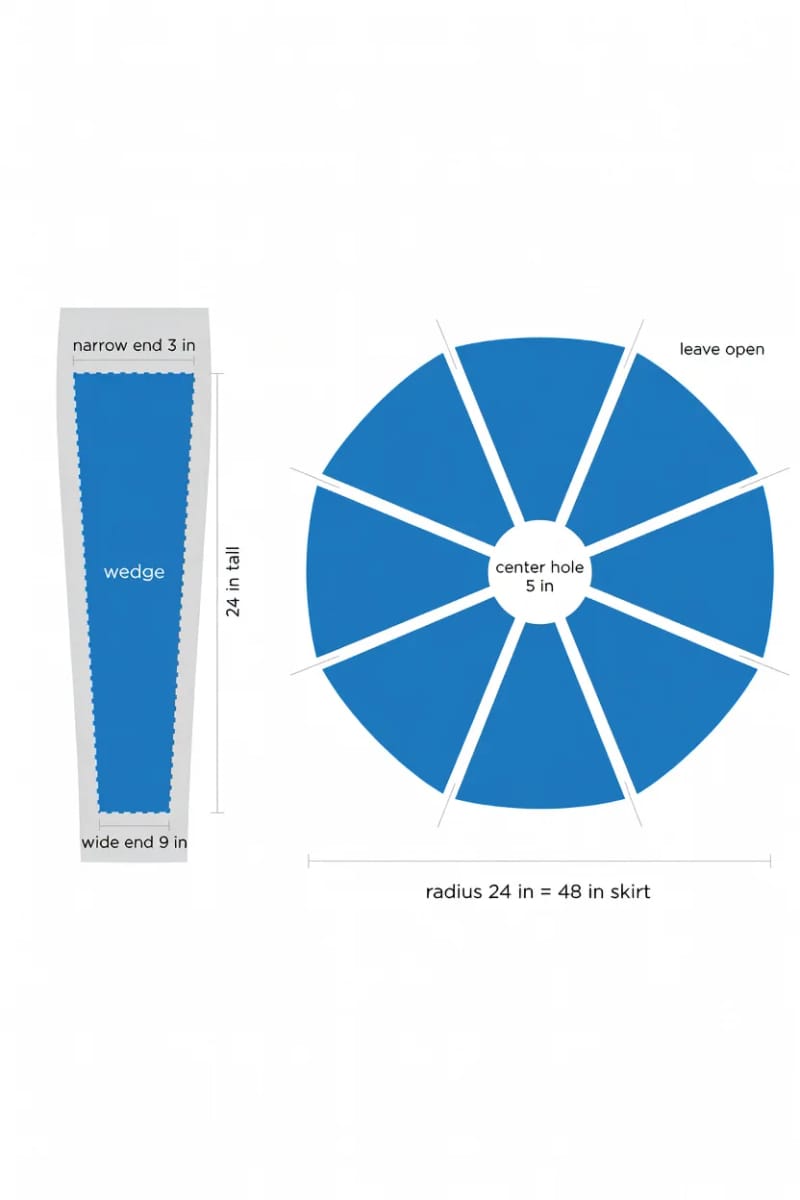
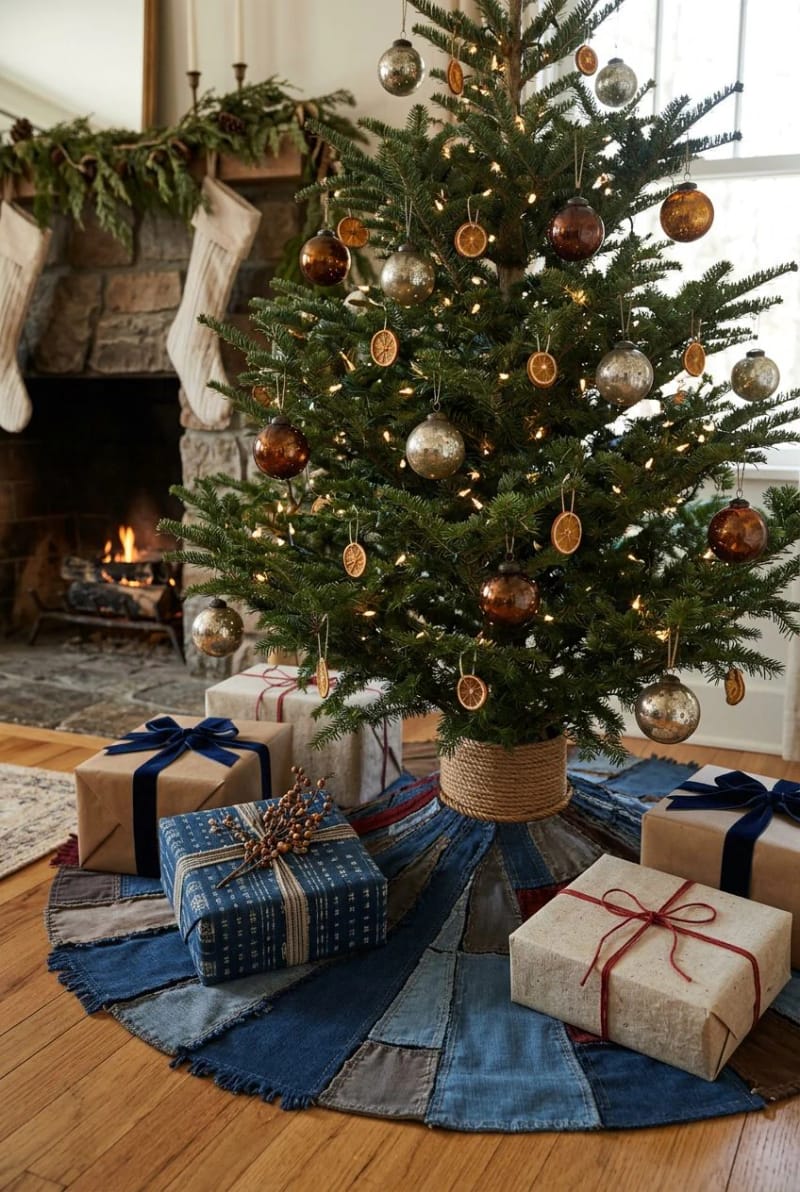
Cut tall trapezoid wedges from the long straight run of each jean leg and sew them into a circle like slices of a pie. Eight wedges give you 45-degree segments, which is the easiest math and hides the seams as radiating spokes; ten or twelve reads finer but eats more jeans. Cut the center hole to about 5 inches using a saucer as a template, leave one radial seam open so the skirt wraps around the trunk, and skip the ties entirely: an open seam that overlaps holds itself closed under the weight of the fabric and never tangles.
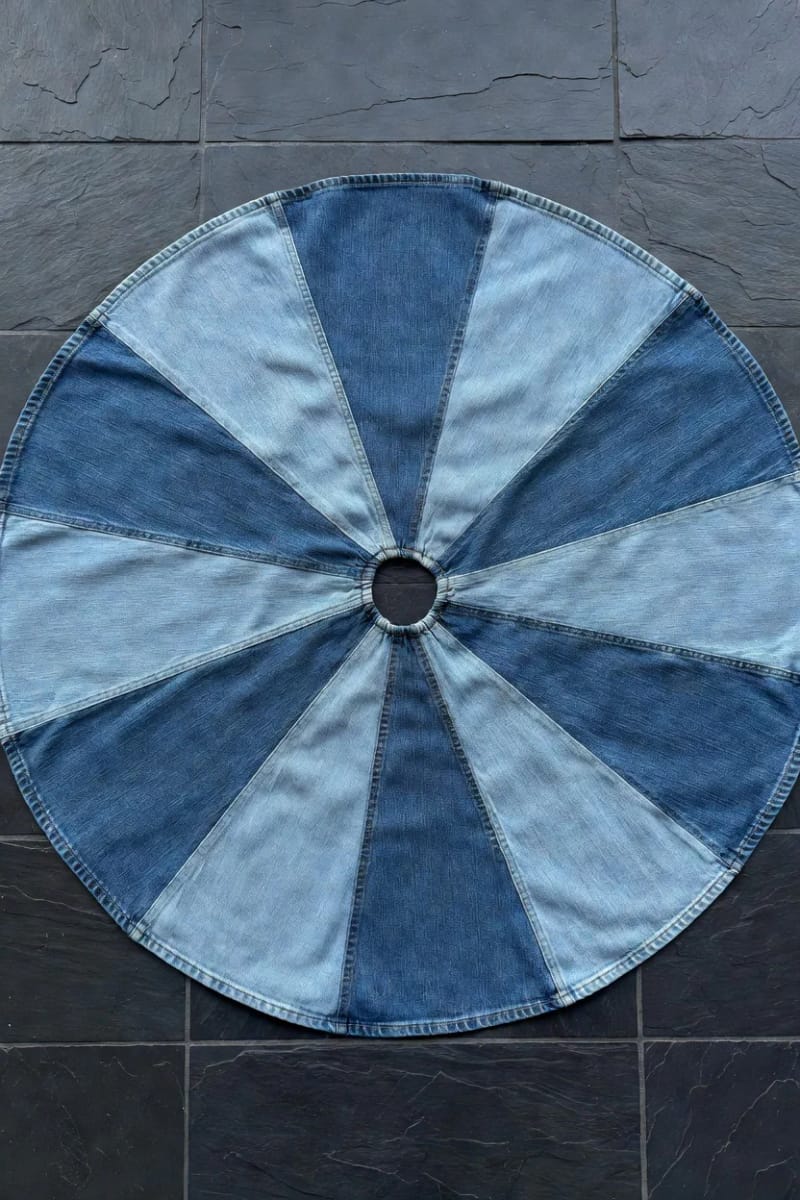
One nice cheat: position two of the wedges so an original hemmed cuff lands on the outer rim, and that part of the edge is already finished for you.

Let the wash carry the design
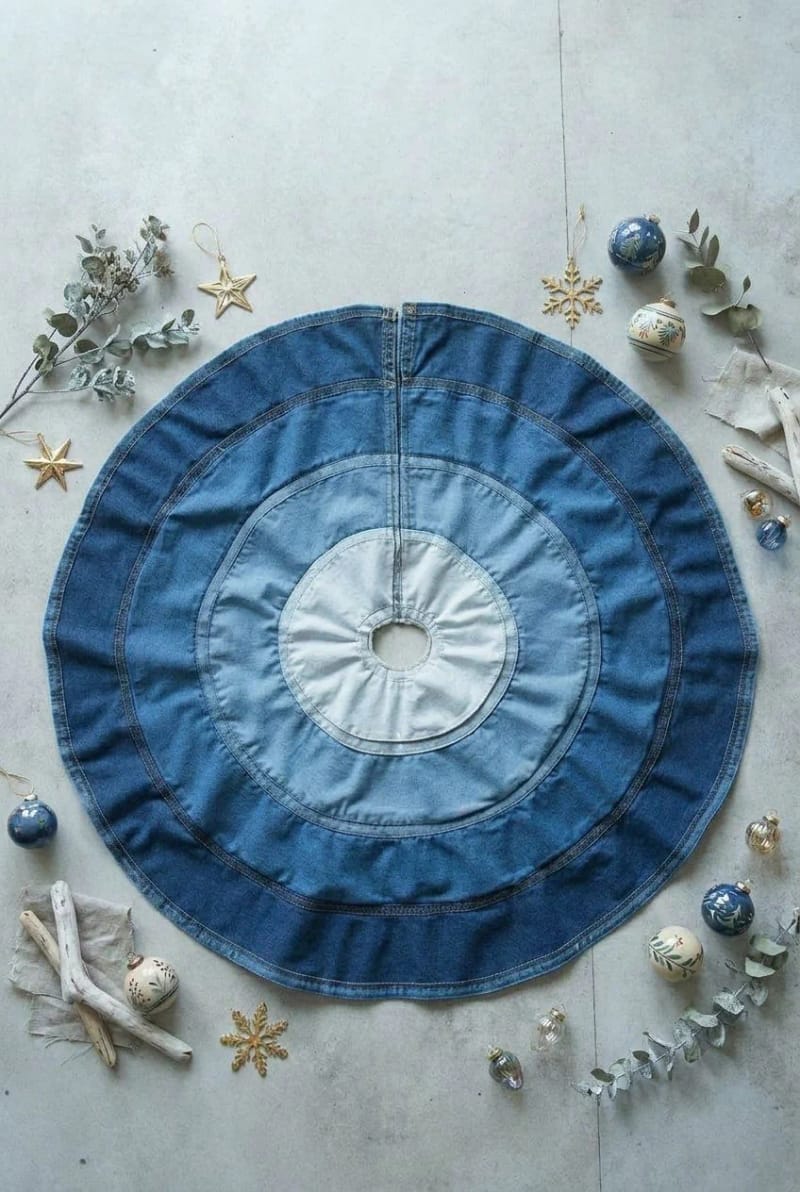
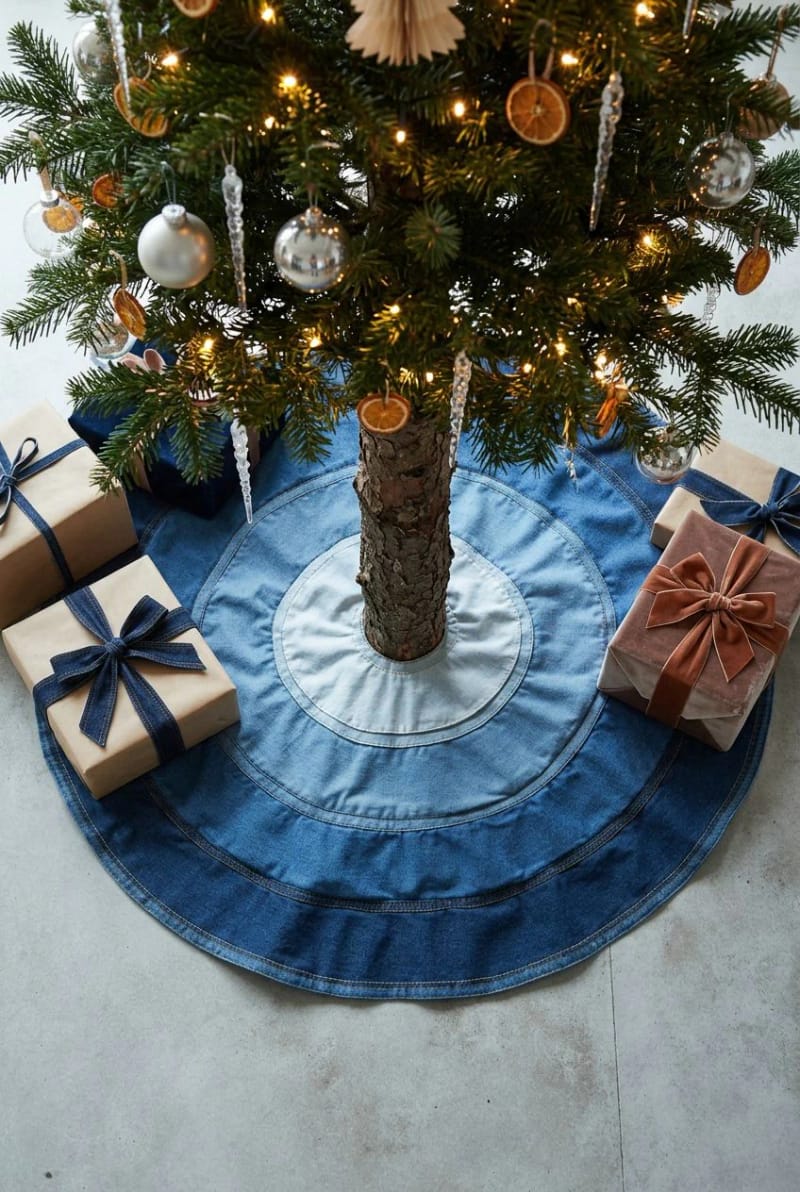
4. Graduated wash, pale center to dark hem
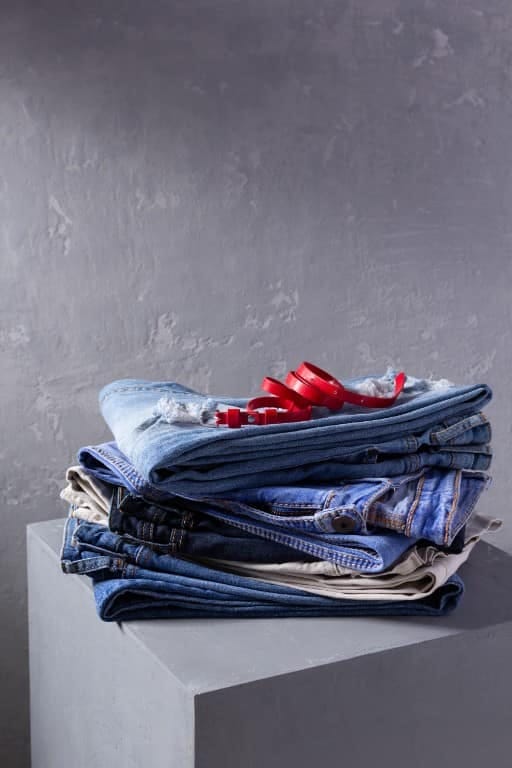
Sort your jeans by wash before you cut anything, then build the circle so it moves from the palest denim at the center hole out to the darkest at the hem. It costs you nothing extra and turns a plain patchwork into something that looks planned. You need maybe five distinct tones to read as a gradient rather than a jumble, which is easy once you start pulling from other people's discard piles as well as your own.
5. Bleached snow-wash denim skirt

Bleach a batch of mid-blue jeans down to a chalky frost and you get a white-and-pale-blue skirt that suits a coastal or all-white tree. Dilute the bleach, work outside, spot-test a scrap first, and rinse with a splash of white vinegar to stop the reaction, because full-strength bleach left too long weakens the cotton until the fibers go brittle. Skip stretch denim here: the elastane blotches instead of lightening evenly, and it will not fray cleanly later if you want that edge.
Keep the jeans recognizable
6. A ring of back pockets around the hem
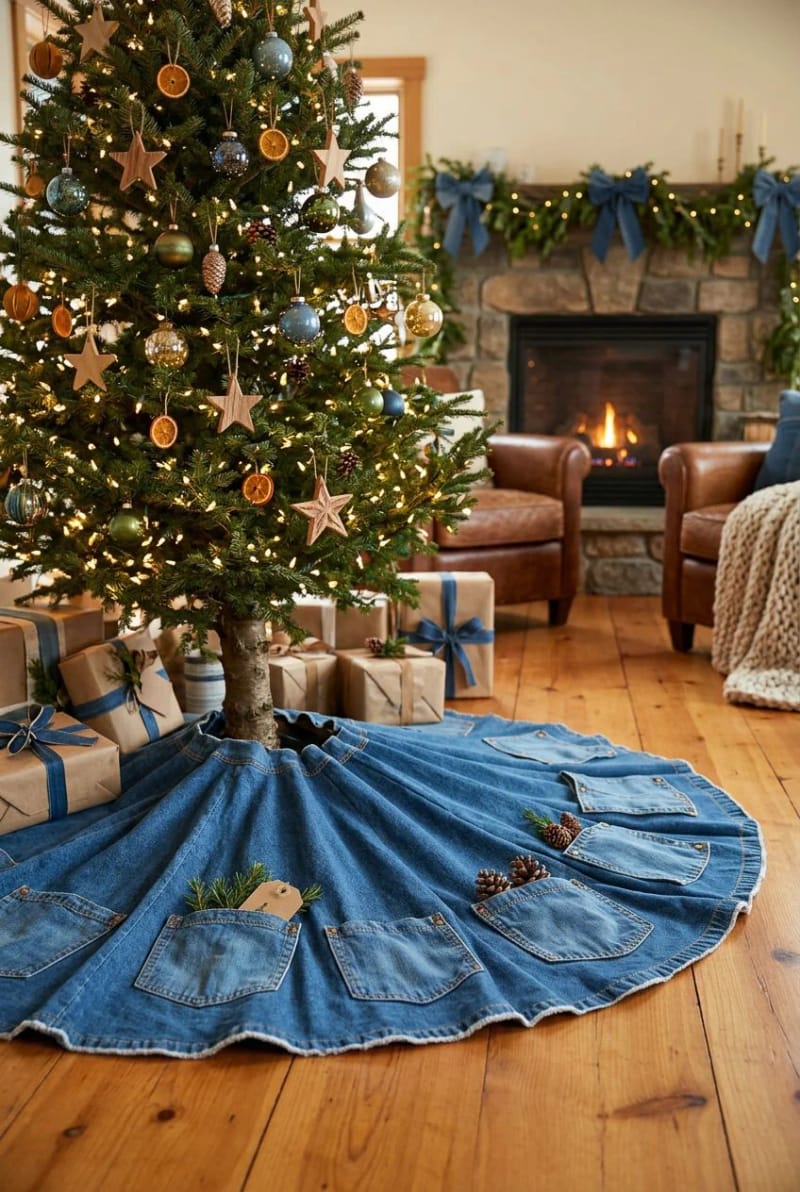
Cut the back pockets off intact, topstitching and rivets and all, and sew them open-side-up around the hem so each one works as a little pouch. Now the skirt holds gift tags, place cards, or a folded note for each person, and on Christmas morning it doubles as the place everyone's small flat gifts live. A standard pair gives you two pockets, so a 48-inch hem wants six or seven pairs raided for pockets alone, which is exactly the kind of thing thrift-store dollar bins exist for.
Leave the pockets slightly loose at the top rather than stitching them flat, or nothing fits inside them and the whole point is gone.
7. Salvaged-waistband bound edge
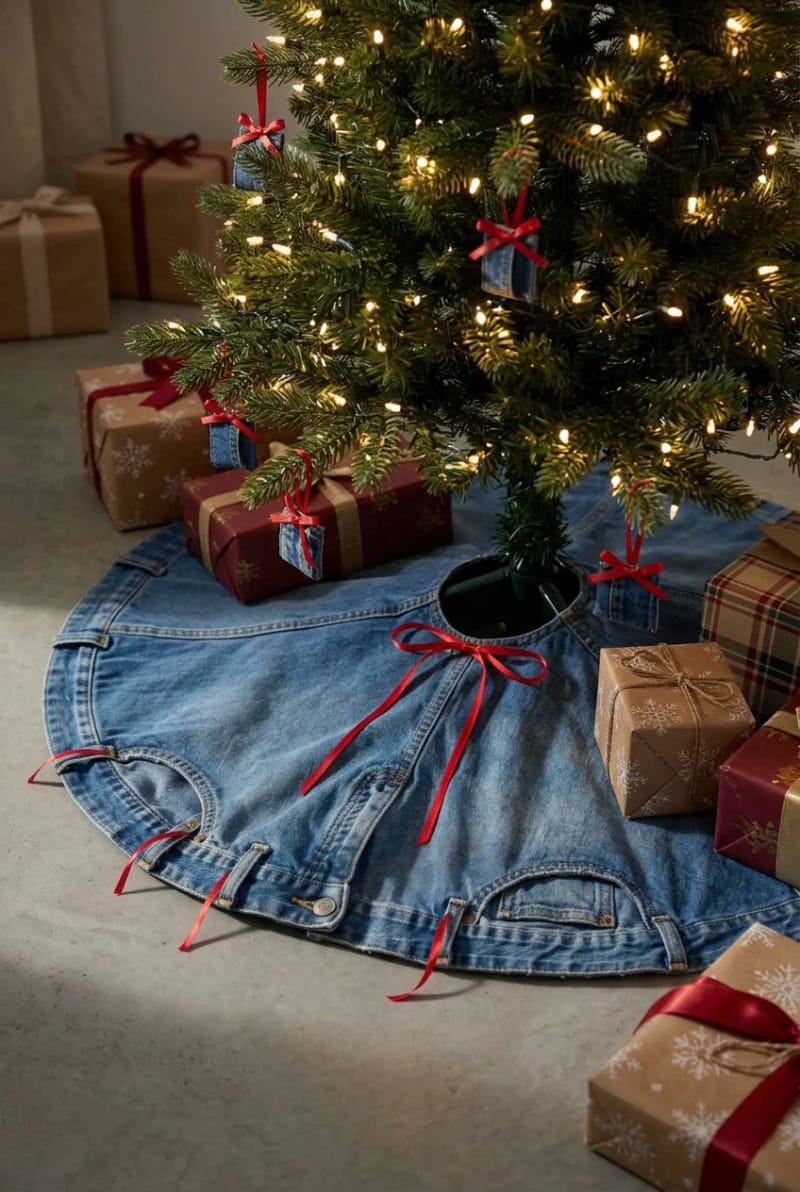
The waistbands are the strongest, most finished part of a pair of jeans, so cut them off in long strips and use them as the bound outer edge of the skirt. Left on, the belt loops become a detail you can thread thin ribbon or a garland of greenery through, and the original button lands somewhere on the rim as a small found ornament. It is fiddly to ease a straight waistband around a curved hem, so clip the inner edge every inch to let it bend.
8. Sashiko running-stitch mended denim skirt

Instead of hiding the seams, cover the denim in big white or cream running stitches in the sashiko tradition, where visible mending is the decoration rather than a repair to disguise. Use thick sashiko or perle cotton thread and keep the stitch length loose and even, around a quarter inch, so the lines read from across the room. It is slow handwork, and that is the honest tradeoff, but it turns three mismatched pairs of jeans into something that looks like one considered piece.
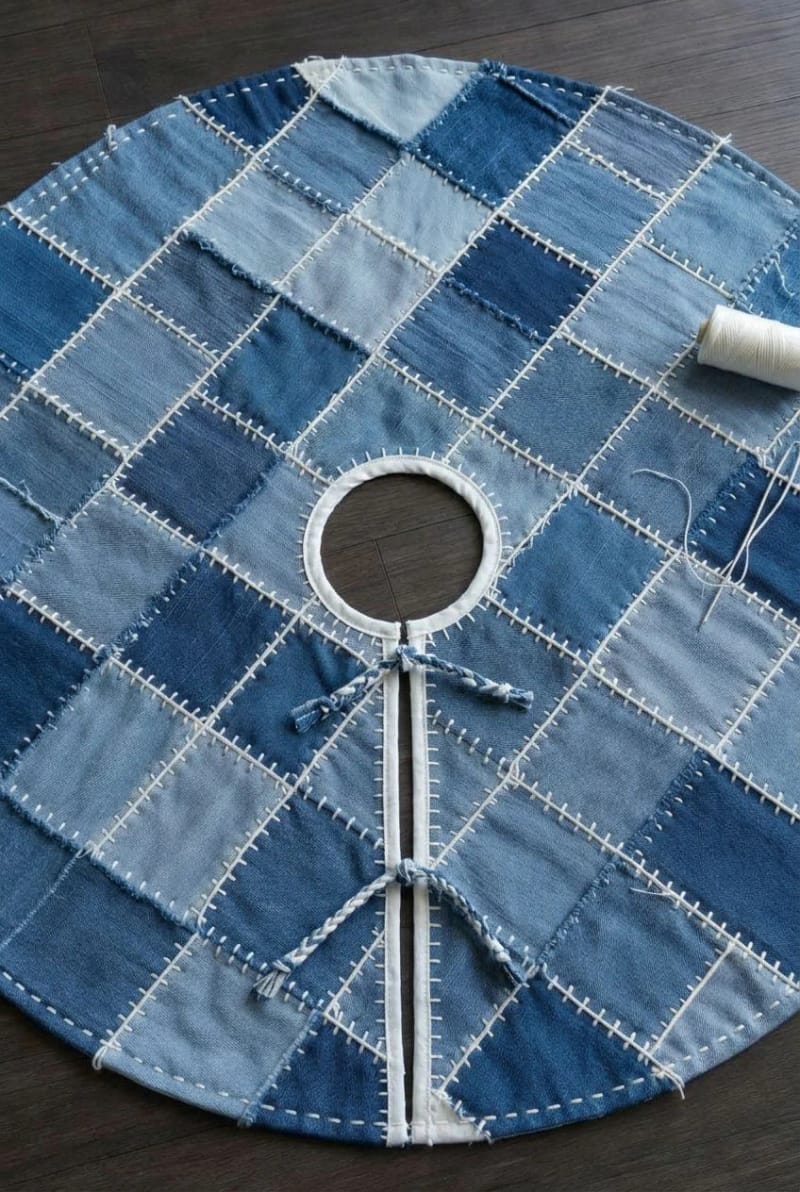
The frayed and rag versions only work with 100% cotton. Stretch jeans with elastane, and any poly-blend denim, will not bloom at the cut edges no matter how many times you wash them, so check the label before you commit a pair. Two more traps: an all-denim skirt gets heavy enough that it will not sit flat and pooches up around the trunk, which is why a flannel backing is worth it; and that first fraying wash sheds so much lint it can clog a home machine’s filter, so run it at a laundromat or clean the trap immediately after.
Commit to a style
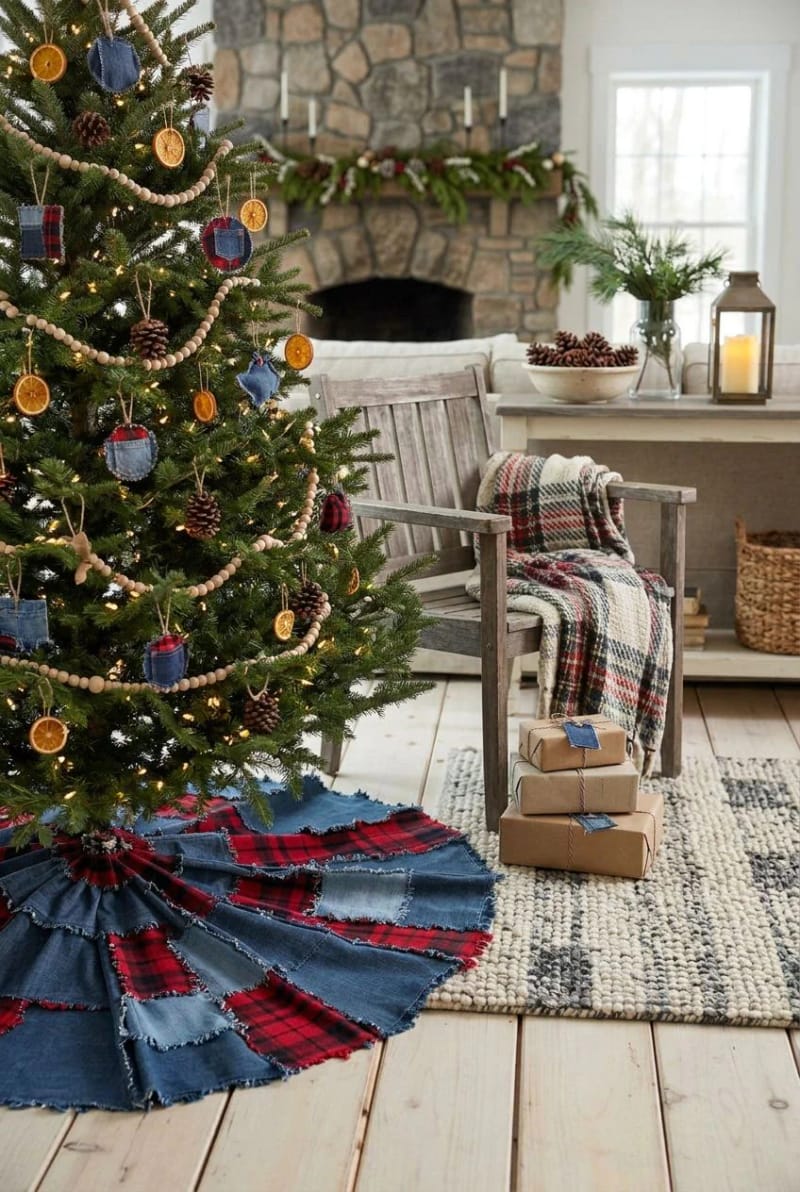
9. Denim and red flannel plaid patchwork skirt
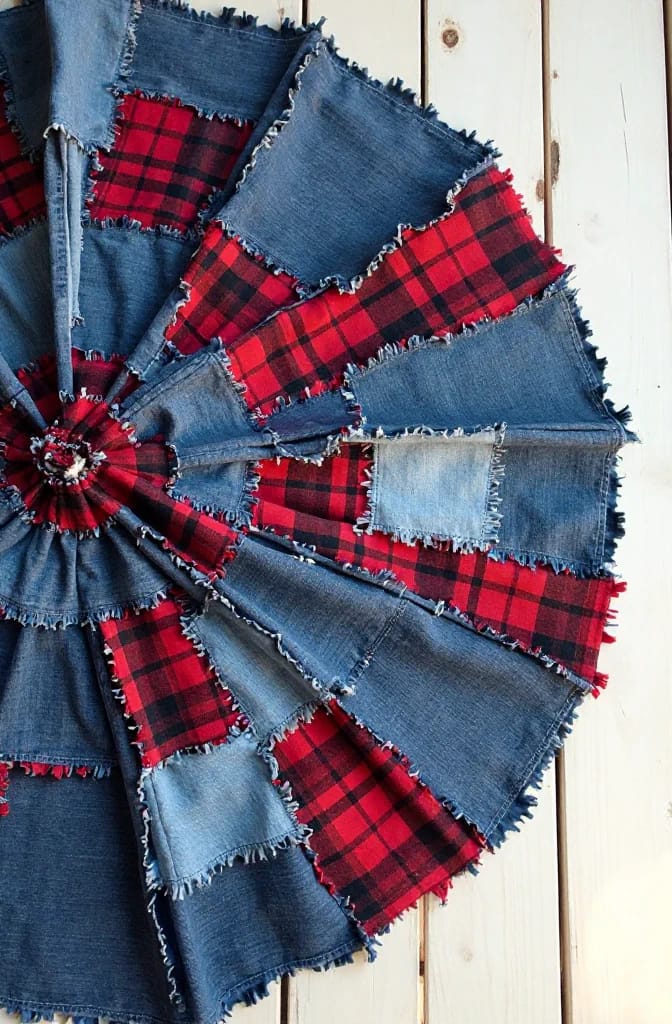
Alternate denim squares with red-and-black buffalo plaid flannel and you land on the cabin-Christmas look that carries the whole tree without any other color work. Flannel frays even more willingly than denim, so a rag-quilt build using both fabrics gives you two edge textures against each other, the crisp denim ridge and the softer flannel one. Old flannel shirts are the source here, and they turn up in the same thrift bins as the jeans; a men's XL shirt yields a surprising number of 5-inch squares once you cut around the seams and plackets.
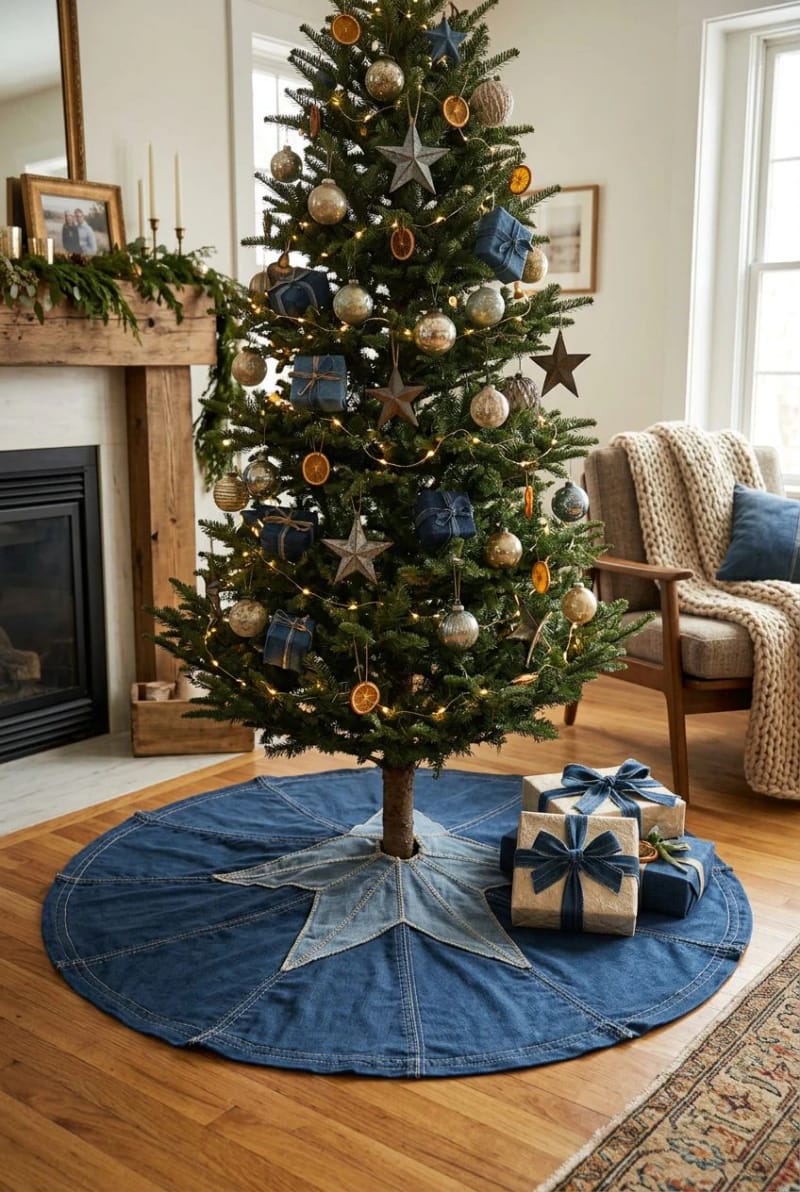
10. Topstitched lone-star farmhouse skirt
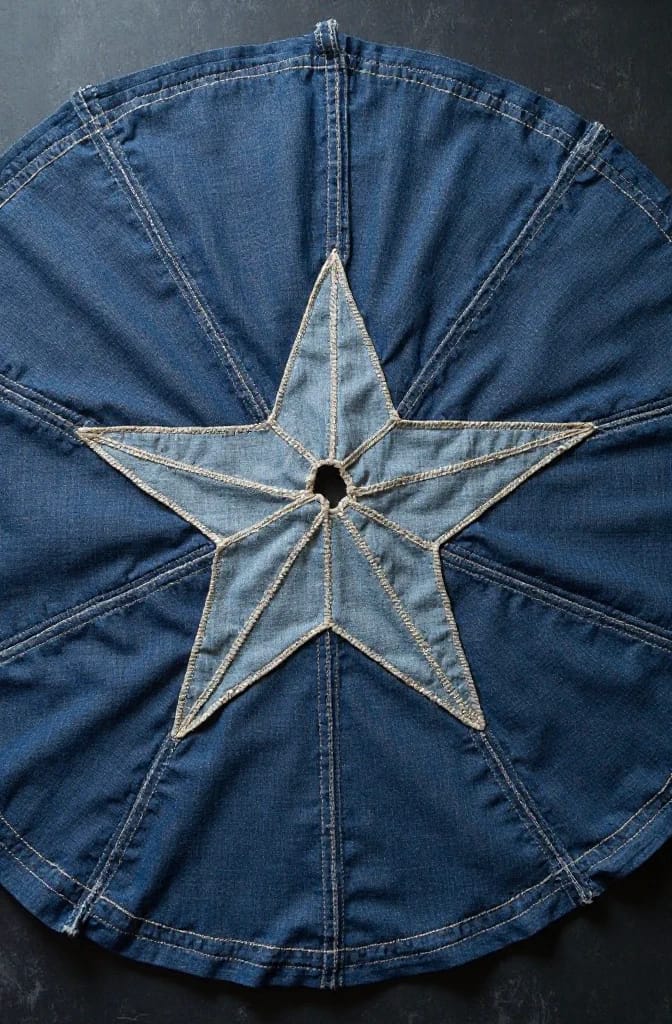
Keep the denim plain and let one big five-point star do the talking, topstitched across the assembled wedges in heavy cream or gold thread so it spans most of the skirt. It reads western or farmhouse depending on the rest of your room, and it is the fastest way to make a simple wedge skirt look finished. Double-stitch the outline so the star holds its shape after a few seasons folded in a box.
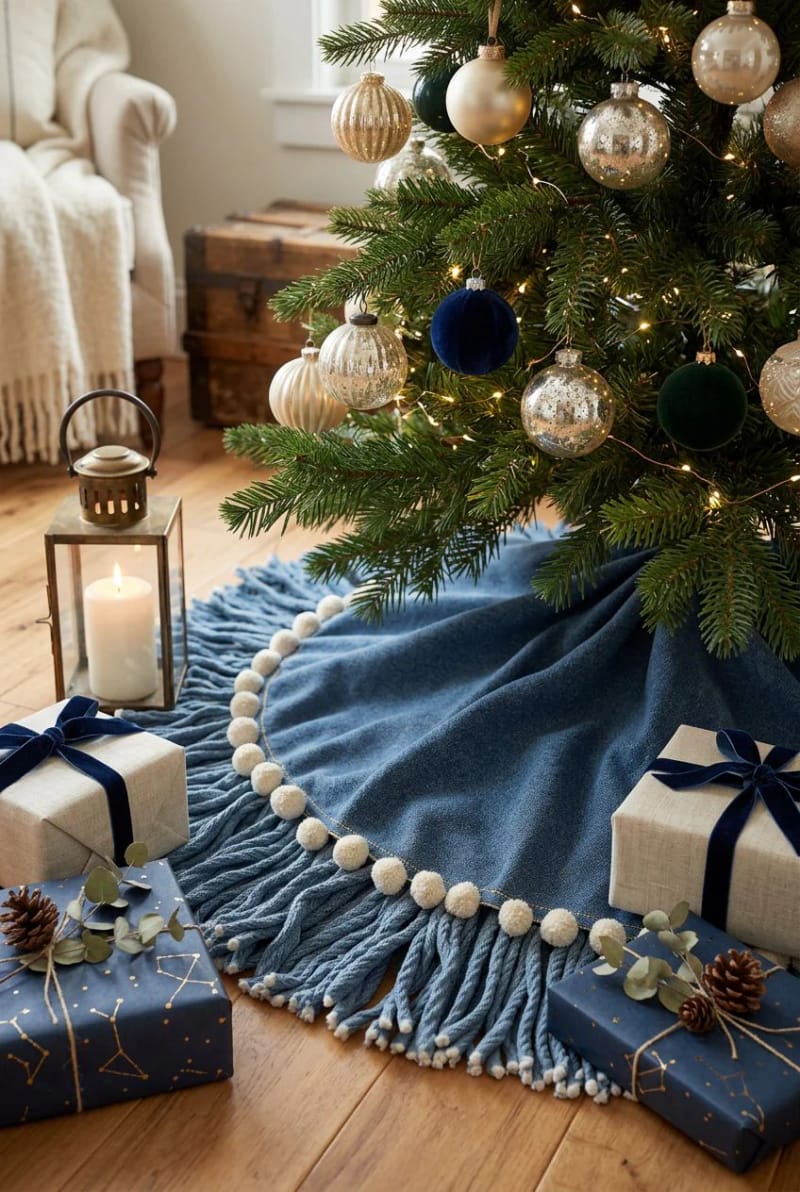
11. Raw-fringe boho skirt with pom trim
Cut the entire outer hem into long raw fringe, roughly four inches deep, and let it curl and pale as it frays. A row of cream yarn pom-poms sewn along the top of the fringe band tips it fully into boho territory. This is a good use for the thinner, softer jeans that are too worn for the structural wedges, since worn denim fringes faster and hangs better.
12. Crazy-quilt denim mixed with other salvage
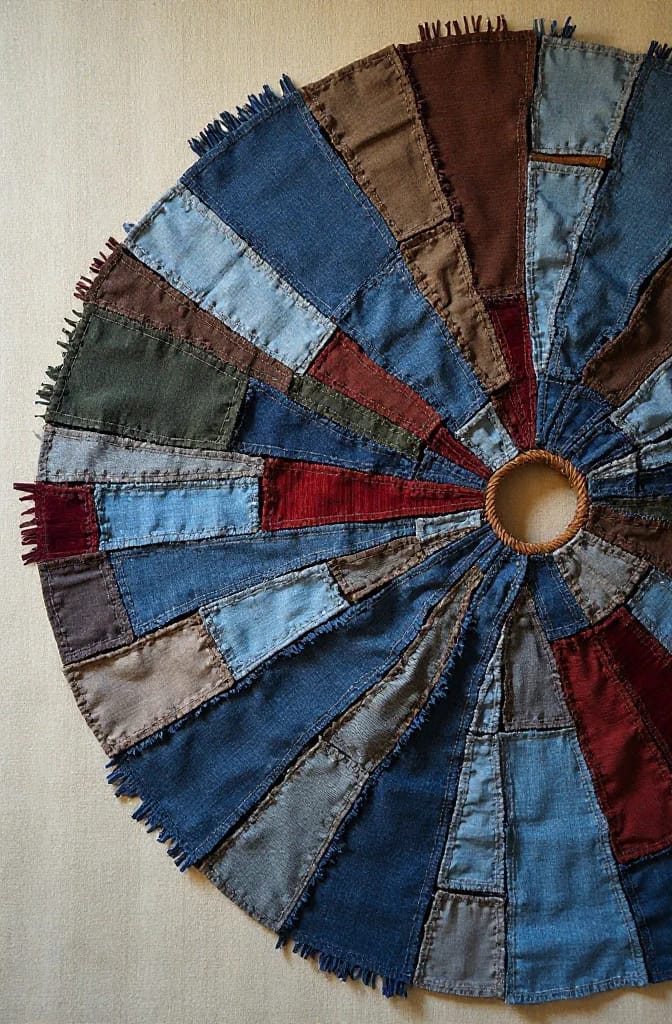
Let denim be the base but break it up with whatever else is in the salvage pile: corduroy, wool, a little red velvet, set at odd angles crazy-quilt style with hand embroidery over the joins. The denim gives the skirt its weight and structure while the other fabrics add nap and shine the eye can catch. Balance is the only real constraint, because a heavy wool patch next to a light worn-denim one will pull unevenly once it hangs, so keep the weights roughly matched across the circle rather than clustering all the thick pieces on one side.
Do this
- Raid mid-weight 100% cotton jeans in varied washes; the range is what makes patchwork read as intentional.
- Keep the finished parts. Waistbands, hems, and pockets are already sewn, so build them into the design instead of cutting them off.
- Save a saucer or salad plate as your center-hole template, around 5 inches, and cut one slit to the edge so the skirt wraps.
Avoid
- Stretch or poly-blend denim if you want frayed edges. It will not bloom.
- Backing denim with more denim on a full-size skirt; it gets too heavy to lie flat.
- Overthinking ties. One open radial seam that overlaps is enough.
| Construction | Sewing needed | Rough time | Edge texture |
|---|---|---|---|
| Rag-quilt squares | Machine, several long seams | A weekend | Soft frayed ridges |
| No-sew fused panels | None, iron only | An afternoon | Smooth, bound edge |
| Pie wedges | Machine, radial seams | A few hours | Clean topstitched seams |
| Sashiko / hand | Hand stitching throughout | Several evenings | Visible white stitching |
Conclusion
If you are choosing where to start, the honest ranking is not the one the internet gives you: the rag-quilt is oversold as a beginner project because of all the clipping and the walking foot, and the no-sew fused-panel skirt or a simple eight-wedge build will get a first-timer to a finished skirt far faster. Save the rag-quilt for your second one, when you already know your machine handles four denim layers.
Whatever you pick, do the sorting before the cutting. Pull every pair you can find, group them by wash and by cotton content, set the stretch pairs aside for the fringe or the pockets where fraying does not matter, and only then decide between the ombré arrangement and the plaid. The skirt that looks planned almost always started as a sorted pile, not a design.