
Most beginner guides hand you a hot glue gun and tell you to stick whole corks together into a snowman. That glue is the reason half of those ornaments are shedding corks by the first week of January, and a lump of whole corks photographs like exactly that: a lump of corks. The eleven projects below were picked for the opposite outcome, ornaments a first-timer can finish in an evening that still read as ornaments on the tree, with the one or two small decisions that separate a keeper from a craft-fair reject called out in each.
You need three things before you start: natural corks (the spongy, wine-stained kind, not the smooth plastic plugs, which won't take stain and won't soften for cutting), a glue stronger than a hot glue gun, and roughly an evening. Corks are the easy part. Any restaurant with a bar will usually save you a bag if you ask, and a used-cork lot on eBay runs a few dollars if your household doesn't drink enough to supply itself.
1. Stacked wine cork Christmas tree


Glue five or six corks upright into a squat pyramid and you have the ornament that started this whole niche. Three on the bottom, two in the middle, one on top, all standing on their ends, is the classic arrangement; a star button or a scrap of gold cord on the peak sells it.
The build is forgiving, which is why it goes first. Corks sit close enough in size that small gaps read as rustic rather than sloppy, and a bead of tacky glue between each one grips in a couple of minutes if you hold them. For a tree small enough to hang flat, cut the corks in half lengthwise first so the whole thing lies against a branch instead of jutting out like a cork hedgehog. (I'd skip painting these; the natural cork gradient is the point, and green paint on cork just looks like green cork.)
2. Wine cork snowflake
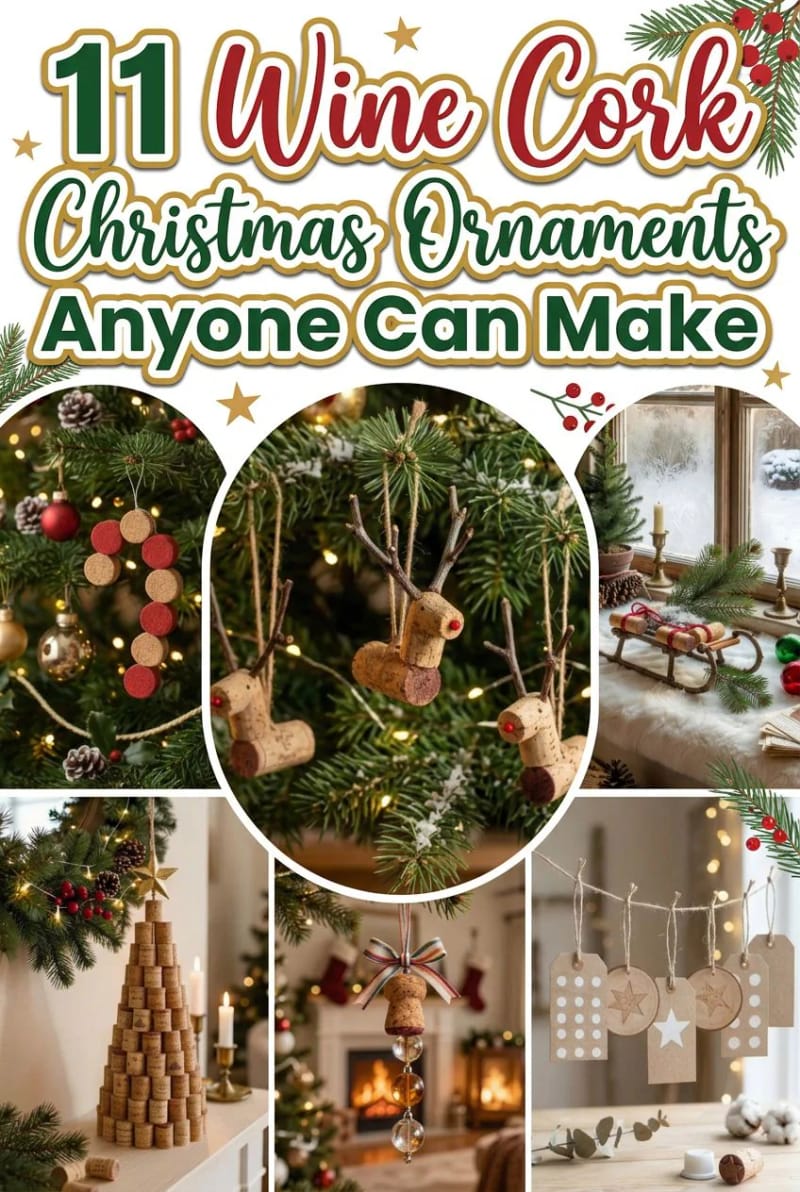
Six corks laid flat in a spoke pattern, glued to a small wooden disc at the center, make a snowflake that looks far more intricate than the effort it takes. This is the project that convinces people cork ornaments can look designed rather than salvaged.
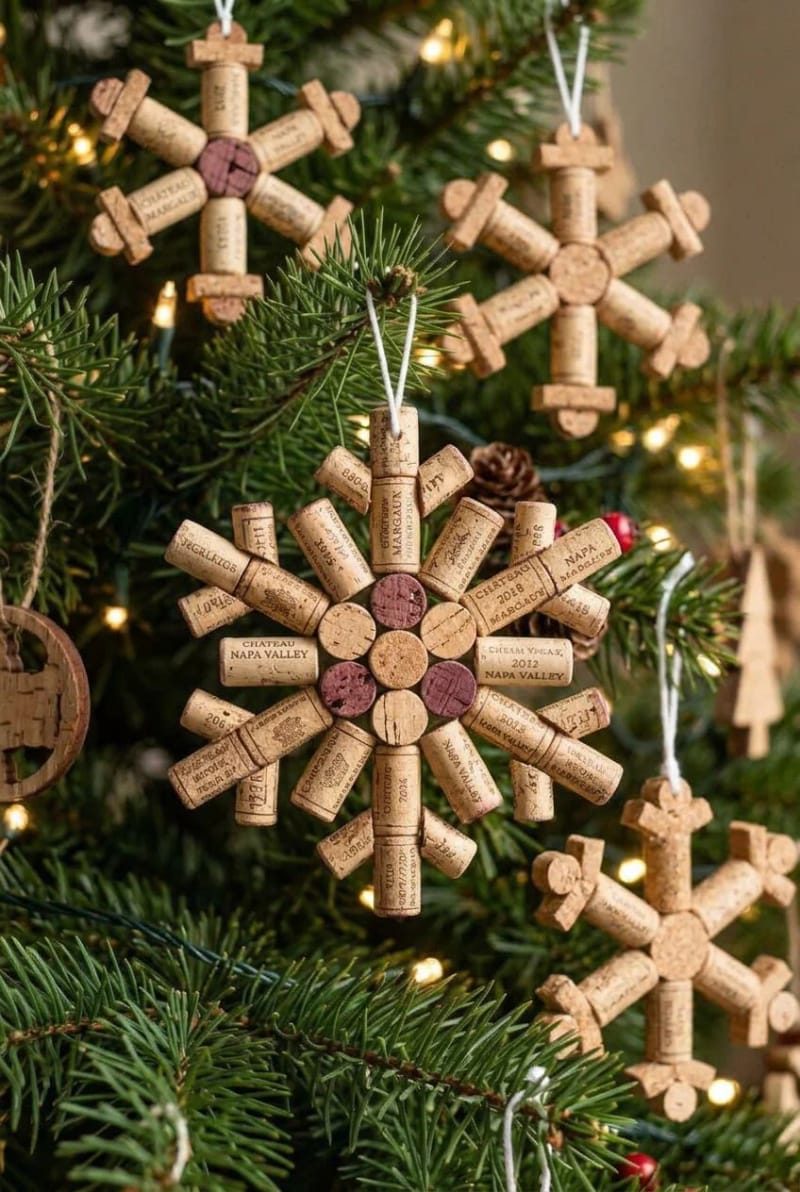
Cut each cork in half the long way so the spokes lie flat, then notch the outer ends with two angled snips to fake the branching arms. A dab of white paint dry-brushed across the top catches light like frost without hiding the grain. Make this one in a batch; once the center-disc trick clicks, you can turn out a dozen while a movie plays.
3. Nordic cork-slice ornaments

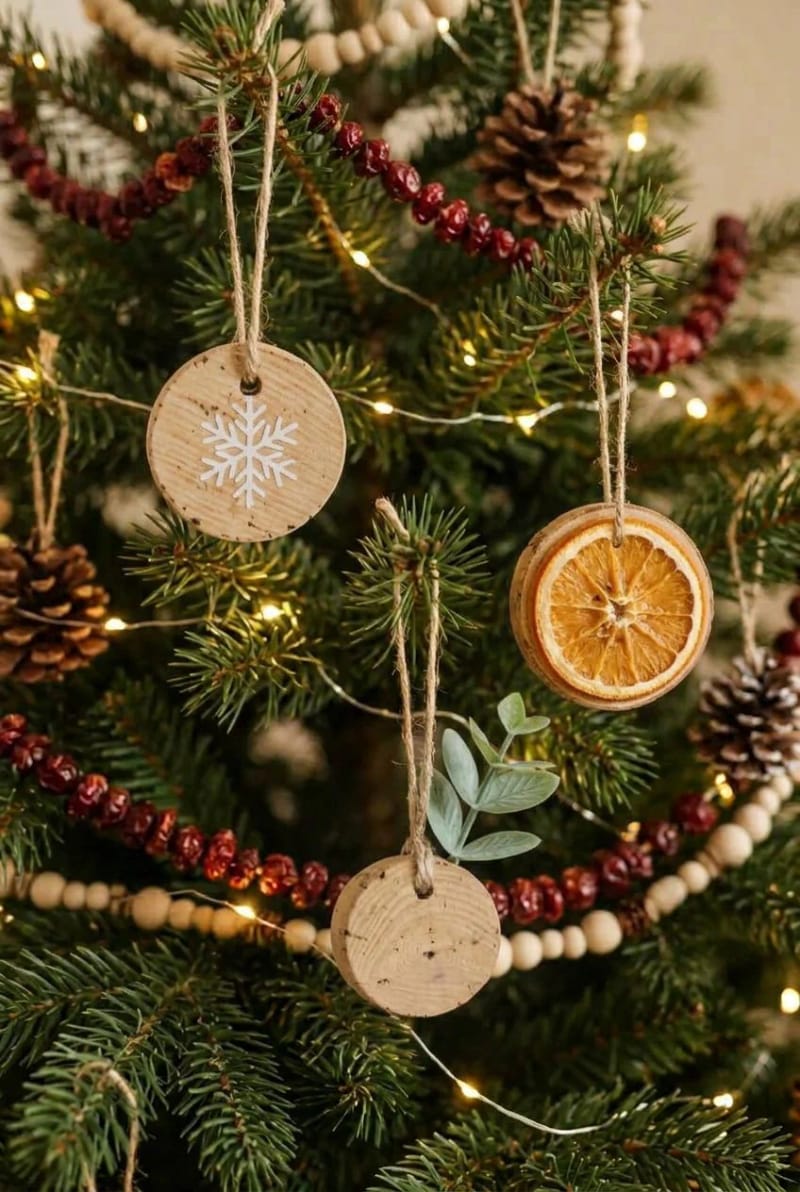
Slice corks crosswise into quarter-inch discs and you leave the whole-cork look behind entirely, which is where the current Scandinavian-leaning ornament trend lives. A single disc, a stamped initial, a loop of jute, done.
Steam the corks for ten minutes before slicing or they crumble into confetti; a vegetable steamer over boiling water softens them enough to cut clean with a serrated knife. From there the disc is a blank canvas: a snowflake stamped in white ink, a dried orange slice wired alongside, a sprig of faux eucalyptus for the dried-botanical look that reads more expensive than it costs. Hold the palette to two colors and it stays modern instead of tipping into farmhouse clutter.
4. Wine cork reindeer
One cork on its side for the body, a shorter piece angled up for the head, two twig antlers and a red bead nose, and you have the ornament kids reach for first. It is the friendliest project here and the one most likely to get a whole family involved.

It is fiddly in exactly one spot, the antlers. Real twigs snapped to size look better than pipe cleaners and cost nothing, but they need E6000 or the reindeer loses its rack in the ornament box by next year. Everything else is tacky-glue simple: a loop of twine off the back, a painted dot or googly eye, a micro pom or red bead for the Rudolph nose.
5. Cork pinecone ball ornament
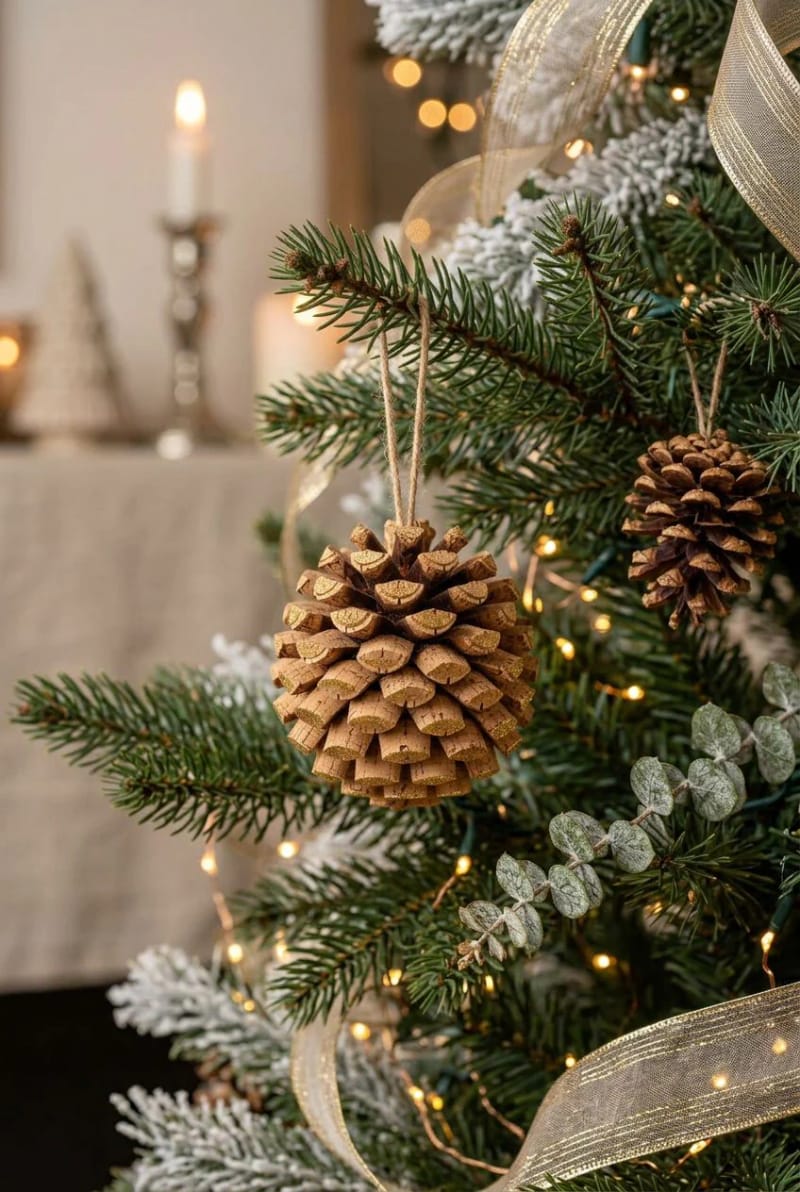
Cut corks into short angled segments and glue them scale-style around a foam ball, and you get a cork "pinecone" that hangs like a proper ornament with no cork-lump silhouette. It is the piece on this list most likely to get mistaken for something bought.
This one takes the longest of the batch, maybe forty minutes, because you are shingling small pieces in overlapping rings from the bottom up. Steam-soften the corks so the segments cut without shredding, and use a two-inch foam ball; bigger gets heavy for a branch. Granted, this is the one project here I would not hand a six-year-old, because the cutting is real.
6. Wine cork candy cane
Slice corks into discs, thread them onto bendable floral wire, and bend the top into a hook for a candy cane that uses nothing but corks and wire. The wire is the trick that makes it beginner-friendly.
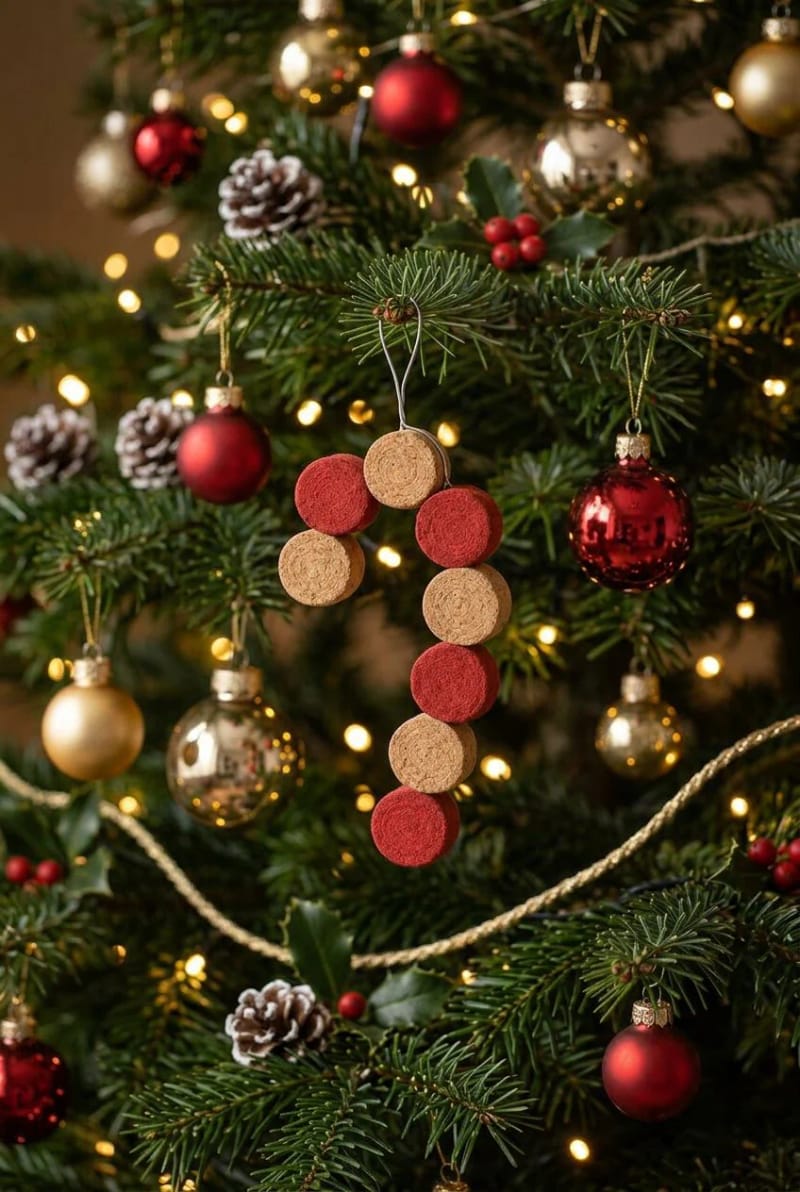
Alternate painted-red discs with natural ones for the stripe, or paint after threading if you want cleaner lines. The wire holds the curve and doubles as the hanger, so there is no separate loop to attach and nothing to glue. Seven or eight discs is about right for tree scale.
7. Wine cork snowman
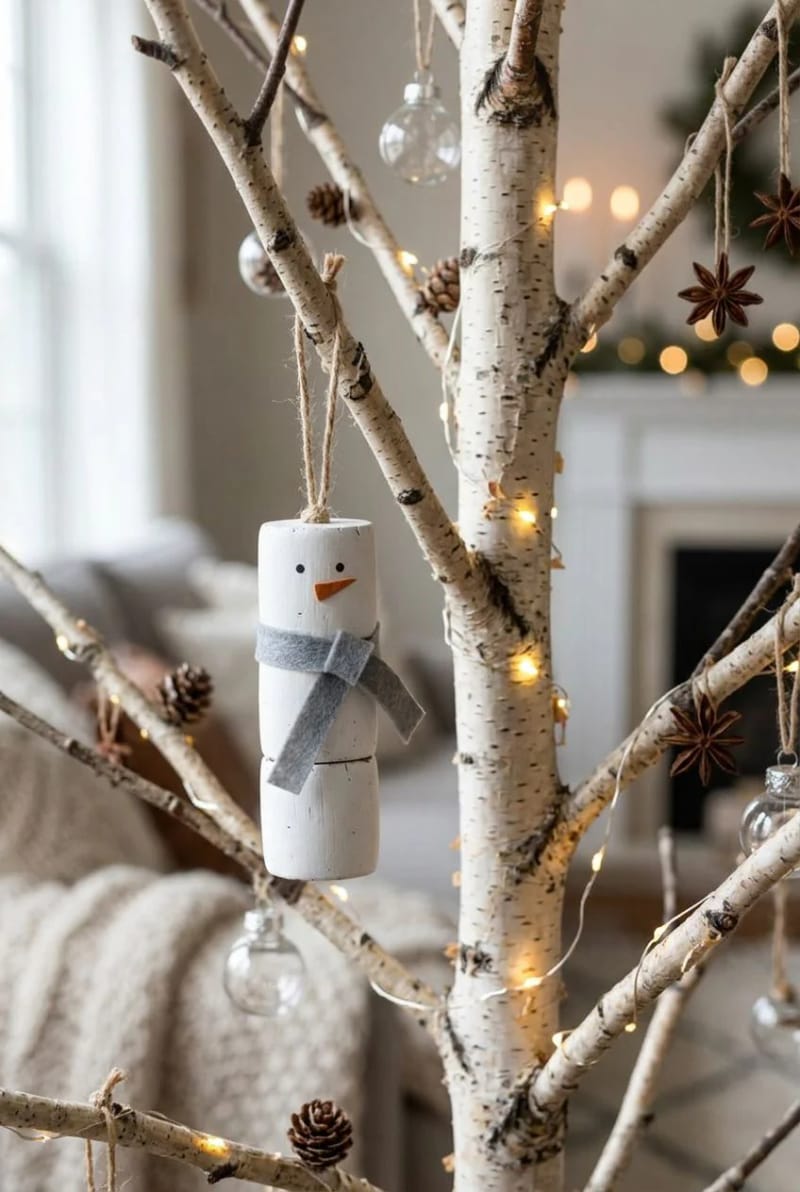
Three corks stacked and painted white is the most-made wine cork ornament on the internet, and it earns the spot because a first-timer cannot mess it up. Stack, glue, prime, paint, and add a scrap-felt scarf, two peppercorn eyes, and a nub of orange for the nose.
The single upgrade worth making is priming before the white. Raw cork drinks paint, and without a primer coat you will be on coat four wondering why it still looks tan. (This is the overdone one, but overdone got that way by working.)
8. Cork-stamped flat ornaments
Use the flat end of a cork as a stamp rather than the ornament itself, and one cork prints dozens of polka-dot or snowflake ornaments on plain wood slices or kraft tags. This is the sleeper of the list for anyone making gifts in bulk.
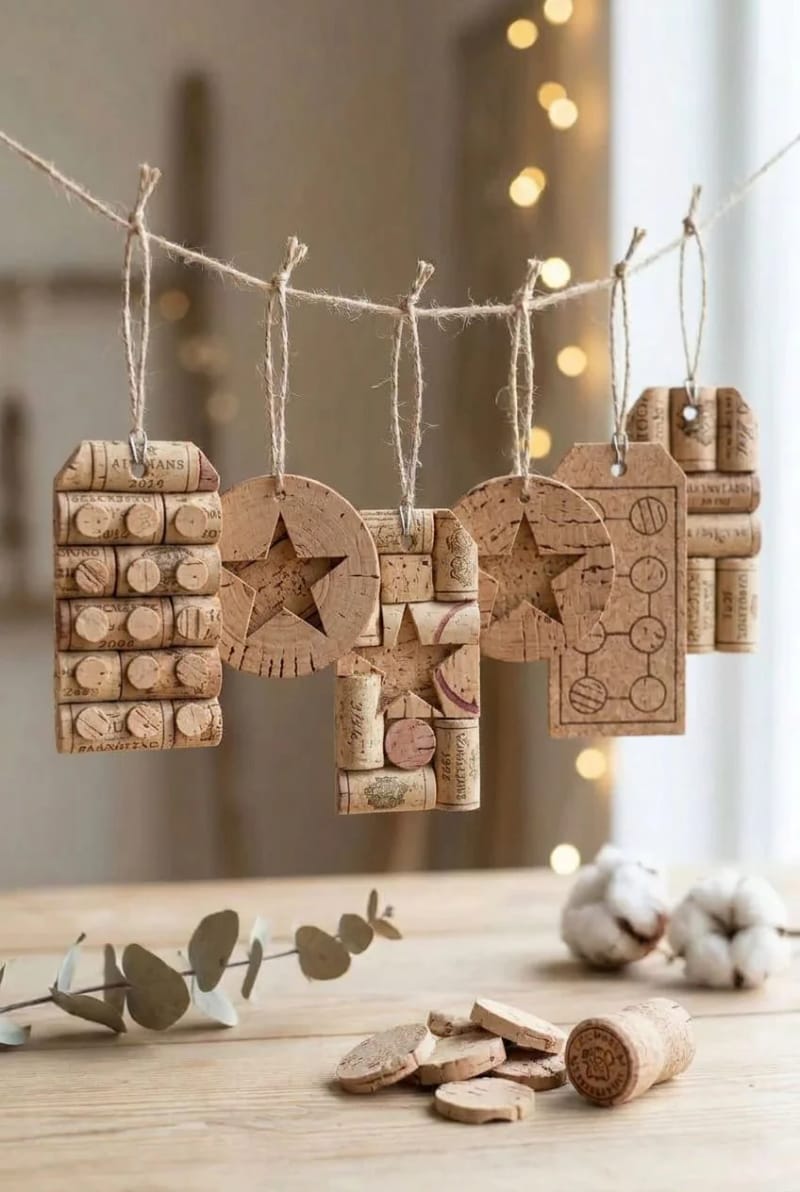
Dip the cork end in acrylic or an ink pad and press: circles every time, which a beginner hand cannot draw freehand. Carve a simple shape into the cork end with a craft knife (a star, a tree, a plus sign for a faux snowflake) and you have a custom stamp for the cost of one cork. For a classroom or a stack of gift tags, nothing else on this list scales as fast.
Do this
- Sort for natural corks and prime before you paint anything white.
- Hold each glued joint for a full minute; cork is light and will drift while the glue is still wet.
- Add the hanger, a screw eye or a twine loop, before you decorate, so you are not forcing it in later.
Avoid
- The hot glue gun on anything that will get handled or stored.
- Skipping the steam step before you cut. That is the crumbling.
- Plastic corks. They won’t stain, resist paint, and turn gummy when steamed.
9. Mini cork-slice wreath
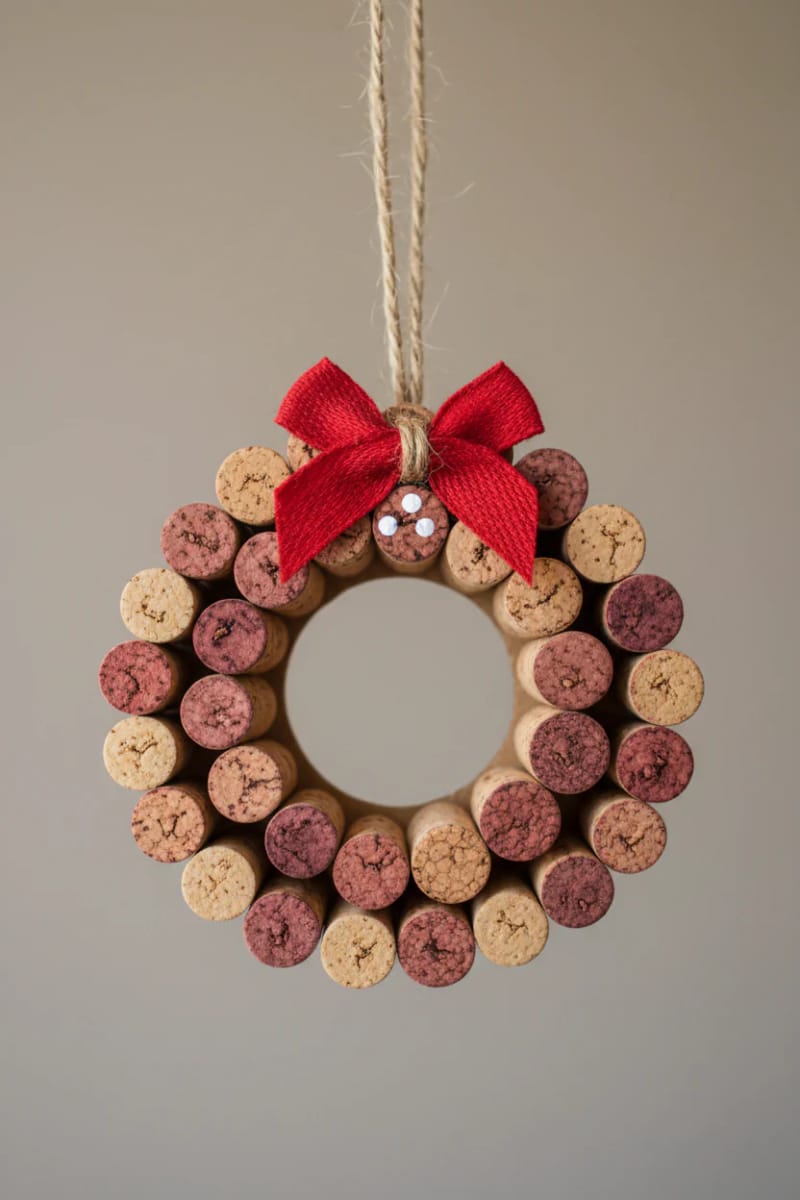
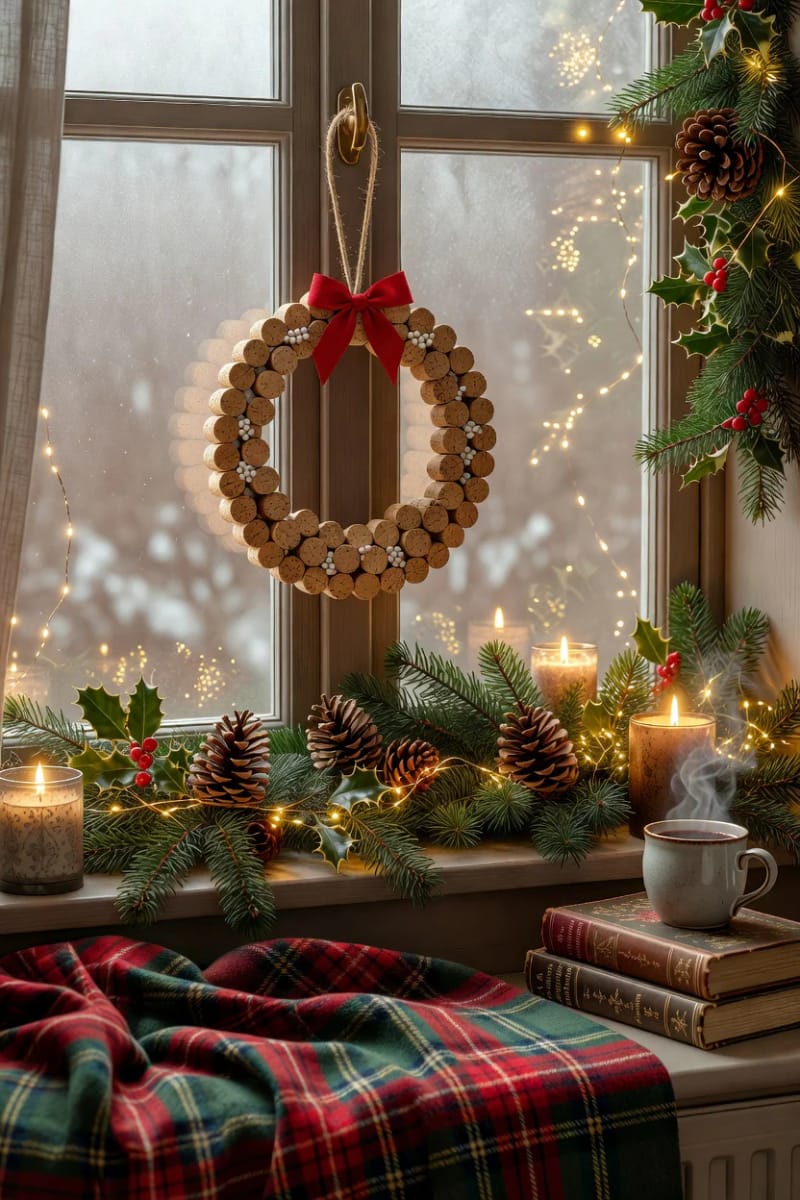
Glue cork discs in a ring around a metal washer or a cardboard donut and you get a miniature wreath, the slice-based cousin of the whole-cork wreath everyone hangs on the front door. Overlap the discs slightly as you go so there are no gaps, then finish with a tiny bow and a few white dots for berries.
Slicing is the whole game here, so steam first. And keep it under three inches across, or it stops reading as an ornament and starts reading as a coaster with ambitions.
Which glue you reach for decides whether these survive a year in a storage bin. Here is the short version, because the packaging won't tell you what holds cork and what quietly fails.
| Glue | Holds cork long term? | Beginner notes |
|---|---|---|
| Hot glue | Weakly; goes brittle | Fast tack, but pops off cork within months. Fine for a piece you only need for one season. |
| Tacky glue | Yes, cork to cork | Non-toxic, kid-safe, slow to set. The default for most of this list. |
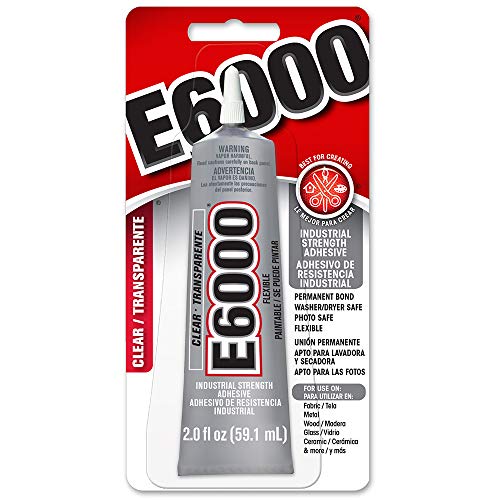
| E6000 | Yes, strongest | Bonds twigs, wire, and beads to cork. Fumes; adults only, work ventilated. |
| Wood glue | Yes | Cheap and dries hard, but wants clamping or a long hold you have to stand there for. |
For the cork-to-cork joints that make up most of these projects, a non-toxic tacky glue is all you need, and Aleene’s is the one crafters have reached for the longest: Aleene’s Original Tacky Glue, 4 oz. Keep the stronger stuff for the reindeer antlers and the sled runners.
Bonds the twig antlers, wire, and beads that tacky glue can’t hold; the one tube worth buying for the fiddly joints that fail in storage.
10. Beaded wine-charm ornament
Screw a small eye hook into the top of a single cork, hang a few glass beads and a charm from wire below it, and you have the dressed-up ornament that crosses over into wine-lover gift territory. It is the least crafty idea here and the most giftable.
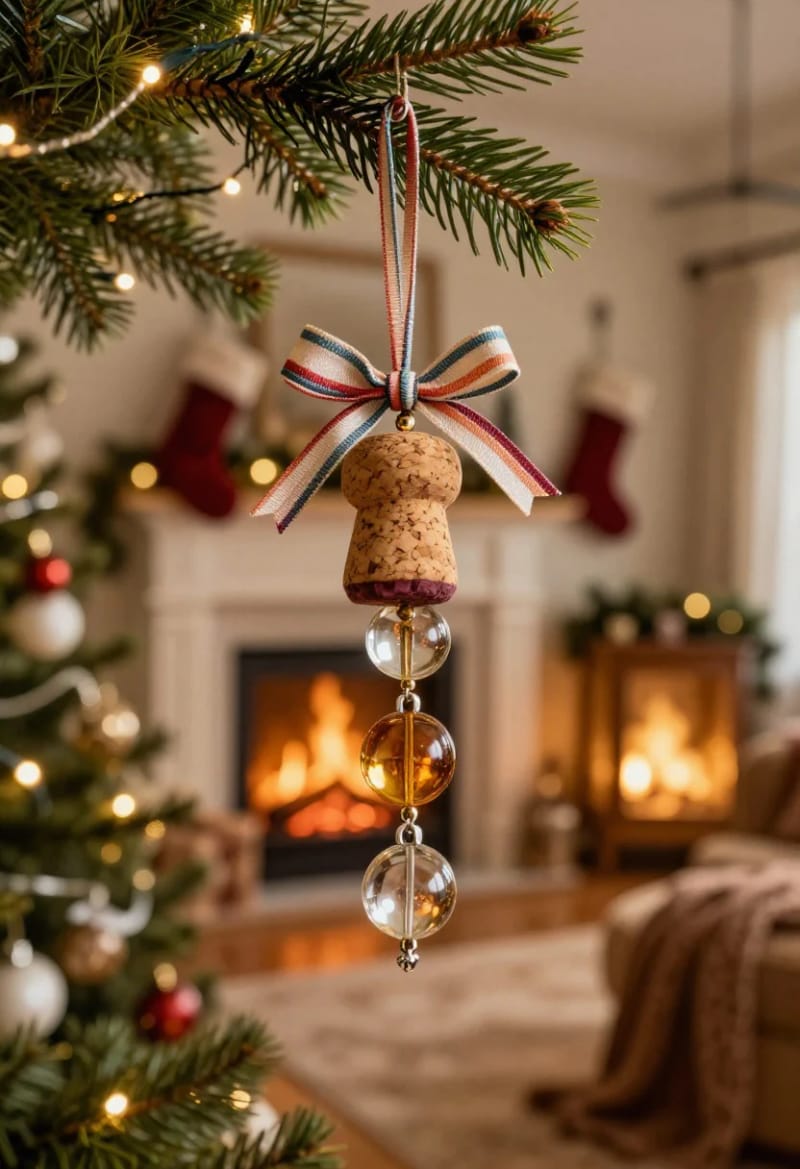
One cork, one screw eye, and whatever beads and a silver charm you have in a drawer, strung on head pins or thin wire. A multicolored ribbon at the top instead of plain twine pushes it toward ornament rather than keychain. These sell at craft fairs for well over the cost of their materials, which tells you how little they take to make.
Synthetic corks look close enough in the bag, but they behave nothing like the real thing: they won’t soak up stain, they resist paint, and they turn gummy instead of soft when you steam them, so anything you try to cut from them shreds and anything you paint on them peels. Sort them out before you start. Natural cork is lighter, spongy, and usually wine-stained on one end. One more thing about steaming: the corks come out hot, so give them a minute before your fingers meet the knife.
11. Rustic cork sled
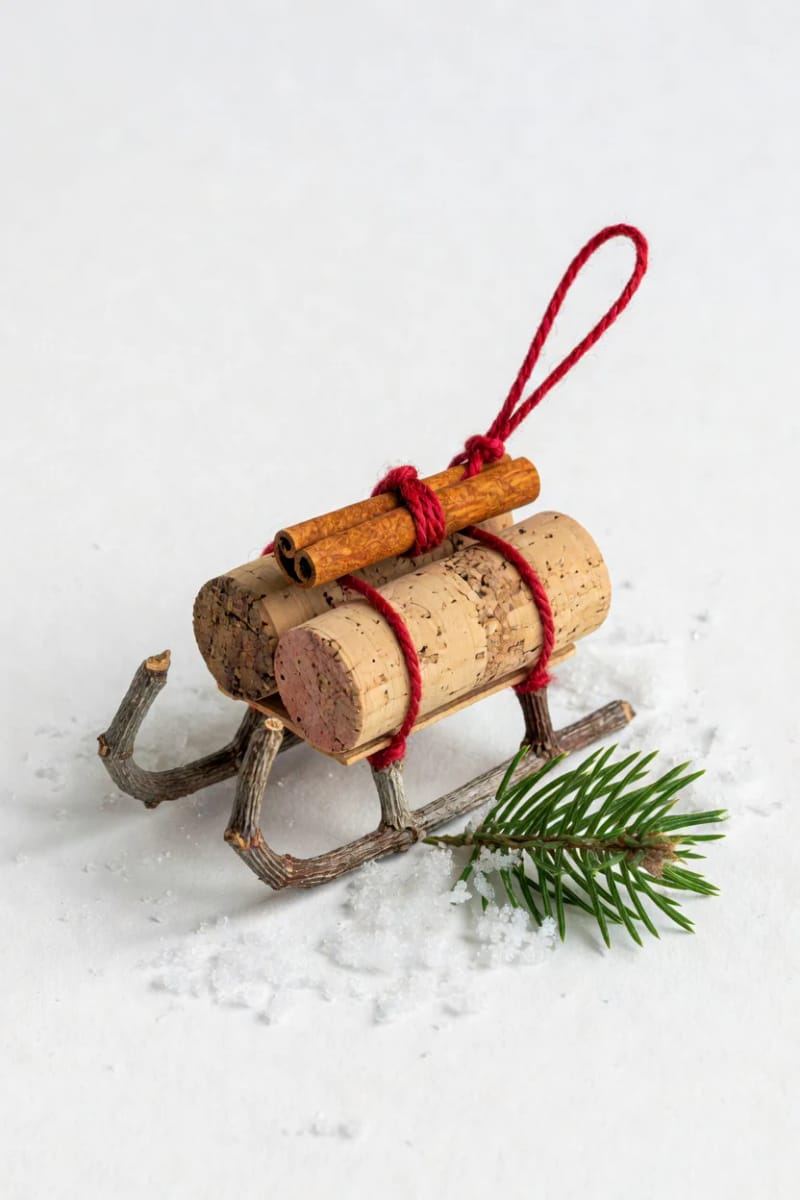
Lay three corks side by side for the sled bed, glue two bent twigs or craft sticks underneath as runners, tie on red twine, and you have a little sleigh that looks harder than it is. A sprig of faux greenery or a cinnamon stick lashed on top turns it from plain into a gift topper.
The runners are the only real trick: they have to sit flush and level or the sled lists, so glue them one at a time and let each set before you add the next. E6000 here again, since the runners take the stress every time the ornament comes off the tree.
Your first evening: three ornaments, one bag of corks
About 20 corks, roughly $10 to $15 in supplies, two to three hours.
Start with the snowman, which needs no cutting at all, then the stacked tree, which is glue only, then a batch of stamped tags off a single carved cork. That order walks you from zero cutting to light cutting with no steam step, so you can decide whether slicing is your thing before you commit to the wreath or the pinecone ball.
Shopping list
| Qty | Item | Spec | Price |
|---|---|---|---|
| 20+ | Natural wine corks | used, wine-stained | Free to $8 |
| 1 | Tacky glue | 4 oz, non-toxic | $3 to $6 |
| 2 | Craft acrylic paint | white and red, 2 oz each | $2 to $5 each |
| 1 | Screw eyes | small, 100-pack | $4 to $7 |
| 1 | Twine | red or natural jute | $3 to $6 |
| Total | $15 to $30 | ||
Prices are approximate ranges as of 2026; verify before purchase.
Conclusion
If you make one thing off this list, make the stamped tags, not because they are the most impressive but because one carved cork end becomes thirty ornaments and teaches you the tool-versus-object move that the sled and the wreath both quietly rely on.
The honest limiter is not skill, it is the steam step. Everything that requires slicing, the snowflakes, the Nordic discs, the wreath, the pinecone ball, lives or dies on softening the corks first, and it is the step beginners skip right before they wonder why their corks turned to crumbs.
Buy the E6000 even though tacky glue covers most of what is here. The projects that fail in a storage bin are always the ones with a twig or a bead hanging off a joint that a hot glue gun was never going to hold.