
A one-pound coffee can is roughly six inches tall and four across, which happens to be the footprint of a fat pillar candle and about the height of a small nutcracker. That is the whole reason this works: the can is already at mantel scale before you touch it. The real constraint is depth, because most mantels give you eight or nine shallow inches to play with and a garland eating half of that, so the ten ideas below are grouped by what the can actually becomes on the ledge, from a lit luminary to a stacked snowman to a vintage tin you barely alter at all.

Cans that turn into characters
These are the pieces people reach for first, and the reason they usually look homemade in the bad way is that the maker skipped the one structural step that keeps them from slumping or peeling. Fix that step and the character reads as intentional.
A stacked coffee-can snowman
Two cans, larger on the bottom, with a plastic snap lid or a smaller tin for the head, and the trick that separates a keeper from a toppler is a length of wooden dowel run down through both lids so the stack can't shear sideways when the mantel gets bumped. Granted, that only matters if you actually want it to survive December with a cat in the house, but you do.
Prime the metal before you go anywhere near white paint. Bare steel and the slick interior coating shed craft paint in sheets, so scuff the surface with 220-grit and hit it with a bonding primer (Rust-Oleum's spray version is the easy one) before two thin matte coats. Matte, not gloss, because gloss under warm mantel bulbs turns every fingerprint into a glare. For the face, coal-dot eyes and a ridged brushed-tin brim beat the orange pom-pom nose, which, I'll say it, has been done to death since about 2015.


A Santa boot from a plastic coffee canister
A plastic Folgers-style canister already has the barrel shape of a boot cuff, which is why the trash-to-treasure crowd keeps making these: cut a curved toe from stiff cardboard or floral foam, hot-glue it to the base, skin the whole thing in red felt or red craft paint, then a band of white fur at the top and a black buckle. The proportions do most of the work, so keep the toe short and blunt rather than elfish.
Plastic behaves differently from metal here. A light sanding and a plastic-specific primer (Krylon Fusion is the usual pick) keep the red from scratching off the first time it slides on the shelf. True, you can skip primer and it will look fine on day one, but the cuff is exactly where fingers grab it. Cluster two boots of different heights rather than a matched pair.


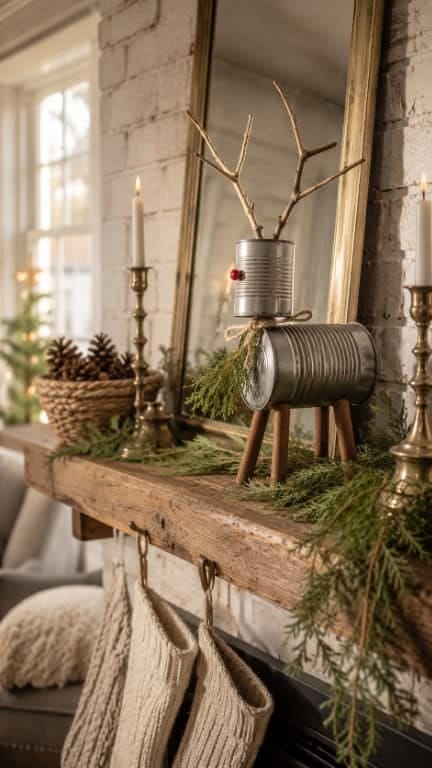
A tin-can reindeer with twig antlers
Lay the can on its side for the body, add a smaller can or a wooden ball for the head, and let the antlers carry the whole thing: real forked twigs or a curl of grapevine wired through two nail-punched holes read as reindeer far faster than any painted-on detail. Cinnamon-stick legs, a red bead nose if you must. Keep this one small and slightly crude; a reindeer that looks too finished stops being charming.
Cans that hold light
Punched coffee-can luminaries
Fill the empty can with water and freeze it solid before you punch a single hole. That is the step everyone skips and then wonders why their can caved in: the ice backs the wall so a nail drives clean through without denting the metal inward, and once you have your snowflake or star mapped out with a marker, it is fifteen minutes of tapping. Let it thaw, dry it, and the punched pinholes throw a speckled pattern of light across the wall behind.
Here is the part that matters more than the craft. Do not put a real tea light in one of these on a garland-covered mantel. Fire agencies are blunt about it, telling you to keep any open flame at least twelve inches from anything that burns, and more than half of candle fires start when something combustible sits too close (see the U.S. Fire Administration’s candle guidance). A mantel draped in dry evergreen and ribbon is precisely that situation. Flameless LED tea lights flicker convincingly, cost about a dollar each in a multipack, and let you cluster the luminaries right in the greenery where a flame could never go. That is the whole reason to prefer them, beyond the obvious.

A mercury-glass finish on a plain can
Looking-glass spray paint plus a spritz of water is how you fake the speckled, silvered patina of antique mercury glass on a plain can, and it is the finish that makes an upcycle look bought. Mist the can with a water-and-vinegar mix, spray the mirror coat over the wet beads, then dab the droplets away so the silvering breaks up into that mottled, aged look instead of a flat chrome. Do it on the outside of a metal can and you get a reflective luminary; do it inside a glass jar and the effect is subtler.
On palette: pick either the mottled silver or a warm champagne-gold and commit the whole grouping to one, because a mantel of mixed metallics reads as leftovers rather than a set. Admittedly gold photographs warmer under incandescent bulbs, which is usually what a mantel has.

Little trees and greenery
Anything vertical earns its keep on a shallow ledge, and cans stacked or filled with foliage give you height without the depth a real arrangement demands.
Birch-wrapped cans as greenery urns
Wrap the can in a strip of real birch bark or a bark-print paper, tie it with jute, and fill it with fir tips, cedar, and a few red berries, and the coffee logo disappears under something that reads like a little birch pot. The bark texture is what sells it; a plain painted can holding greenery just looks like a painted can holding greenery. Soak real bark briefly so it wraps without cracking, or buy bark-wrapped craft sleeves if you would rather not forage.

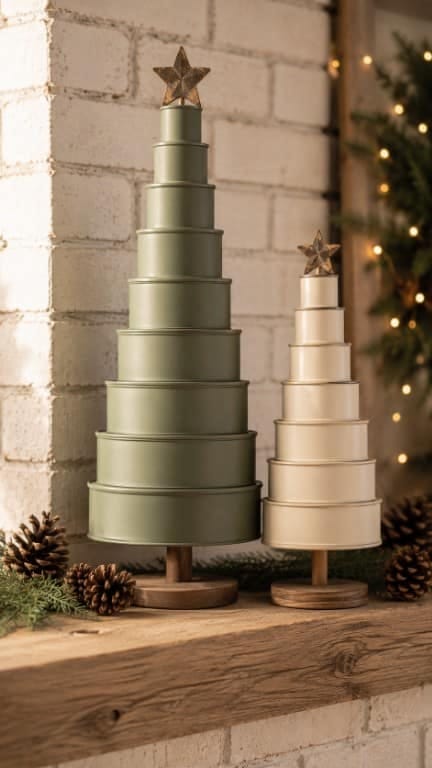
A stacked-can cone tree
Graduated cans, widest at the base up to a small tomato-paste tin at the top, threaded onto a central dowel, make a tiered cone that reads as a stylized tree from across the room. It is the most sculptural thing on this list and the one that most needs a stable base, so weight the bottom can with plaster or sand before you stack. Paint it a single flat color, or wrap each tier in a different textural paper and let the widths do the tapering.
Bottle-brush trees in mini coffee tins
Single-serve or sample-size coffee tins are the right scale to hold one dyed bottle-brush tree each, and a cluster of three at odd heights is a five-minute vignette that fills the awkward gap beside a candle grouping. Vintage bottle-brush trees in muted greens and blush have been the flea-market darling for a few seasons now. A pinch of faux snow at the base if you want it, though I would leave it off.


Vintage tins, mostly left alone
Decoupaged vintage-label coffee tins
The most convincing version of this whole category is a vintage-label tin you barely touch. Print a reproduction Maxwell House, Chase & Sanborn, or Folgers label, brush a coat of Mod Podge onto a plain can, smooth the label down, and seal it, and you have the flea-market look without the flea-market price. If you scored a genuinely old tin with a faded pine-tree graphic and a bloom of orange rust, use that instead and leave the patina exactly where it is. If you ask me, that rust is worth more than any label you could apply over it, and repainting a real vintage coffee tin is the one move I would talk you out of.
Group these low and let a few sit on their sides so the graphics face the room. They anchor a mantel that otherwise reads as a pile of white craft projects, which is a real risk once you have made three snowmen.

Coffee-can risers under a cloche
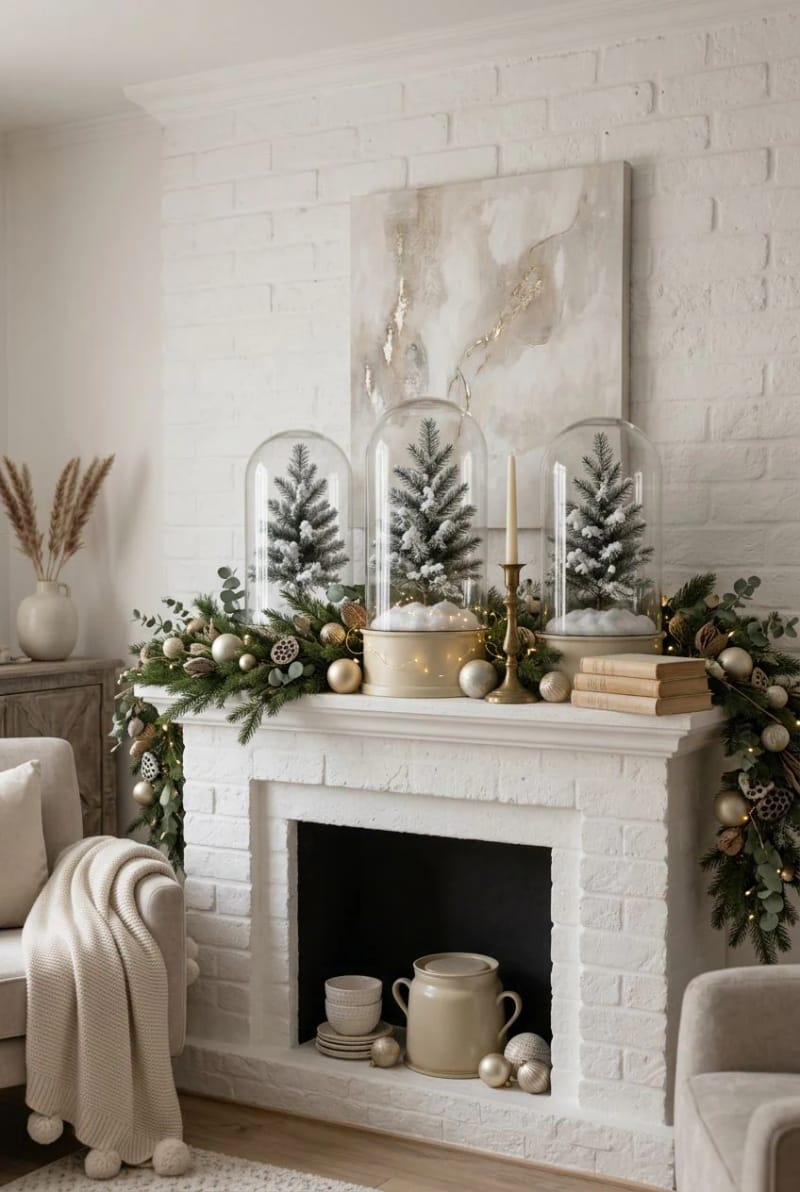
Turn a painted can upside down and it becomes a pedestal, which is the quietest useful idea here. Set a glass cloche over a bottle-brush tree or a tiny paper village on top of the inverted can and you have lifted a small scene to eye level, giving a flat mantel the height variation it usually lacks. Vary the riser heights across the ledge so the cloches sit at three different levels rather than a row. A can that is going to bear weight under glass should be filled and capped so it does not crush.

Conclusion
Build the mantel in that rough order: set the tallest silhouette first, whether that is the stacked-can cone tree or the snowman, then place the luminaries where the light will read against the wall, and use the low vintage tins and cloches last to fill the gaps and stagger the heights.
Two finish notes decide whether it looks made or homemade. Scuff and prime any slick metal before painting, and choose matte over gloss, because a mantel lit by warm bulbs turns a glossy can into a smear of glare while a chalky matte holds its color.
Work in odd numbers, vary the heights deliberately, and let the garland fall across the bases so the seams and lids disappear into the greenery rather than lining up like a shelf of canisters.