
The pallet Christmas tree that fills every holiday board is bolted to an exterior fence or screwed flat into a garage wall. Fine if you own the garage. If you rent, that same build quietly puts your security deposit on the line, and most of the tutorials never mention it. So this is the renter's version of the rustic pallet look: seven pieces that lean, stand on the floor, or hang from removable adhesive, and come down clean in January without a patched hole or a landlord email.
The constraint shapes every choice here. No drilling means freestanding bases and weight-rated adhesive instead of anchors, which rules out the giant yard silhouettes and points you toward pieces sized for an apartment. There's also one thing to sort out before you cut a single board, and it has nothing to do with your lease.
The other quiet goal is making reclaimed slats read as decor rather than as scrap lumber that wandered indoors. That comes down to two decisions, finish and restraint, and I'll flag them where they matter.

Look on the stringer for the IPPC brand. HT(heat treated) and KD(kiln dried) are safe; MB means methyl bromide, a fumigant you don’t want to sand indoors, and it never goes in a fireplace. Skip unmarked boards too, especially the dark, weathered ones people grab because they look the most rustic, since you can’t tell what soaked in. And leave painted blue (CHEP) or red (PECO) pallets alone: those are rental company property, not free wood. Penn State’s extension office has a plain rundown of the markings if you want the full list ( Penn State Extension: pallet safety).
1. A Leaning Pallet Christmas Tree You Never Screw to the Wall
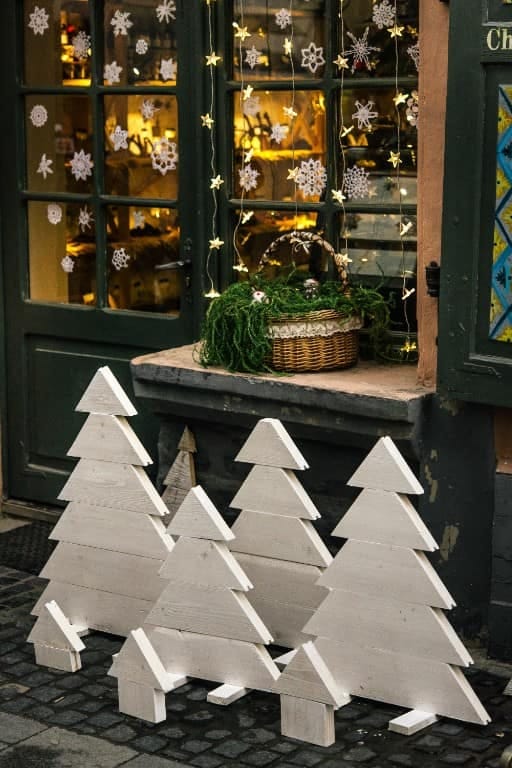
Build it as a flat silhouette that leans, not a mounted one. A row of horizontal slats, longest at the bottom and stepping shorter toward the top, screwed to two vertical battens on the back, gives you a tree shape roughly four to five feet tall that stands on the baseboard and tips back against the wall. No French cleat, no anchor, nothing behind it but a felt pad where the top edge kisses the paint. This is also the one build here sturdy enough to be a real anchor piece for the room, so it's worth slowing down on.
Cut the taper so it reads as decor, not a fence
The difference between "handmade tree" and "someone stapled fence pickets together" is the taper and the gaps. Step each slat in by an inch or two per row and leave a consistent finger-width gap between boards; a solid wall of wood with no daylight through it just looks like siding. Five to seven slats is plenty. If you want a trunk, two short offcuts at the base sell it.
Whitewash, don't varnish
Reach for a watered-down white or a warm grey wash, not a glossy polyurethane. Poly turns rustic pine into something that looks laminated, while a wash (one part flat white paint to two parts water, wiped on and immediately wiped back off with a rag) lets the grain and knots show through, which is the entire point of using pallet wood. Most tutorials over-thin it into milk; you want it to catch in the grain and skip the high spots. A raw or lightly stained tree works too, but skip the sisal-rope-wrapped look, which reads craft-fair rather than farmhouse.
Lean it so a cat can't take it down
A leaning tree lives or dies on the base. Set the bottom slat flush to the floor so the whole thing rests on the baseboard rather than balancing on two batten ends, and lean it at a shallow angle, maybe ten degrees off the wall, so gravity holds it in place. In a home with a cat or a toddler, run one loop of clear fishing line from a top batten to a small adhesive hook, a tether that takes almost no weight but stops a tip-over. That is the whole renter trick: the wall holds nothing, the floor does.
2. Build a Faux Pallet Mantel So Renters Can Hang Stockings
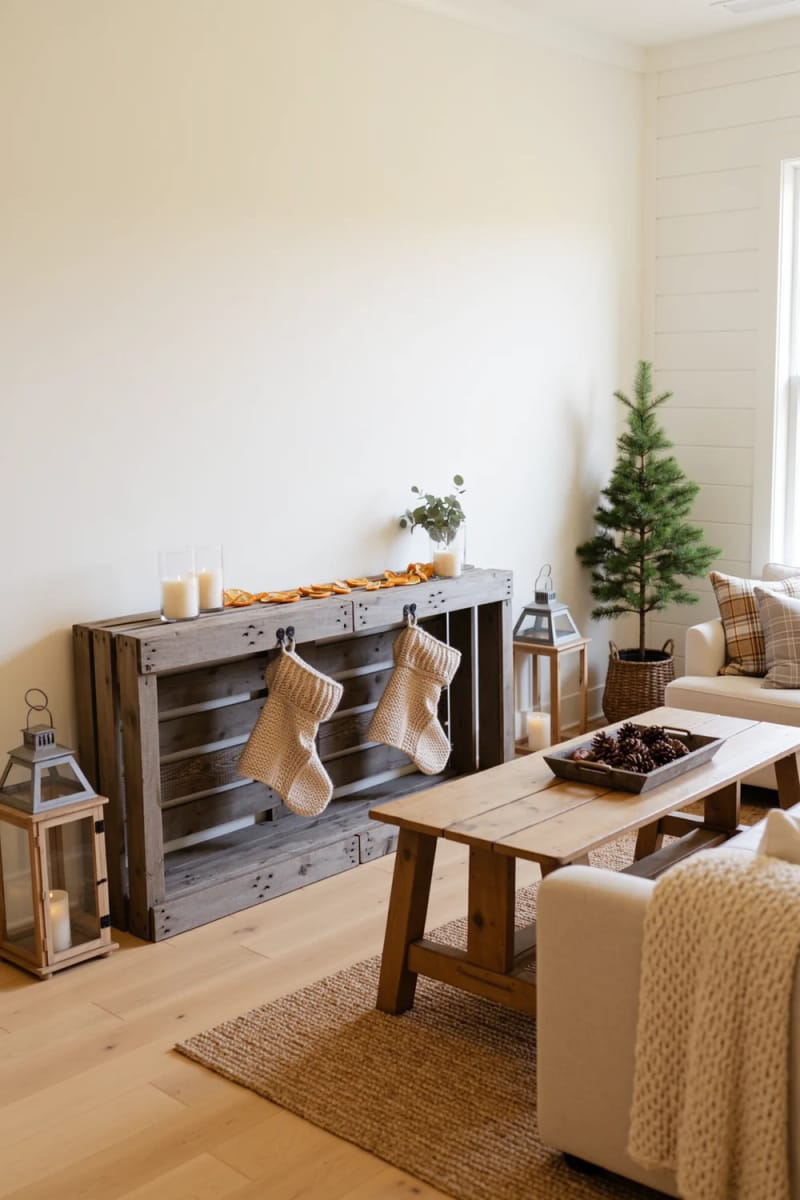
Make the mantel a freestanding console, not a floating shelf. Renters get stuck on stockings because apartments rarely come with a fireplace, and a real floating shelf needs anchors. Instead, build a low pallet-wood box or a slab-top stand that sits on the floor against the wall, roughly the height of a real mantel, and you get the surface and the stocking line without touching drywall.
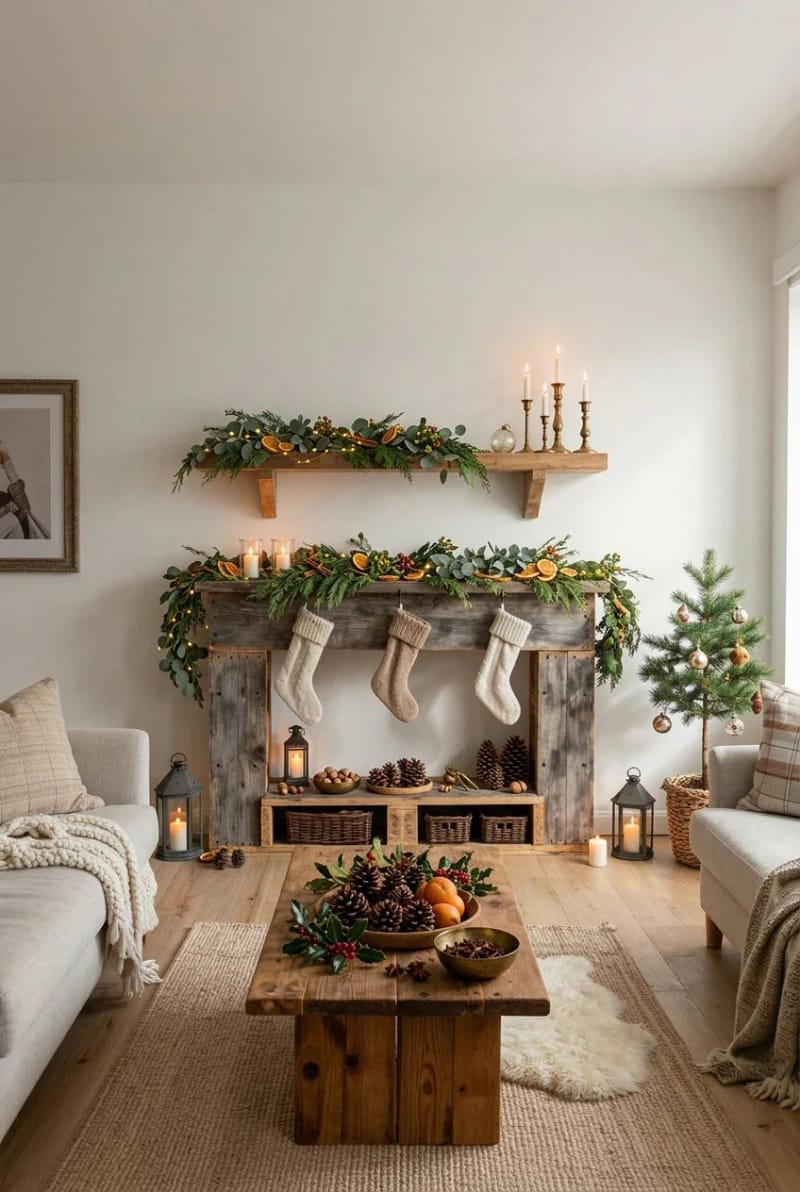
Screw a row of small iron cup hooks along the front edge of the top plank and the stockings hang from the shelf lip, no mantel required. Weight matters more than usual here: because the piece is freestanding and shallow, a kid yanking a full stocking can walk it forward, so either keep the base wider than the top or park it against the wall with something heavy on the shelf. The top doubles as a spot for a bottle-brush village or your keys the other eleven months.
3. A Tabletop Pallet Advent Calendar That Skips the Wall Entirely
When you have no wall to spare, put the countdown on a shelf. A small pallet-wood board with 24 numbered pegs, or a shallow grid of little cubbies made from slat offcuts, leans on a bookshelf or sits on the console from the last idea. Hang tiny numbered kraft bags or mini stockings from the pegs and fill them with chocolate, notes, or the world's smallest ornaments.
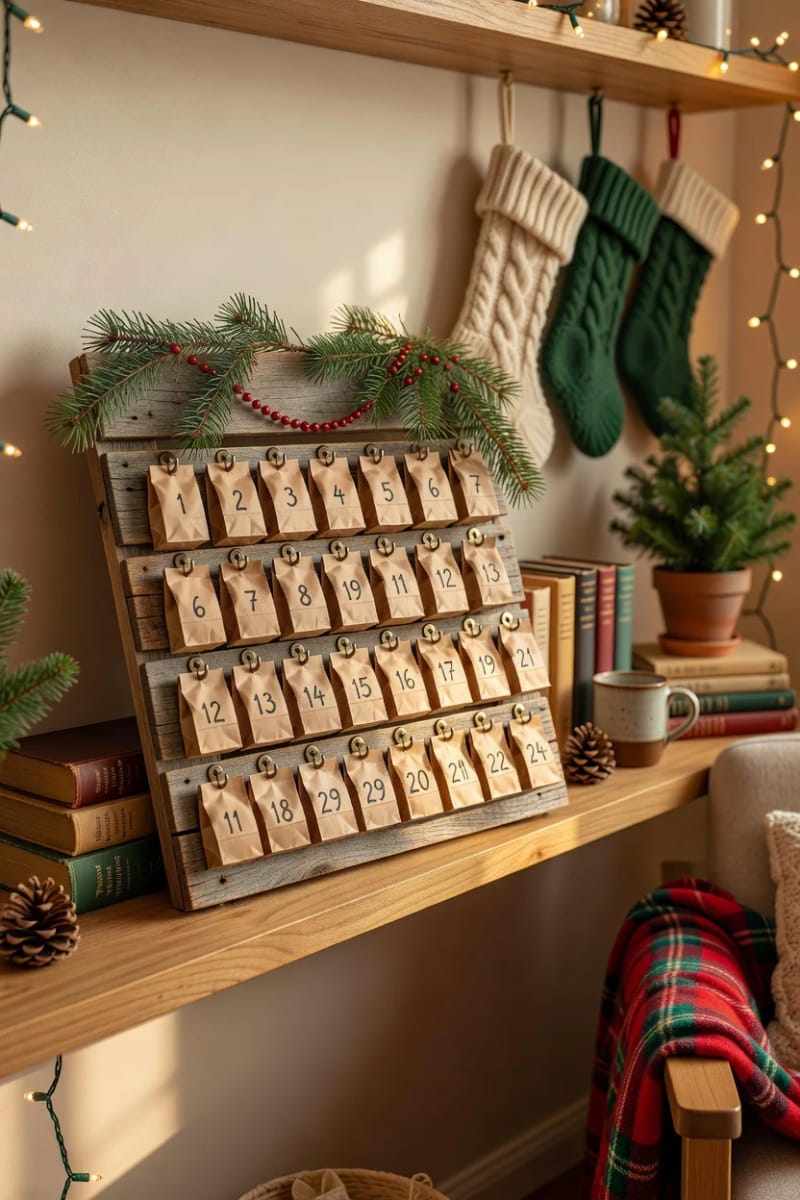
Keep it under about eighteen inches wide so it earns its shelf space; a giant advent board defeats the point of going tabletop. This is the cheapest build on the list, essentially one offcut and a strip of hooks.
4. A Pallet-Slat Star Backlit With Battery Lights

A flat five-point star from five or ten slat lengths is the fastest high-impact piece here, and wrapping it with a strand of battery-operated 33ft warm white LED fairy lights means no outlet, no cord snaking down the wall, and a timer that clicks it on at dusk. Those run roughly $8 to $15, take three AA batteries, and stay cool to the touch, which matters against dry wood.
Back the light instead of facing it
Tuck the strand around the back edges of the frame so the glow spills onto the wall behind rather than blasting the camera. Warm white (around 2700K) reads like candlelight; the bluish "cool white" strands read like a parking lot and fight the whole rustic idea. Fewer, softer points of light beat a densely wrapped star that turns into a solid blob after dark.
Hang it damage-free
- Wipe the wall with rubbing alcohol first and let it dry; skin oils and dust are why strips fail.
- Use weight-rated adhesive strips on smooth painted drywall, then press hard for 30 seconds and wait an hour before hanging the piece.
- Take it down by pulling the tab slowly straight down toward the floor, not out.
Where adhesive quits
- Textured walls, wallpaper, and fresh paint. Give new paint a full week to cure or the strip peels it off when you remove it.
- Don’t treat strips as shelving. They’re for flat art, not load-bearing brackets.
- Overloading. A chunky slat piece can outweigh a strip’s rating fast, so weigh it on a bathroom scale and match the pack.
Or don't hang it at all
Leaned on a shelf, propped on the console, or hung from a single rated adhesive hook, the star never needs a nail. For anything up to about 20 pounds on smooth drywall, four pairs of Command 20 lb XL picture-hanging strips are the standard renter answer; lighter slat pieces need far less.
5. Stacked Crate Vignette: A Tiny Pallet-Wood Tree Farm on a Console
Two or three reclaimed crates, stacked and offset, become an instant display shelf, no build required beyond stacking. Fill the openings with a cluster of small wooden bottle-brush-style trees cut from slat offcuts in graduated heights, a string of lights, and a few pinecones. It gives you the pallet look as a whole scene rather than one object, which is genuinely handy in a studio where floor space is the scarce thing.
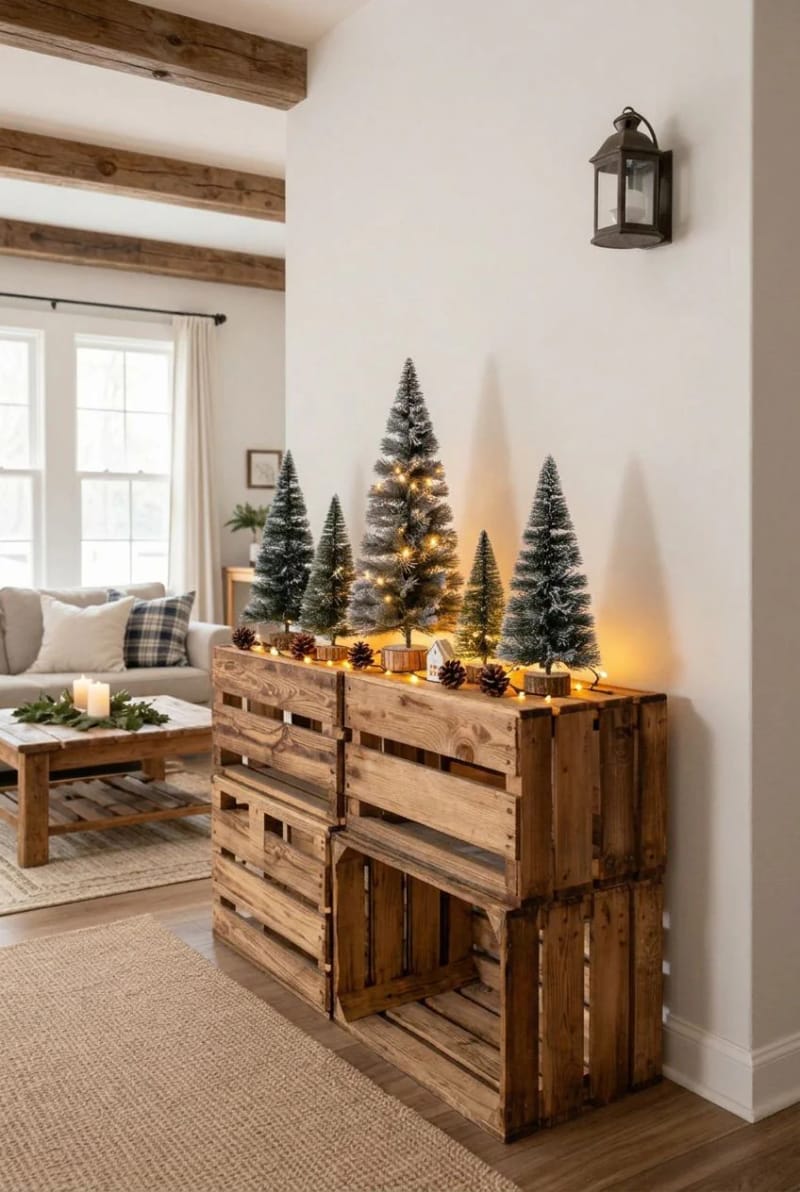
Weight the bottom crate if you stack three high, and stop at two on anything a pet brushes past.
6. A Pallet Gift-Tag Garland Draped Over Your Curtain Rod
Skip the wall entirely and use the hardware you already rent. Cut a couple dozen mini tags or tiny trees from thin slat offcuts, drill a hole in each, string them on jute twine, and drape the garland over a curtain rod, along a bookshelf edge, or across the freestanding mantel from idea two. Nothing gets fastened to anything; the rod and the shelves do the work.
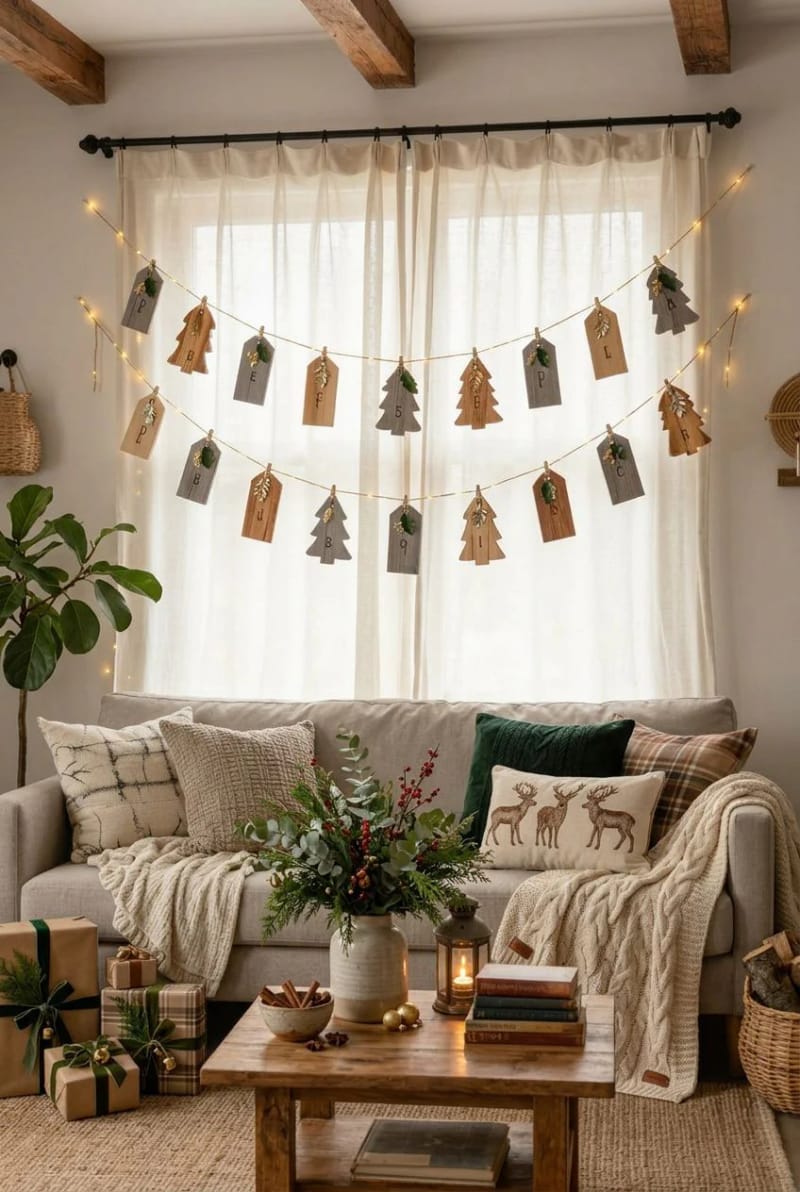
Because there are no fasteners, it moves rooms in seconds and stores flat in a shoebox. Vary the tag shapes and the spacing; a perfectly even row of identical rectangles is the thing that tips handmade into mass-produced.
7. A Rustic Pallet Wood Wreath for a Door You Don't Own
A wreath built from short slat pieces fanned around a ring reads rustic without a single sprig of greenery to replace every year, and it solves the renter door problem with one piece of hardware. Cut a dozen or so tapered slat segments, arrange them like petals around a cardboard or plywood ring, glue and pin, then add a small bow or a few berries off-center.
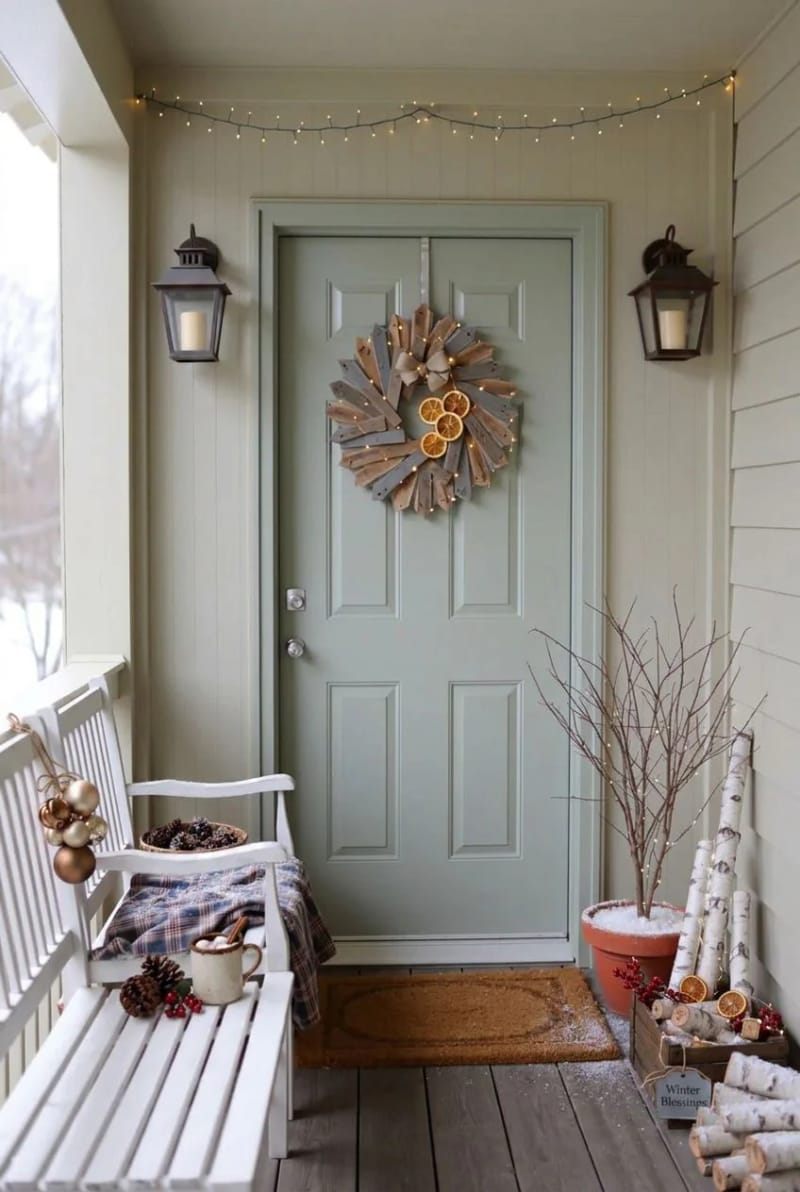
Hang it on a slim over-the-door hook that slips over the top edge, so the door itself takes no hardware, or use a rated adhesive hook on a smooth-faced door. Keep the ring under about sixteen inches; a wreath heavy enough to swing will scuff the door every time it opens, which is exactly the mark you're trying to avoid.
Conclusion
If you only build one thing, make it the leaning tree from idea one; it carries a room on its own and needs nothing but a felt pad and a shallow angle. Add the star and the draped tag garland after that, since between them they cover the two spots renters always miss, the wall you can't nail and the window you forgot counts as display space.
Everything here comes apart as easily as it went up, which is the actual test of renter decor. The one corner to not cut is the pallet stamp: an HT board sands into charming grain, and an MB board is the kind of shortcut you notice later.