
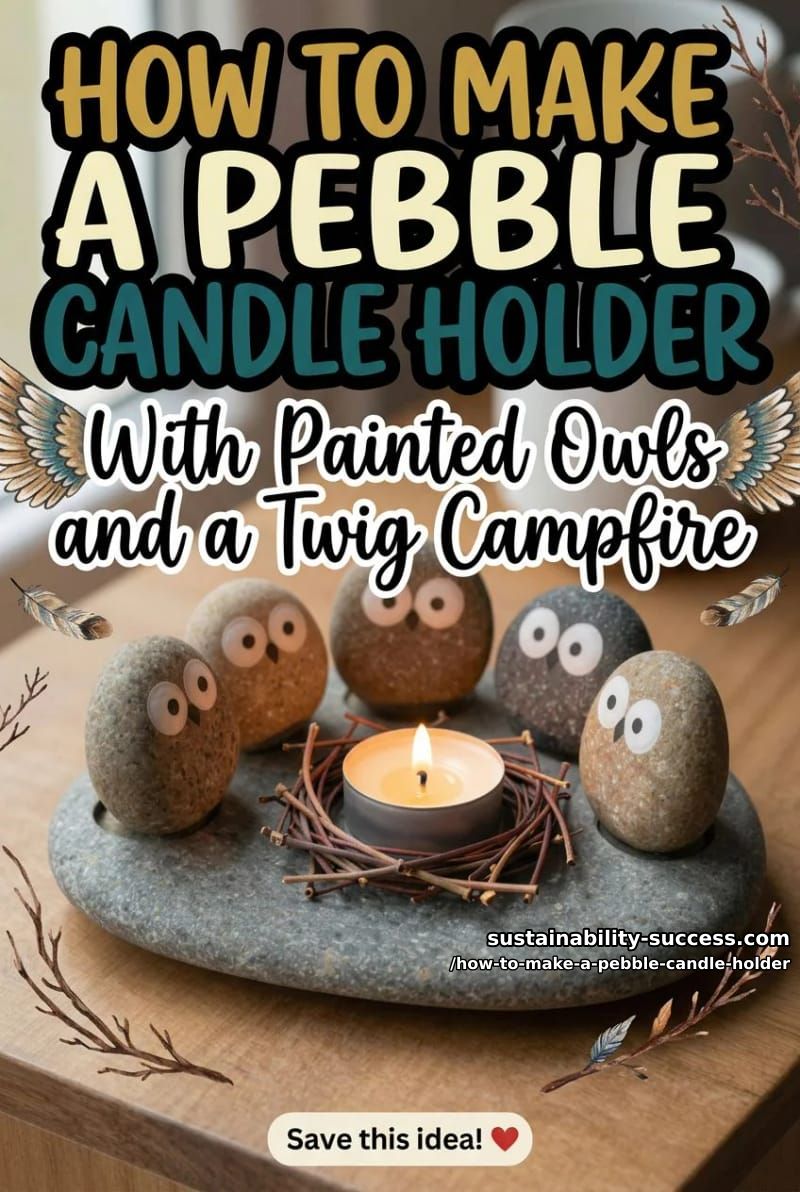
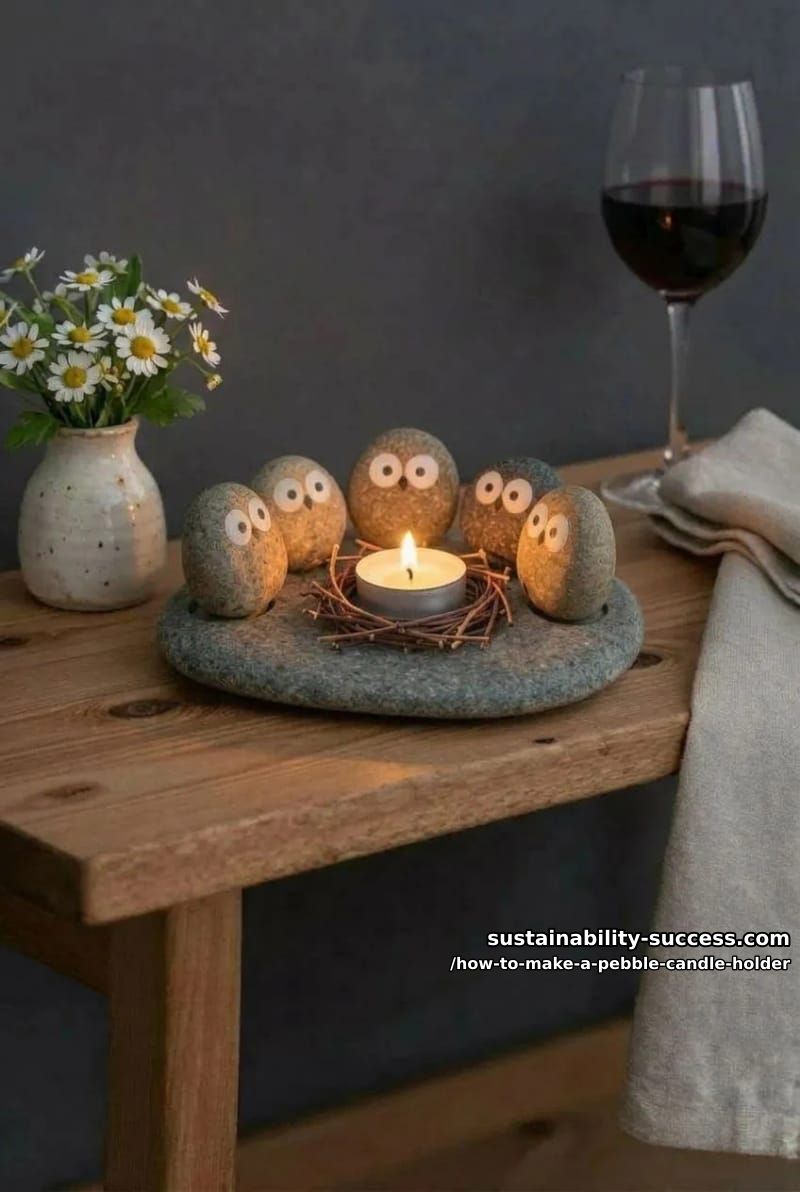
Everything in this project is foraged except a tea light, a tube of acrylic, and a stick of hot glue. Five river pebbles become a small council of painted owls, gathered around a campfire of dry twigs with a flame at the center. One evening to paint, one night to dry, twenty minutes to put it all together. The craft isn't the hard part. Finding the right base stone is.
Why this one is worth making instead of buying
Etsy will sell you a stone tea light holder for $28 to $60. They look fine. They also look identical to every other stone tea light holder on Etsy, because most of them come out of the same three or four small workshops sourcing the same machine-tumbled basalt. The one in the reference image isn't for sale anywhere, because the person who made it built it around a specific oval stone they happened to pick up in a specific place. That, more than anything, is why you do this yourself.
There’s also a heritage thread worth pulling on. Scottish painted pebbles are a class of Pictish-period artifact from northern Scotland , small quartzite beach stones painted with dots, wavy lines, crescents, and pentacles in what archaeologists think was peat tar. Dated to roughly 200 AD through the eighth century. Fifty-five of them have been found, total. You aren’t recreating a Pictish ritual object on your kitchen table. But putting marks on a found stone is one of the older things humans do with their hands, and a candle holder is a perfectly reasonable contemporary excuse to do it.
Everything load-bearing here is foraged: the base, the five owl pebbles, the twigs. What you pay for is paint (cents), a tea light (under a dollar), and a bit of hot glue. The finished object weighs three to five pounds of literal rock and will outlast every IKEA candle holder ever sold, because , in the most boring possible sense , it is indestructible.
Materials and tools
The list below assumes you own none of this. If you already have a glue gun and a few brushes hanging around, the real cost drops below $20. Paint and matte sealer are the consumables that matter. Everything else lasts years.
Materials (consumables)
| Qty | Item | Spec | Price |
|---|---|---|---|
| 5 to 7 | Smooth standing pebbles | Egg-shaped, 1.5 to 2.5 in tall, foraged | Free |
| 1 | Flat base stone | Oval, 6 to 8 in across, foraged | Free |
| 8 to 12 | Dry twigs | 2 to 3 in long, snapped clean, foraged | Free |
| 1 | Liquitex BASICS Acrylic Paint Set, 6 tubes including titanium white and mars black | 22ml tubes, heavy body acrylic | $15 to $20 |
| 1 | Mod Podge Clear Acrylic Sealer, Matte 12 oz spray | Non-yellowing, matte finish | $9 to $13 |
| 1 | Bluecorn 100% pure beeswax tea light candles, 24 pack | 4 to 5 hour burn, American-made, no paraffin | $22 to $28 |
| 1 | Surebonder mini hot glue sticks, 100 pack | 27 in diameter, 4 in length, all-temperature | $10 to $14 |
| Materials subtotal | $56 to $75 | ||
Tools (reusable)
| Qty | Item | Spec | Price |
|---|---|---|---|
| 1 | Surebonder GM-160 compact mini hot glue gun | 10W, high-temp, accepts 5/16 in sticks | $8 to $12 |
| 1 | Fine Detail Paint Brush Set, 7 pieces | Sizes 0, 00, 000 for dots and pupils | $7 to $10 |
| 1 | Old toothbrush | For scrubbing grit out of stone surfaces | Free |
| 1 | Pencil and scrap paper | For test-sketching owl proportions | Free |
| Tools subtotal | $15 to $22 | ||
Combined total (everything from scratch)
| Total | $71 to $97 | ||
Prices are approximate ranges as of November 2025; verify before purchase.
A note on the beeswax tea lights, since the default in most carts is paraffin. Paraffin is a petroleum byproduct. The cheap unscented stuff throws soot when you burn it inside a confined holder like this one, which you will notice within about a week of staining on the inside of the twigs. Beeswax burns cleaner and drips less. It also , the reason it matters here , puts off the right warm color through the gaps in the twig pile. Bluecorn pours theirs in Colorado, in metal cups. The metal cup is what you want; it contains the wax flowback that would otherwise wick straight down into your kindling.
Step 1: Forage the right stones
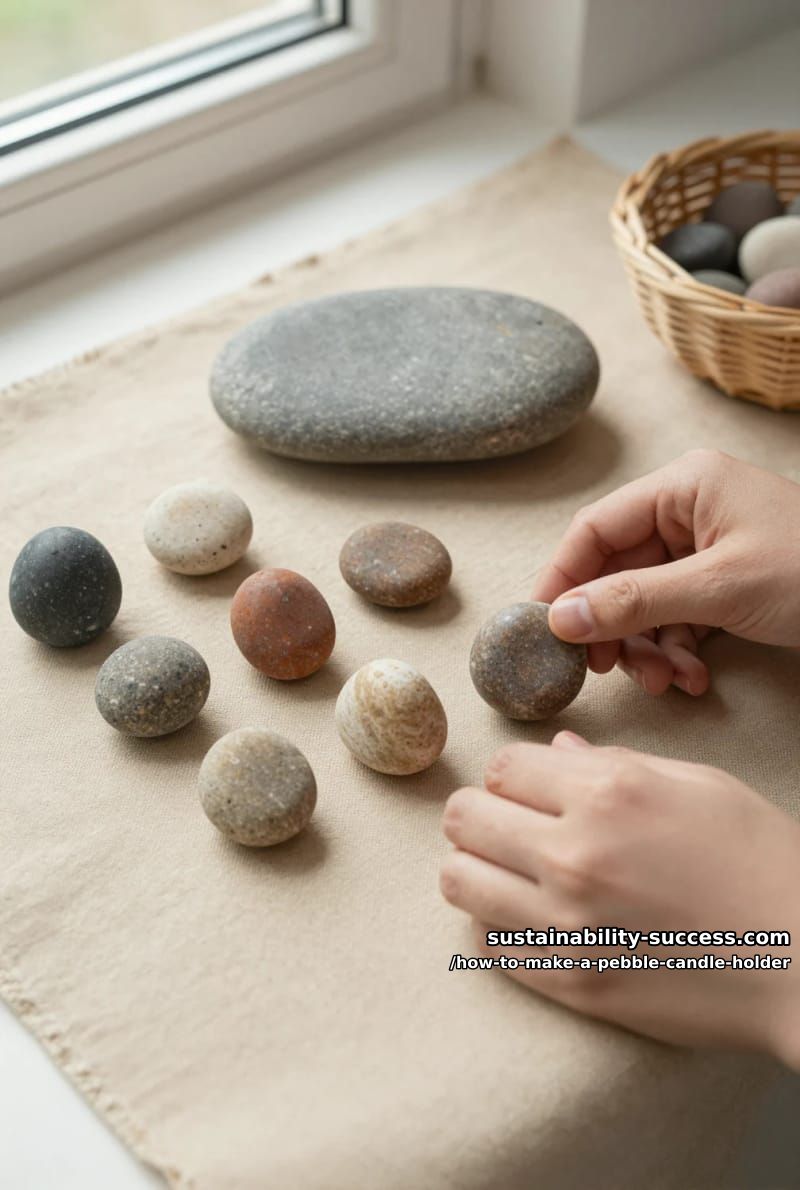
The base stone makes or breaks this. You want a flat-bottomed oval, roughly six to eight inches across, with at least one upper surface that's mostly level. River bends and gravel bars on the inside of a curve are reliable. So are the slow shoulders of slate creeks. Beaches usually disappoint, because wave action keeps everything spherical.
For the owls, you're after what geologists call "egg pebbles" , elongated stones with one rounded end and one flatter end that lets them stand on their own. Test every candidate the same way: stand it up on a table. If it tips over more than once, it's out. You need five that pass, so pick up twelve.
Do this
- Forage from slow river bends, dry creek beds, and landscaping suppliers’ bulk bins.
- Pebbles with one smooth flat face are the ones you want. That face is where the eyes go.
- Bring more than you need. Rejection rate is high once you start standing them up.
- Match owl-pebble heights within an inch of each other for a unified council.
Avoid
- National parks, state parks, and protected beaches. Removing stones is illegal in most US national parks and many state-managed shorelines.
- Porous sandstones and shales , they crumble at the edges and soak paint into mud.
- Wet stones picked straight from water. They weigh wrong and take 48 hours to fully dry.
- Visible quartz veins on the painting face. Acrylic skids.
Step 2: Wash, dry, and arrange the council
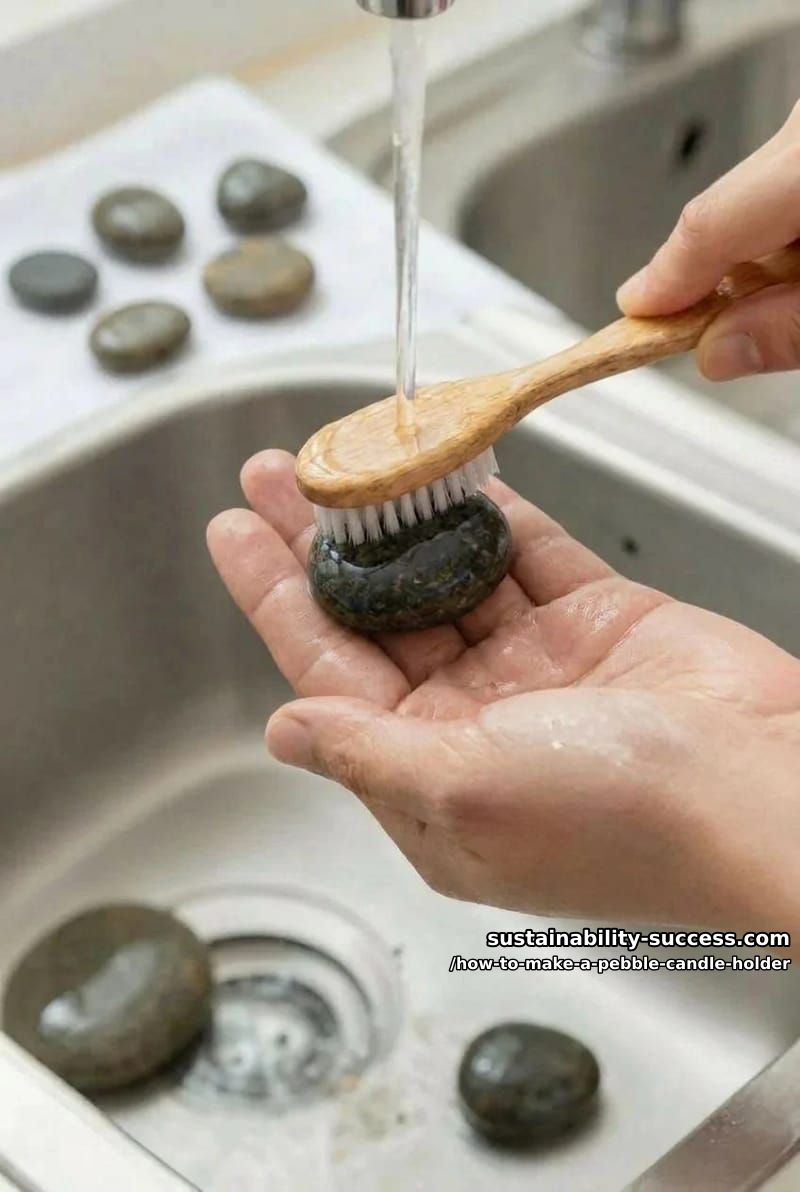
Scrub each stone under cold tap water with the toothbrush. River stones carry algae film and fine clay you can't see when they're dry, and acrylic will absolutely reject it. A brown smear on the bristles means algae. Get the painting face especially clean.
Air-dry at least four hours. Skip the hair dryer; the temperature differential cracks stones with internal moisture, and limestone and certain shales are particularly prone. Once dry, arrange the five owls on the base in a loose semicircle facing the center, mark each position with a pencil dot, and take a phone photo so you can rebuild the layout after sealing.
Step 3: Paint the owl faces
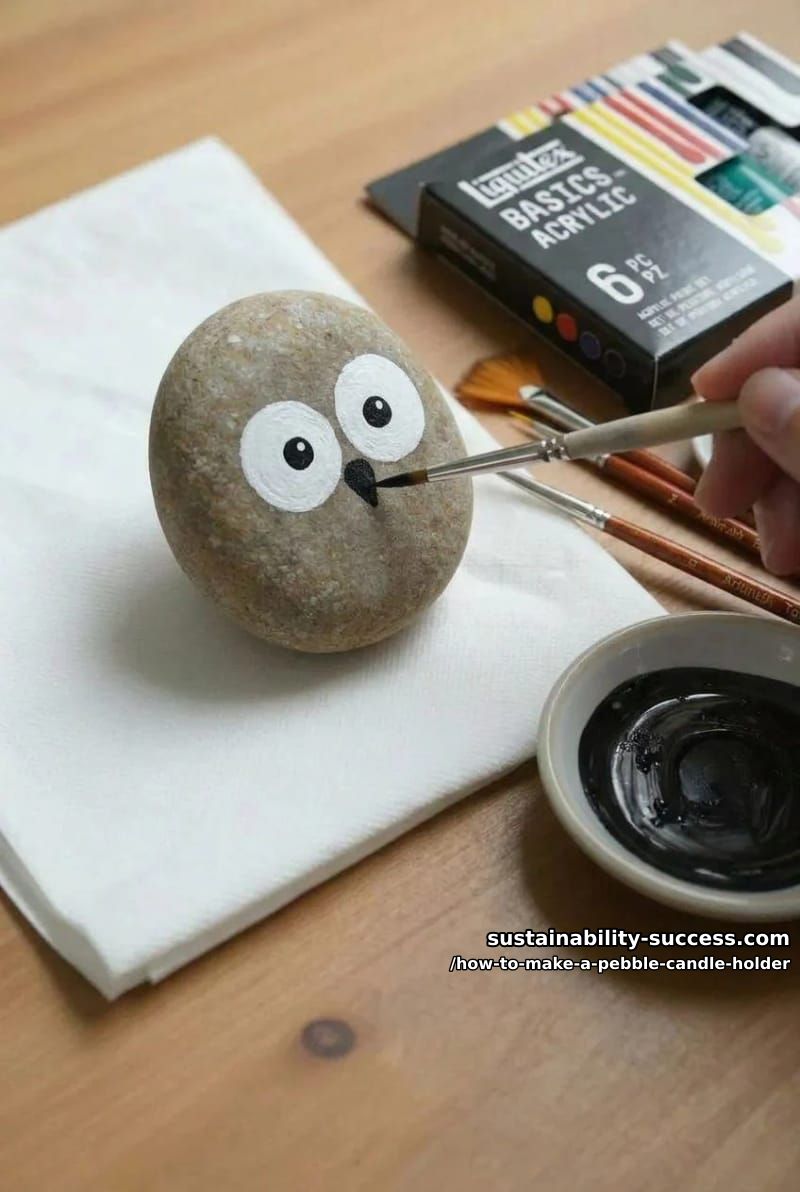
Owl faces are stupidly simple to paint, which is exactly why the reference image works. Two white ovals. A black pupil offset slightly toward the center. That's the whole design. No beak. No feathers, no scoring around the eyes, no shading. Restraint reads as charm. Detail reads as effort, and effort reads worse.
Work in two phases.
Step 3.1, the whites. Load a size 0 round brush with titanium white. Paint two ovals on each pebble, roughly 12mm to 14mm tall, one eye-width apart, sitting in the upper third of the front face. Two coats. The first coat will look streaky and you will not enjoy it; that’s fine. Let it dry 20 minutes before the second.
Step 3.2, the pupils. Size 000 brush, mars black, a single dot 4mm to 5mm across in the center of each white oval. Offset the dot slightly toward the inside of the face , the way real owl eyes look when the bird is staring at you. Dead-center symmetrical pupils make the owl look stuffed.
The single most common failure is painting the eyes too low on the stone, which turns the owl into a frog. The eye line sits above the vertical midpoint, not on it. If you’re unsure, sketch the dots in pencil first and step back six feet before committing to paint.
Step 4: Seal the painted stones
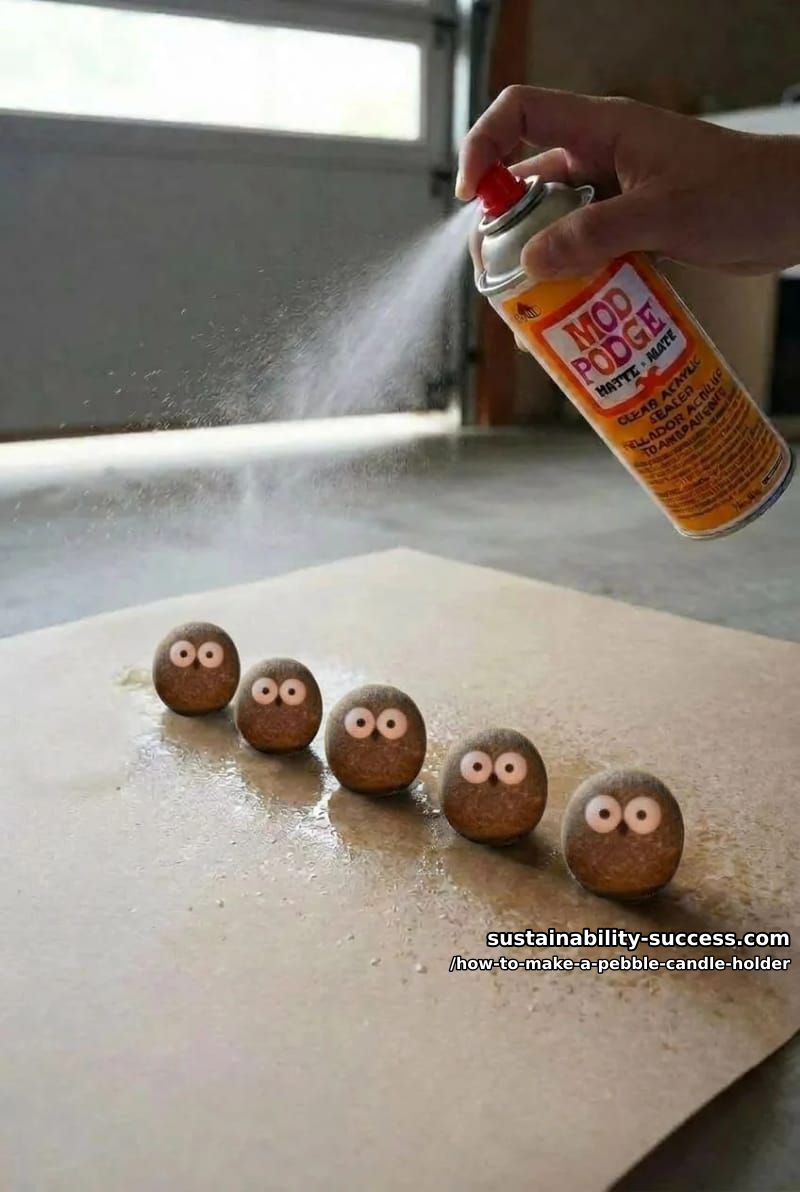
Sealing matters more here than on regular indoor painted rocks, because tea light heat causes thermal cycling on the base, and unsealed acrylic eventually flakes near the candle. Mod Podge matte spray is the workhorse , quick-drying, won't run or yellow. Use matte. Gloss makes the owl eyes look plasticky, which reads cheap.
Outdoors, or in a garage with the door open. Can held 10 to 12 inches from the stones. Light passes, half-overlap, 20-minute dry between coats, then a second pass. Two thin coats beat one thick coat. A thick coat pools in the eyes and turns them milky.
Step 5: Build the twig fire ring
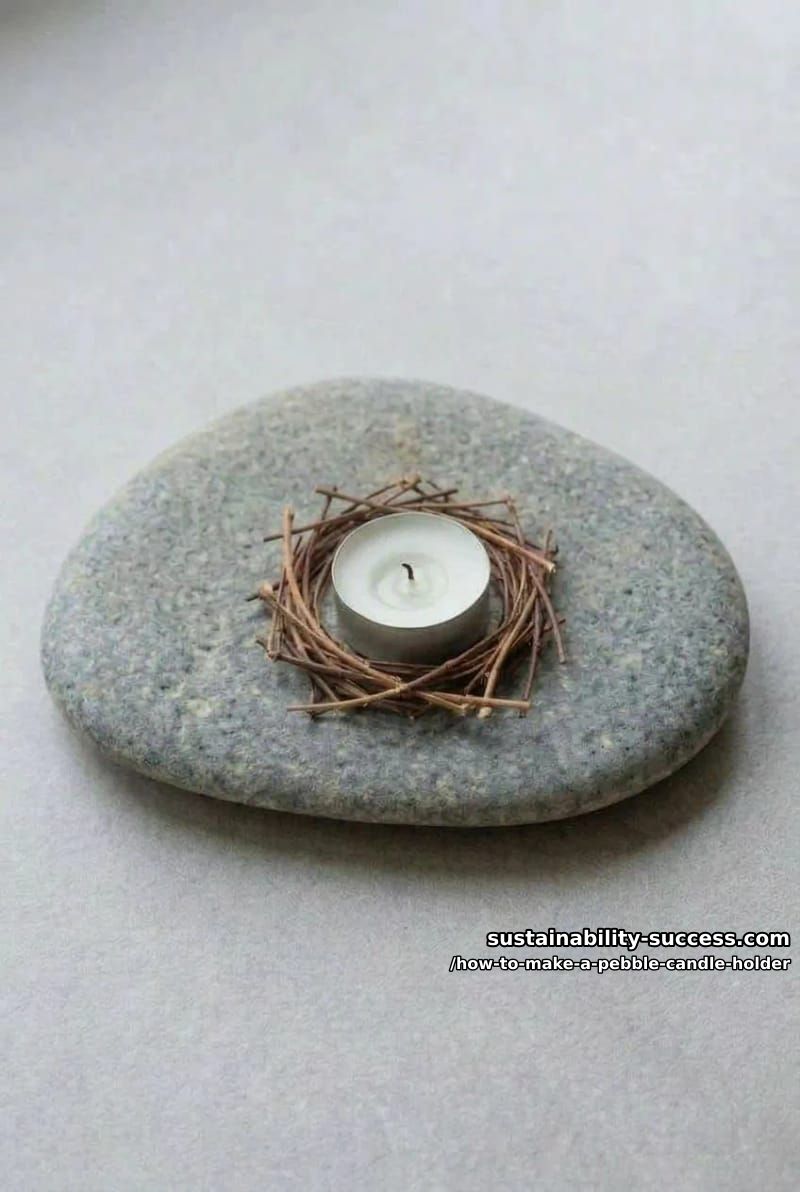
To make the "campfire" of dry twigs around the tea light cup, simply create a ring and hold it together with glue. Then place the candle in the middle.
Dry twigs are kindling. That is the literal definition. The whole point of the metal tea light cup is to contain the flame, but if a twig leans in and touches the flame, it lights. Never leave the holder burning unattended.
Step 6: Glue the owls to the base and stage the fire
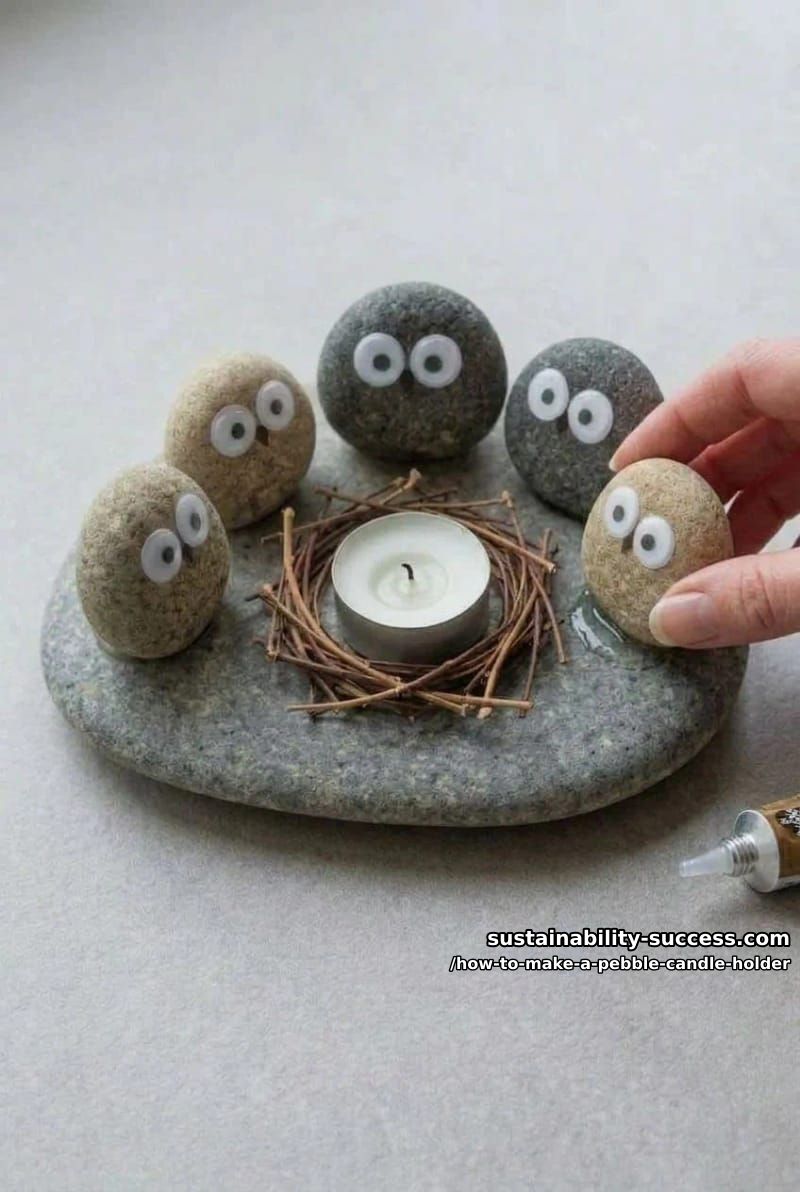
Pull up your pencil marks from step 2. Let the glue gun heat for the full five minutes , cold guns make stringy glue that fails inside a week. Lift one owl at a time, lay down a quarter-sized blob of glue on its base, press onto the stone, hold for thirty seconds. One at a time. If you try to glue all five at once, the first ones cool while you're still positioning the last.
Drop the twig ring into the center of the semicircle, set a fresh tea light into the cup at its core, and check the layout from couch height. The owls should be looking at the fire. If two of them are eyeing each other instead, peel the offender off (hot glue gives up to a flathead screwdriver and a little patience) and rotate.
Mistakes that ruin pebble candle holders
I've built this four times, given two away, kept two. Every failure traced back to one of these.
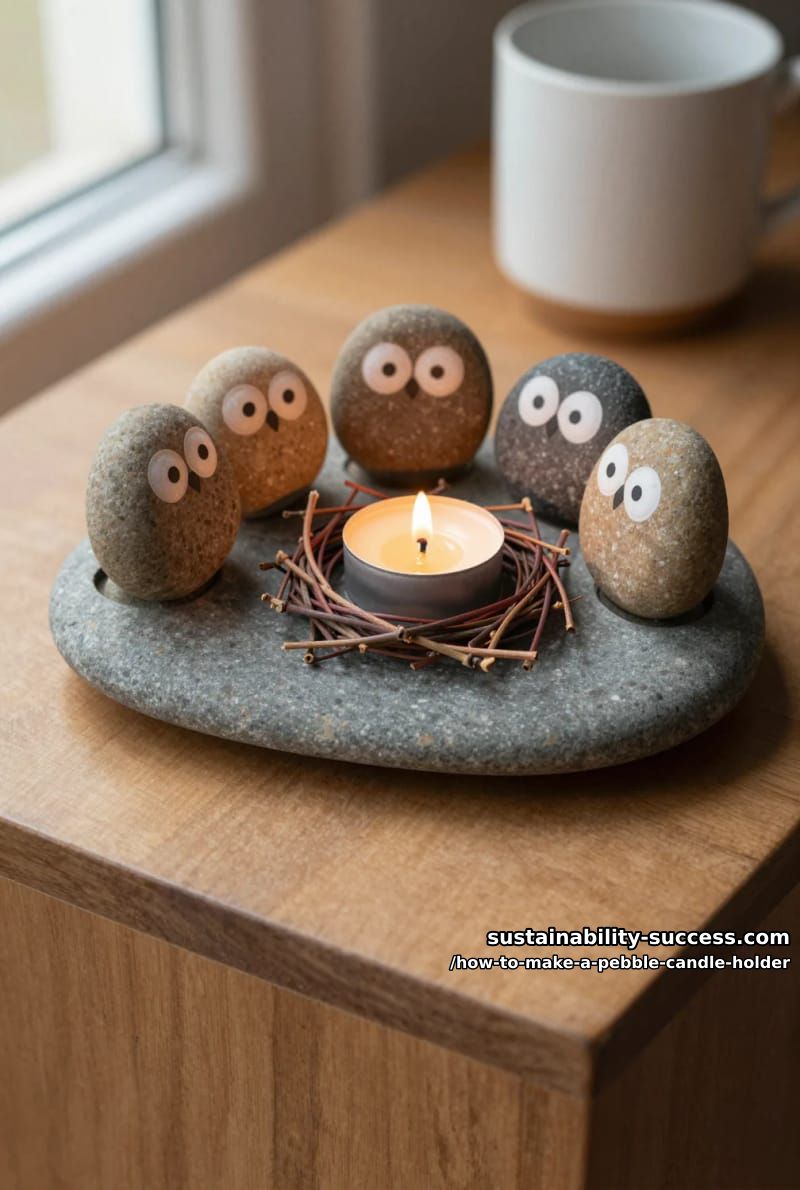
- Eyes too big. The pebble in the reference image has eyes about one-fifth the stone’s height. Bigger reads cartoon. Smaller reads as a face that knows something you don’t.
- Skipping the wash. Algae and clay film are invisible on dry stone, and they reject acrylic. Paint looks fine for a week. Then it peels off in sheets. Wash everything.
- Gloss sealer. On rough river stone, gloss reads as plastic toys. Use matte. Satin is a distant second.
- Twigs that touch the flame.
- Gluing the tea light cup to the twig ring. Don’t. You need to swap the cup every four hours of burn time. Glue twigs to twigs, nothing else.
- A wobbly base. A rocking base stone makes the whole thing look broken, no matter how good your owls are. Sand a slightly-wobbly base flat on a concrete patio , ten minutes of figure-eights , before you paint anything.
Build-day timing
Two days, with an optional evening of foraging up front. If you already collected stones on a previous walk, it collapses to a single day.
- Day 0 (optional, 1 to 2 hours): Forage from a creek or river bend. Twice as many as you think you need.
- Day 1, morning (45 minutes): Wash, scrub, air-dry on a towel.
- Day 1, afternoon (1 hour): Paint the eyes , whites, then pupils. Let dry overnight.
- Day 2, morning (30 minutes): Two coats of matte sealer, 20 minutes between. Cure outdoors for 2 hours.
- Day 2, late morning (45 minutes): Snap twigs, build the teepee with jute string and small amout of glue, let cool.
- Day 2, afternoon (20 minutes): Glue owls down, drop in a fresh beeswax tea light, light it, take the photo.
Conclusion
Don't stop at owls. The standing-pebble shape plus a painted face produces a kind of automatic charm that survives mediocre execution, which is most of the reason this works. The same logic carries other designs: pine tree silhouettes painted black against the stone's natural color, a single bold letter spelling out a short name, dot-and-line patterns lifted straight from the Caithness pebbles in any decent archaeology book. What doesn't work is a fully shaded portrait or a detailed landscape. The stone has texture. Fight it and you lose; use it and you win. One honest caveat: I said this takes thirty minutes of painting plus drying, and at $4 a unit once you own the tools, it lasts forever. The thirty minutes is real. The forever part is probably true. Nobody's tested it long enough yet.