
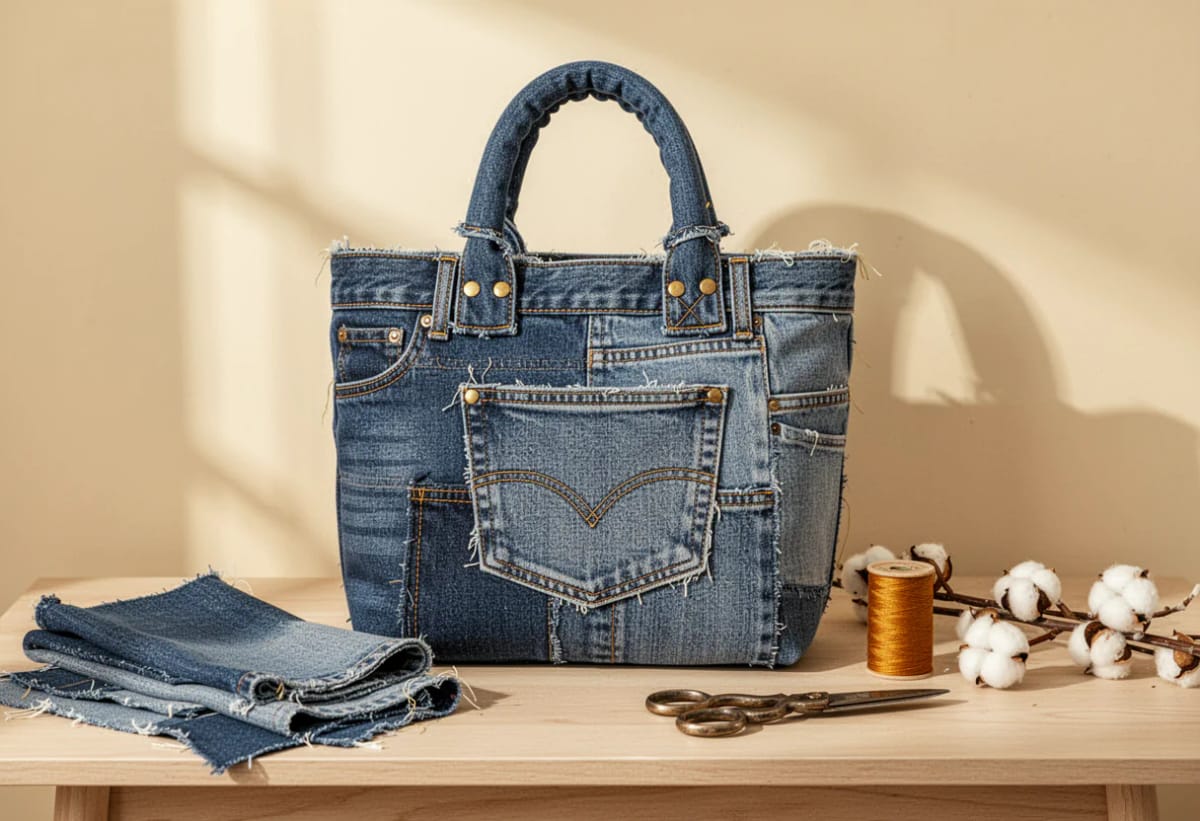
Nearly every denim tote tutorial opens the same way: cut the back pocket off the jeans, then sew it back down somewhere else as a patch. That trades one factory seam, bartacked and riveted and built to survive a decade of wallets, for a worse one you made on a domestic machine. The pocket does not need to move. Cut around it instead, keep the waistband as the rim, and most of the bag is already built before you thread the machine.

Granted, this is a sewing project and not a no-sew one. You need a machine that will take a size 100/16 needle and a straight stitch, and there is exactly one awkward inch in the whole build, where the crotch seam stacks up six or eight layers thick. Everything else is straight lines on flat twill.
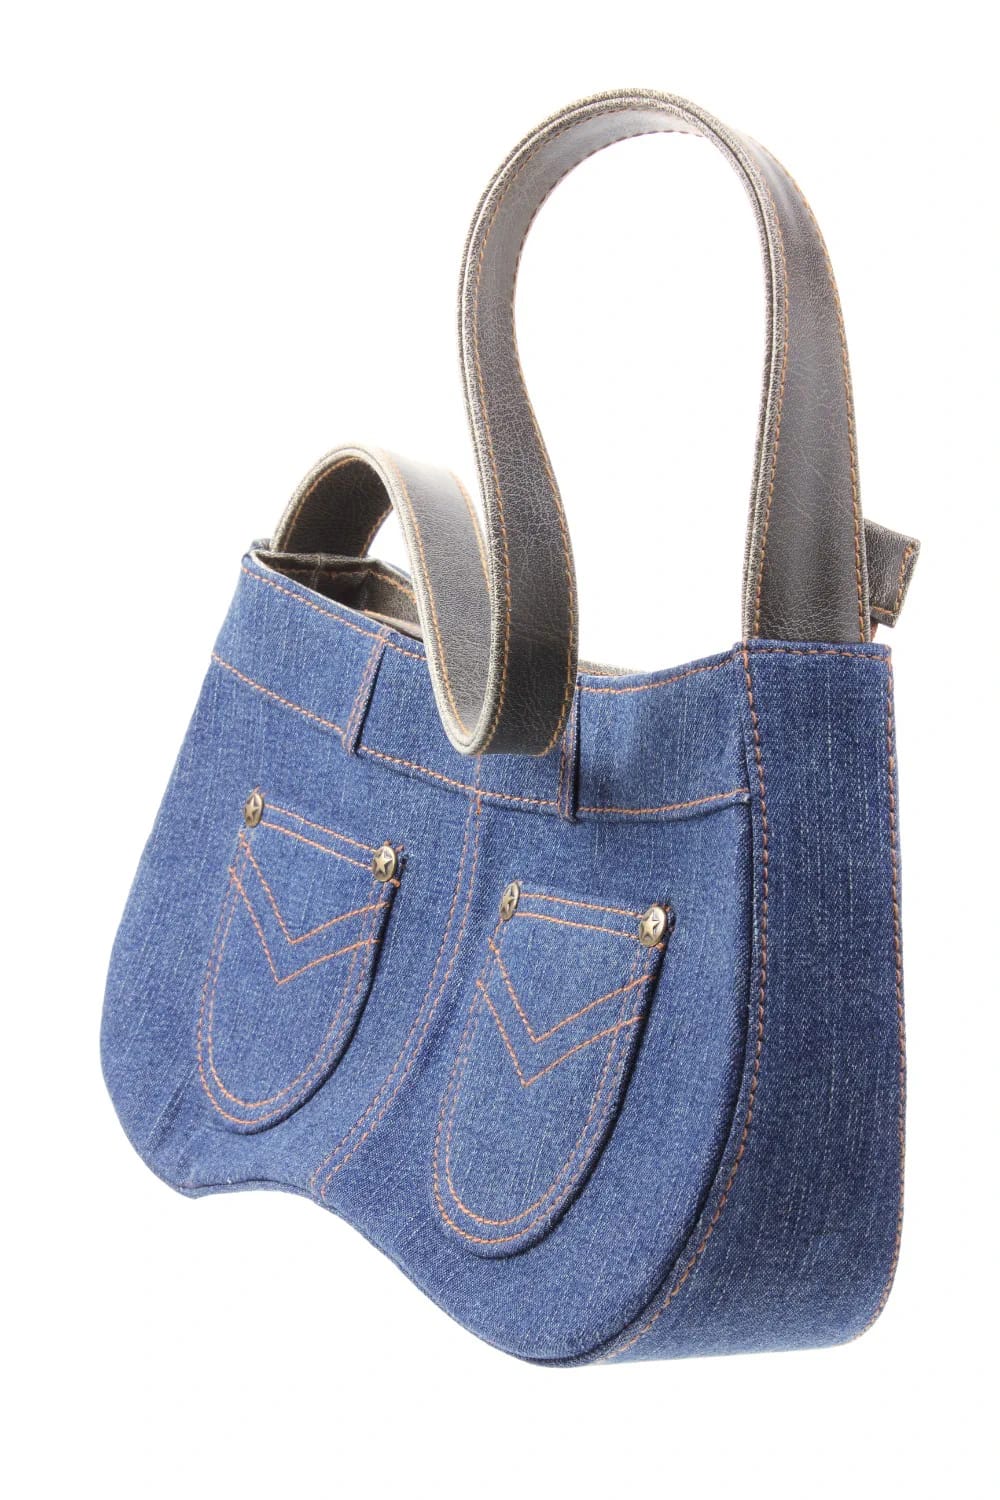
One adult pair yields a tote roughly 13 inches wide, 15 inches tall and 4 inches deep, with both back pockets facing forward and the jeans' own belt loops still running around the rim. The legs stay on the table, unused, which is the point at which most people realize they should have started with the ugliest pair in the pile rather than the nicest.
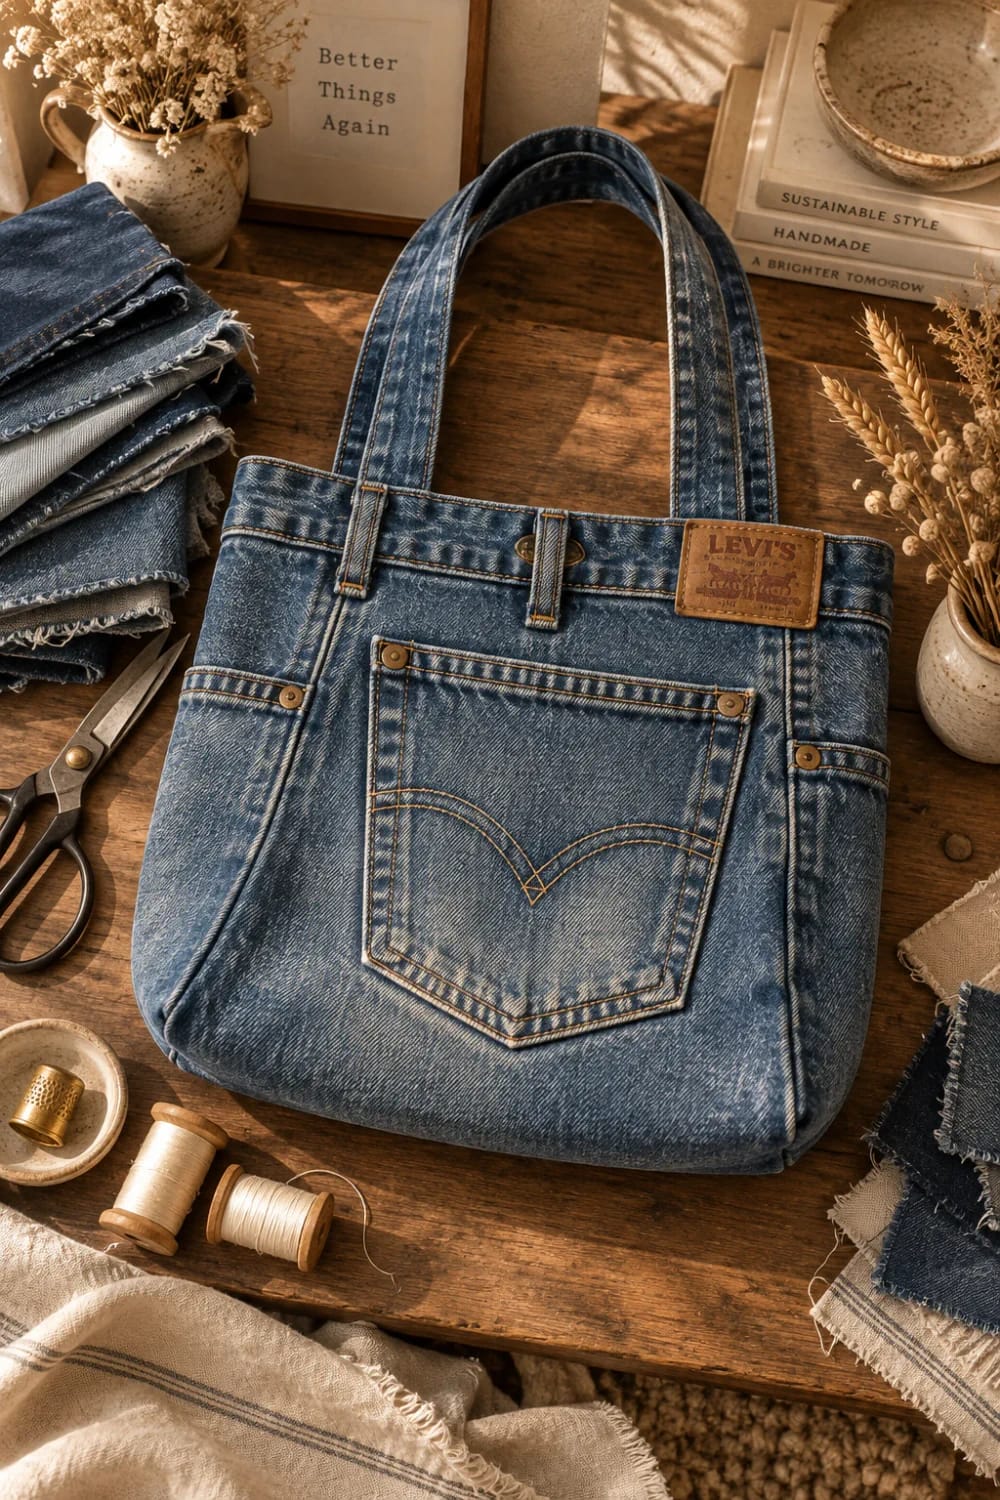
Start With the Pair Whose Back Pockets You Actually Like
Pick the jeans by their pockets, not by how much denim is left in the legs. The back pockets are going to sit at eye level on the front of a bag you carry in public, so the stitching pattern, the rivets and the wear shadow around them are the entire design. A pair with a plain pocket and no topstitching makes a plain bag, and no amount of construction fixes that later.
Wear is an asset here rather than a defect. The seat of a worn pair goes chalky and slightly ridged where the twill has lost its indigo, while the denim shielded under the pocket stays close to the shade it left the factory, so lifting a pocket’s edge reveals a hard rectangle of darker blue. That contrast is free and it is the reason these bags do not read as a fabric-store project. If you have several candidates and want to think harder about which faded panel goes where, the logic behind choosing between the washes in a single pile of dead jeans applies just as well to a bag as it does to a patchwork pair.
Do this
- Rigid 12 to 14 oz denim, the kind that creases instead of draping.
- A men’s 34 or larger. The hip measurement becomes the bag’s width, so smaller pairs give a narrower, deeper bag.
- Back pockets fully attached with their bartacks intact.
- A pale, worn seat. That is the face you want forward.
Avoid
- Anything with elastane in it. Even two percent sags into a shapeless sack after a few grocery runs, and no interfacing saves it.
- A pair that has blown out under one of the pockets. Patch it first or choose a different pair, because that hole lands dead center on the finished front.
- Pre-distressed jeans with sanded whiskers. The fading sits on the surface in fan shapes that make sense on a leg and look printed on a flat panel.
- Jeggings.
What It Costs If You Buy Everything
The jeans are free and the two things you genuinely cannot substitute are cheap: the right needle and a heavy thread. Everything else on this list is either optional or already in a drawer somewhere.
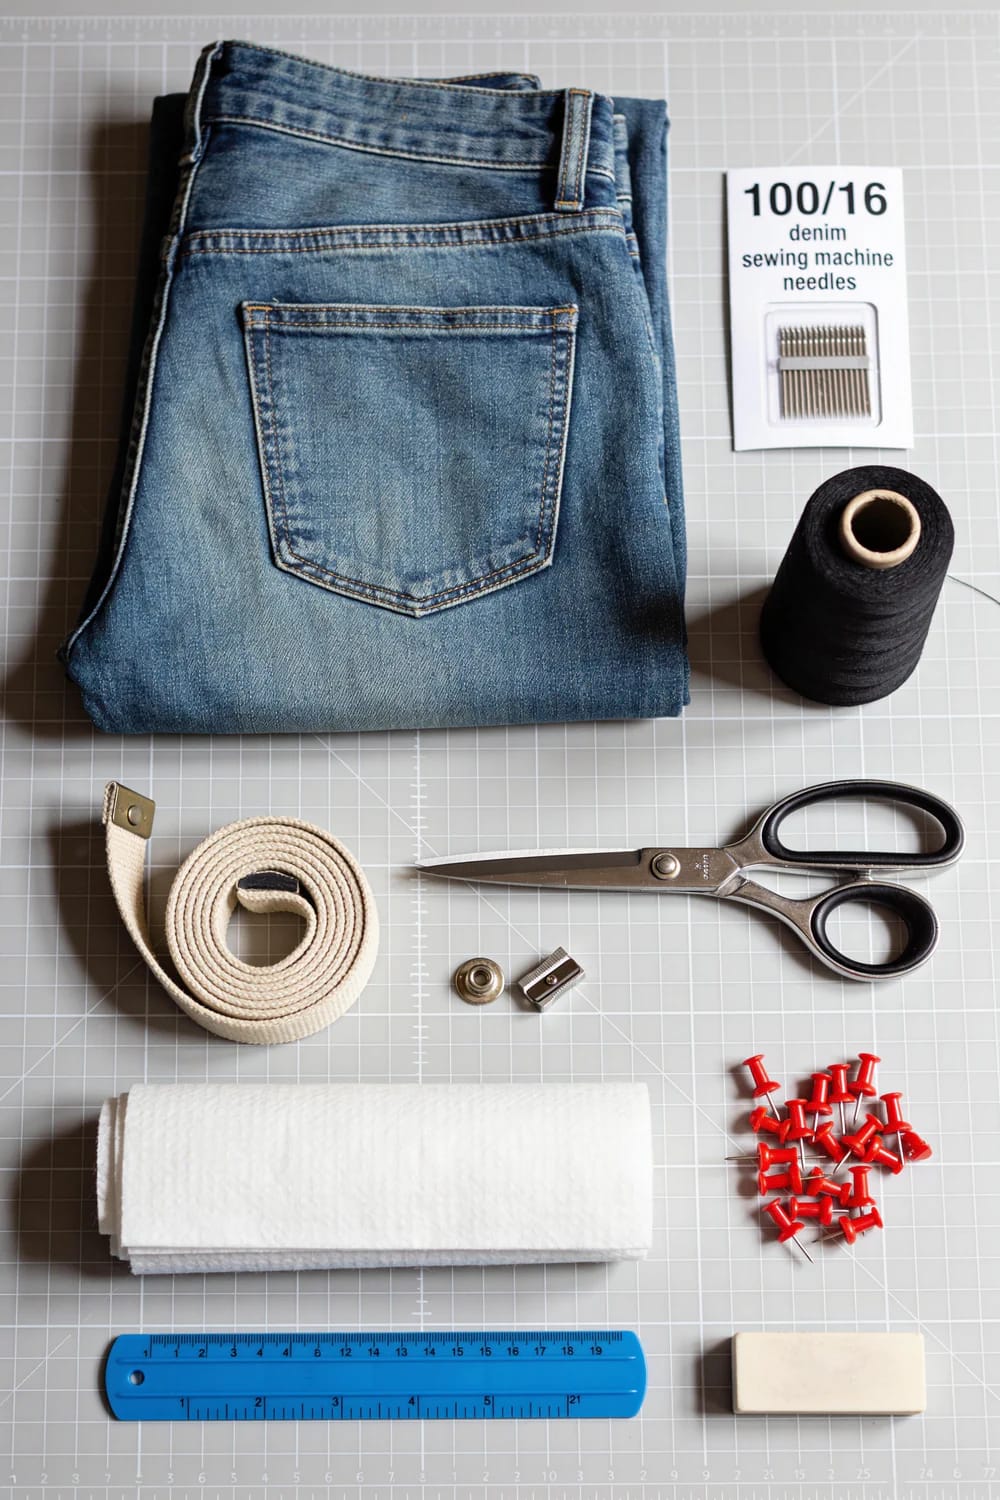
Materials
| Qty | Item | Spec | Price |
|---|---|---|---|
| 1 | Worn-out adult jeans | 12 to 14 oz rigid denim, back pockets intact | $0 |
| 1 pack | Schmetz Jean & Denim machine needles, size 100/16 | 5-needle card, 130/705 H-J system | $5 to $9 |
| 1 spool | Coats & Clark Dual Duty XP Heavy thread, 125 yd | Polyester core-spun, rated for denim and canvas | $4 to $7 |
| 1/2 yd | Pellon SF101 Shape-Flex fusible interfacing | 20 in wide, woven cotton, medium weight | $5 to $9 |
| 5 yd | QIANF natural heavy cotton webbing(optional) | 5 in wide, for straps if you skip denim ones | $12 to $18 |
| 1 set | Dritz 763-65 magnetic snap(optional) | 3/4 in, nickel, one set | $3 to $6 |
| 1/2 yd | Lining from an old pillowcase or sheet | Optional, see below | $0 |
| Materials subtotal | $29 to $49 | ||
Tools
| Qty | Item | Spec | Price |
|---|---|---|---|
| 1 | Sewing machine | Any straight stitch machine that accepts a 100/16 needle | $0, owned or borrowed |
| 1 | Gingher 8 in dressmaker’s shears | Forged steel, knife edge, cuts four layers cleanly | $28 to $40 |
| 1 pkg | Clover Wonder Clips, 50 count | Pins will not close over a felled seam | $10 to $16 |
| 1 | Dritz 915 Jean-A-Ma-Jig | Levels the presser foot over thick seam junctions | $4 to $8 |
| 1 | Tailor’s chalk, or a sliver of dry bar soap | Soap marks denim brightly and brushes off | $0 to $4 |
| 1 | Iron and a tape measure | Steam, cotton setting | $0, owned |
| Tools subtotal | $42 to $68 | ||
| Everything from scratch, both optional items included | $71 to $117 |
| If you own the tools and skip the webbing and snap | $14 to $25 |
Prices are approximate ranges as of September 2026; verify before purchase.
The Cut Map: One Straight Line Below the Crotch
Wash and dry the jeans hot before you touch them with chalk, even if they look clean. Denim shrinks along the weft on its first hot cycle and a bag whose base shrinks after assembly puckers permanently at the seam. Then press the pair flat, back side up, and smooth the seat with your hand so the pockets lie square.
Cut line: straight across both legs, half an inch below the lowest point of the crotch seam. On a men’s 34 that lands roughly 12 inches below the bottom edge of the waistband.
Band pieces: two rectangles 7 inches tall, cut from the thigh of each leg after you slit the leg open along its inseam. Take them as long as the panel allows, usually about 20 inches.
Seam allowance: half an inch throughout, stitch length 3.5 mm. Anything shorter perforates the twill and weakens it.
Corner boxes: 2 inch squares cut from each bottom corner, which gives a base 4 inches deep.
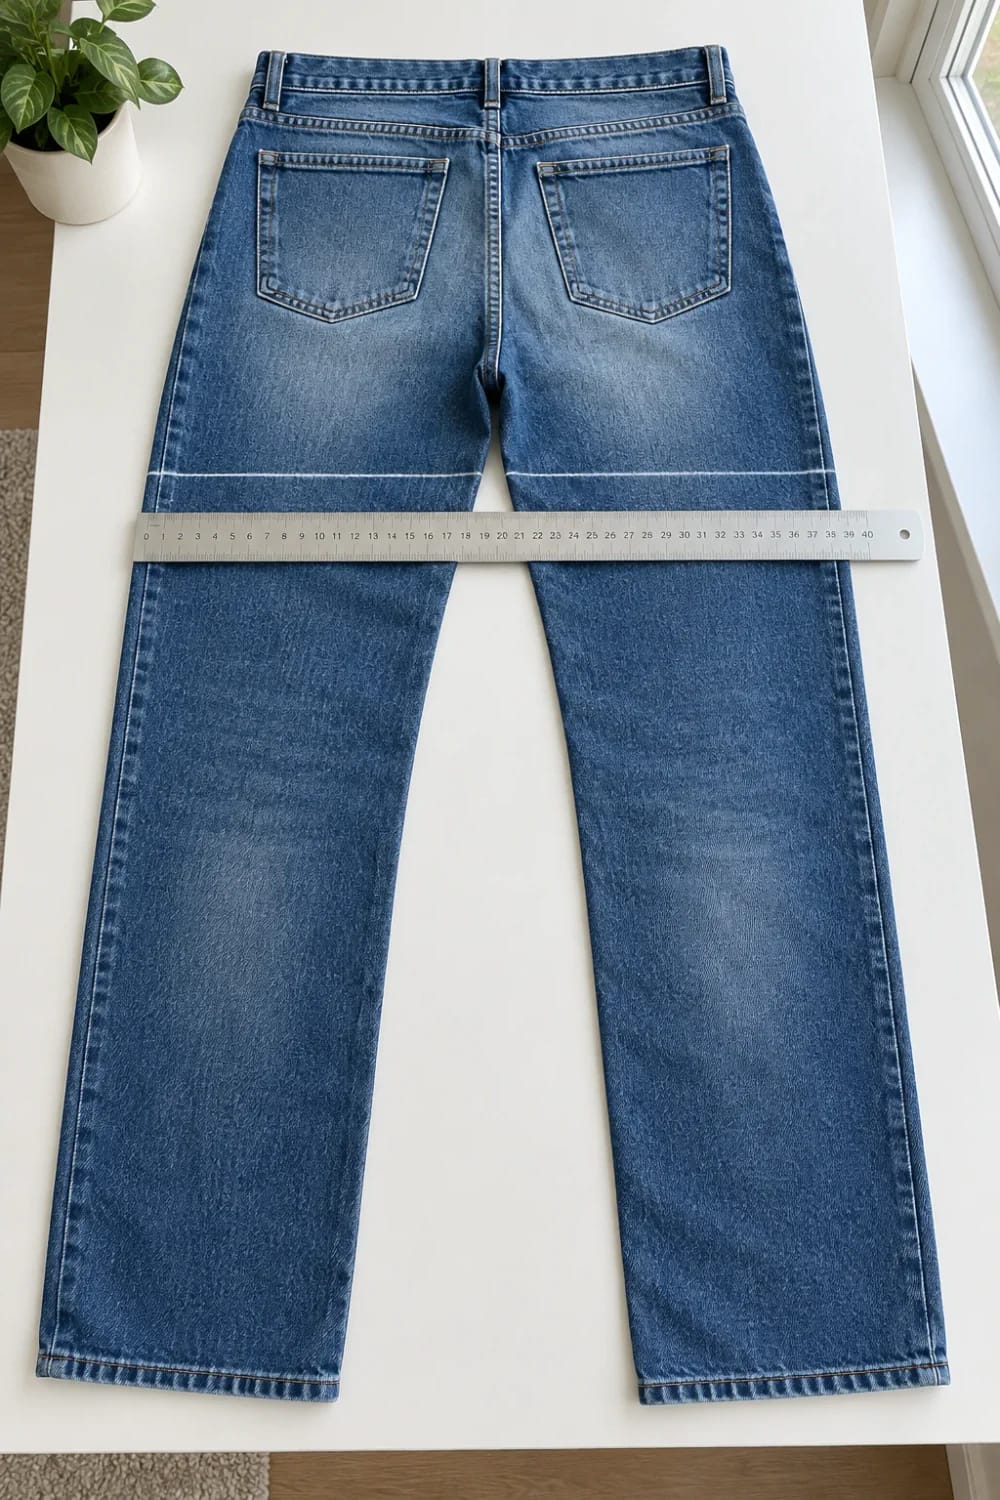
- Find the crotch point. Press a finger into the junction where the two inseams meet the crotch seam. That is your reference, not the waistband, because rises vary wildly between pairs.
- Chalk a straight line half an inch below it, running across both legs, using a ruler rather than your eye. A crooked cut line here becomes a bag that leans.
- Cut through both layers at once with shears, not a rotary cutter. Rigid denim rolls under a rotary blade and the bottom layer ends up short.
- Snip open the two inseam stubs left hanging below the crotch, about half an inch each, so the whole bottom edge lies flat as a single open tube.
- Slit each leg along its inseam and press the panels open. Cut your two 7-inch band pieces from the widest part of the thigh, keeping the felled outseam running vertically through each one if you want that line as a detail.
What remains is a pair of long tapered leg offcuts, plus whatever is left of the seat below your cut. Nobody needs that much scrap denim, and it accumulates fast if you make more than one bag.
 How to Make a Braided Denim Rag Rug From Old Jeans The one denim project that consumes a whole pile of legs rather than one good pair.
Build the Bottom Band From the Legs
Assuming your two band pieces came out around 20 inches each, joining them end to end gives a loop of about 40 inches, which is a little more than the circumference of the cut jeans body. Trim to fit rather than easing, and put the two band seams at the bag's side seams so they disappear into the outseams already there.
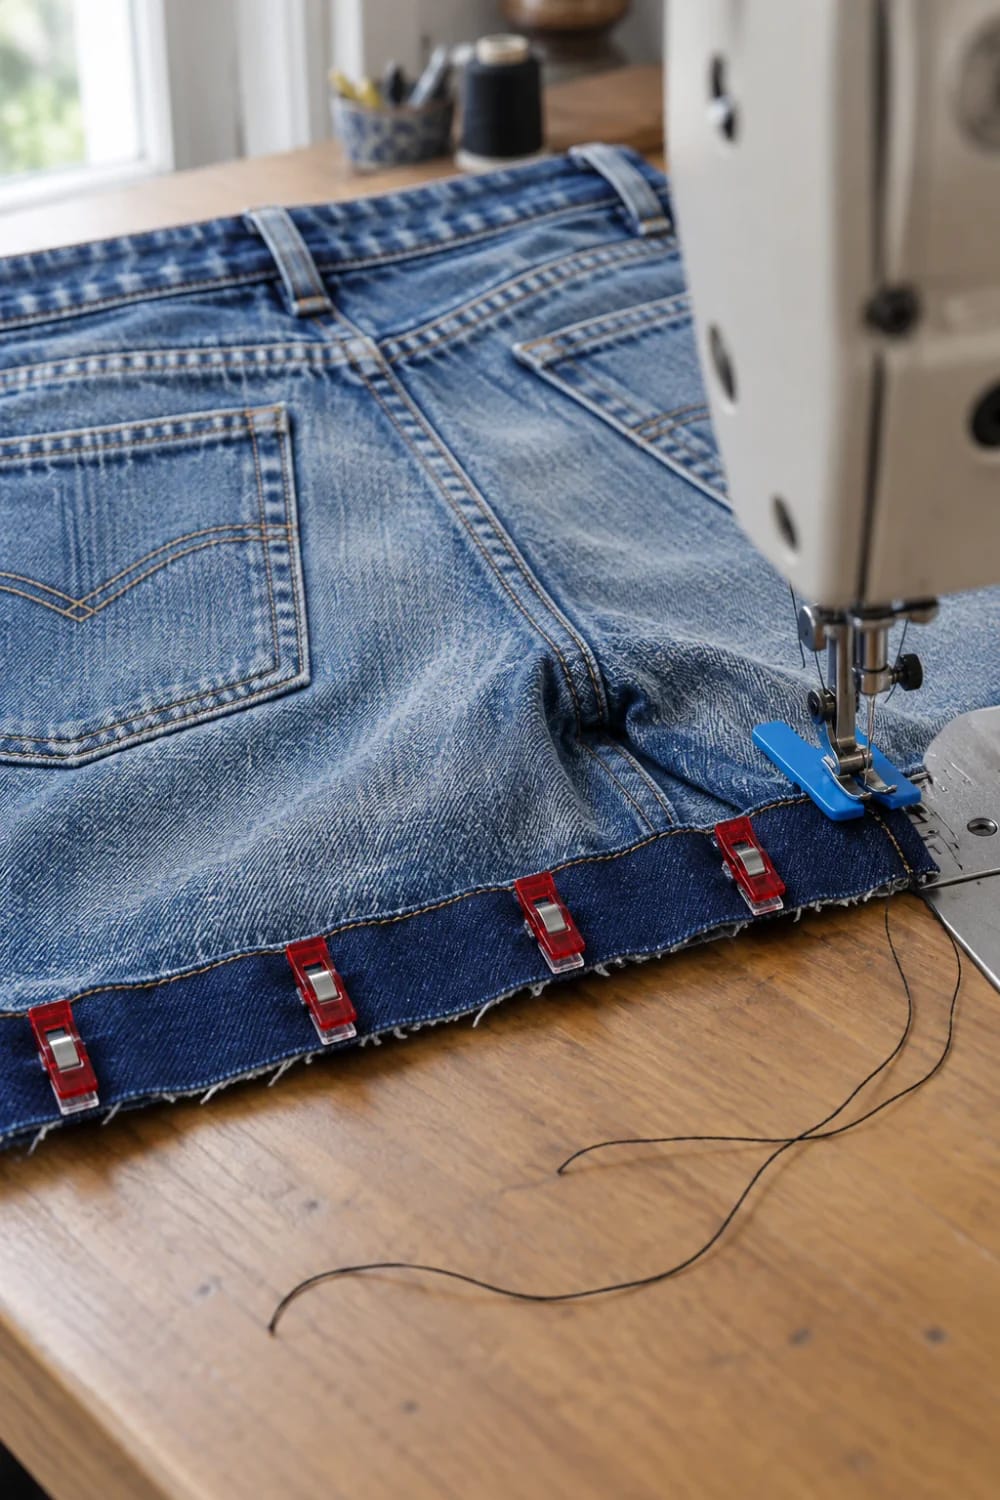
Fuse interfacing to the wrong side of both band pieces before you join them. The band is the part that takes the weight of a full bag and the part that scuffs against car doors and table legs, and a woven fusible adds stiffness without the cardboard feel a heavy nonwoven gives.
- Join the band into a loop with two half-inch seams, press them open, and check the loop against the jeans body before going further.
- Trim the crotch seam allowance down to a quarter inch where it will cross the new seam, then flatten it with a hammer through a scrap of cloth. This is the one spot where a needle breaks, and thirty seconds of hammering prevents it.
- Clip the band to the body right sides together, matching side seams. Clips, not pins: a pin will not close over a felled seam and it will spring out into your hand.
- Sew the seam slowly, and when the foot reaches the crotch lump, stop with the needle down, slip the seam jumper under the back of the foot to level it, and hand-walk the wheel for three or four stitches.
- Press the allowance upward and topstitch through the body a scant quarter inch above the seam. This is not decoration. Without it the allowance flops down inside the bag and the join creases into a permanent ridge.
Close the Base and Box the Corners
Turn the tube inside out and sew the bottom shut with a half-inch seam, then run a second line of stitching a quarter inch outside the first. Two rows here, because this seam holds everything you ever put in the bag.
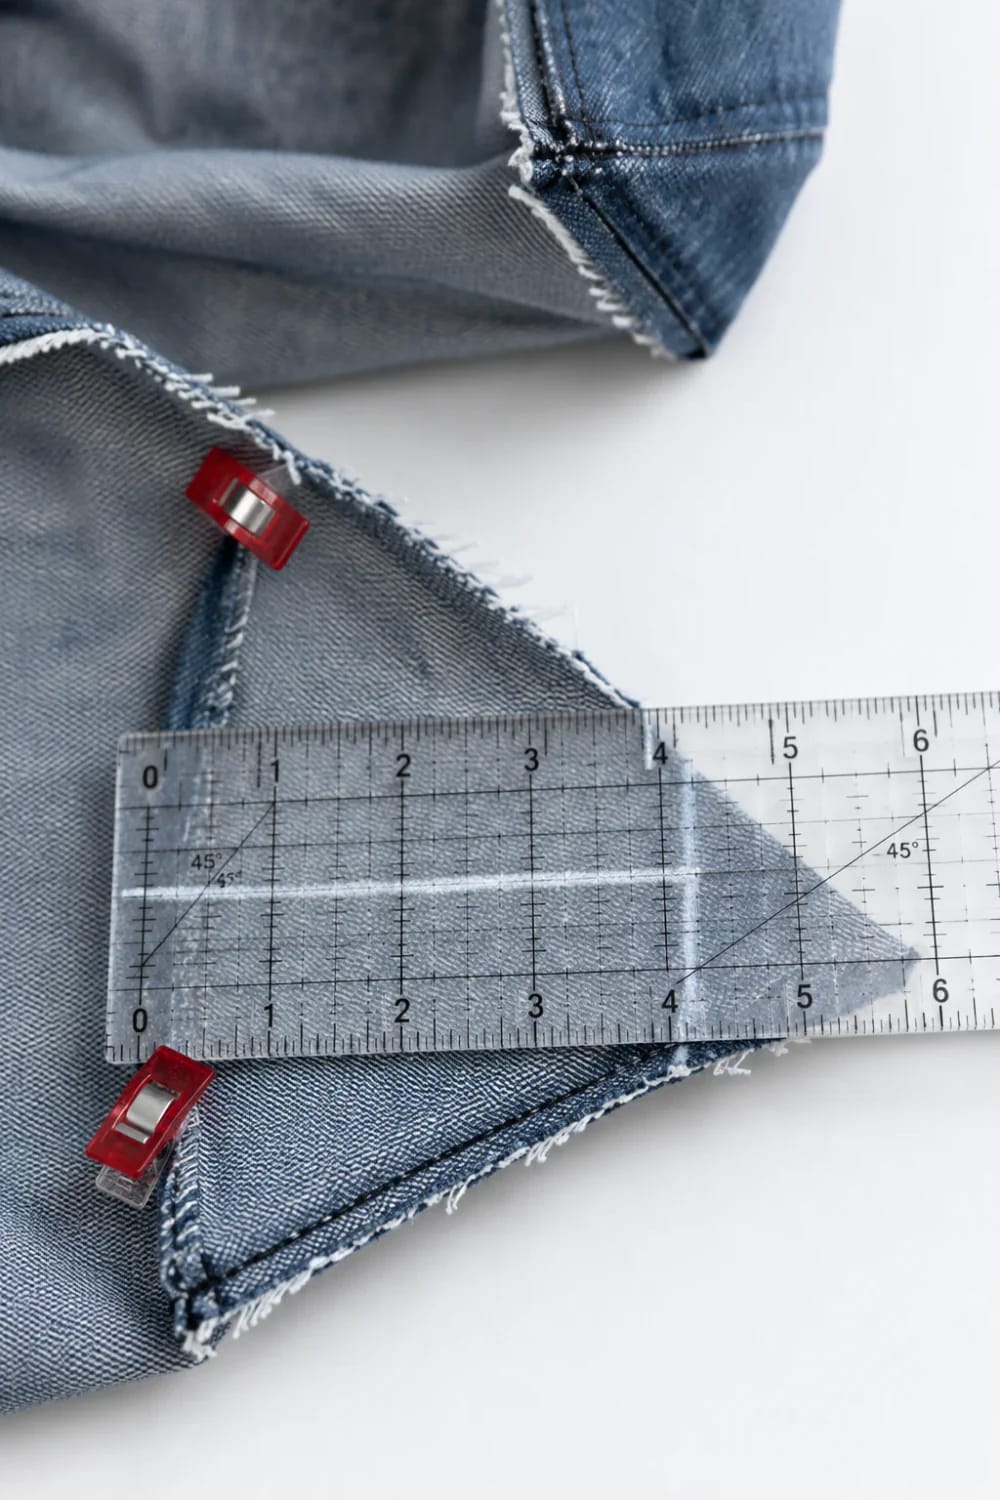
For the corners, flatten each one into a triangle so the side seam sits exactly on top of the bottom seam, then measure 2 inches out from the point along the seam and chalk a line square across. Sew on that line, cut the triangle off half an inch outside it, and repeat. Two-inch squares give a base 4 inches deep, so if you want a flatter bag for books rather than groceries, drop to 1.5 inches and accept the narrower footprint.
Straps: Webbing, Denim, or a Second Waistband
Cotton webbing is the choice I would make, and I say that as someone who would normally argue for using the jeans for everything. Denim straps cut from the legs need folding into four layers and topstitching twice down each edge to stop them twisting under load, which is twenty minutes of fiddly work that produces a strap slightly worse than a $2 length of 1.5-inch webbing. Cut two 26-inch lengths, attach them 5 inches apart, and you get about an 11-inch drop, which clears a winter coat shoulder.
The belt loops are tempting and they are a trap. On most jeans they sit at the hips rather than at the side seams, so straps threaded through them pull the rim into a lopsided oval every time you lift the bag. Anchor the straps to the inside of the waistband instead, an inch down, with a sewn square and an X through it, and let the loops stay as trim. The third option, a strap made from a second pair’s waistband, is genuinely good and we used it on the upcycled jeans messenger bag, where a single long shoulder strap suits the shape better than two short handles do here.
Zip and button the fly before you finish, then sew a short line of stitching across the base of the fly through all layers. A loaded bag puts steady outward pressure on that zip and it will eventually walk open.
Keep the Pocket Front Working, Not Decorative
Reinforce the pocket mouth before you call the bag done. The factory bartacked those upper corners for a garment carrying a wallet, not a bag whose front pocket gets grabbed at every time you park a phone in it while unlocking a door. Run a fresh line of stitching across each corner, ochre thread if you want it to read as original, and accept that the new stitches sit slightly proud of the faded old ones.
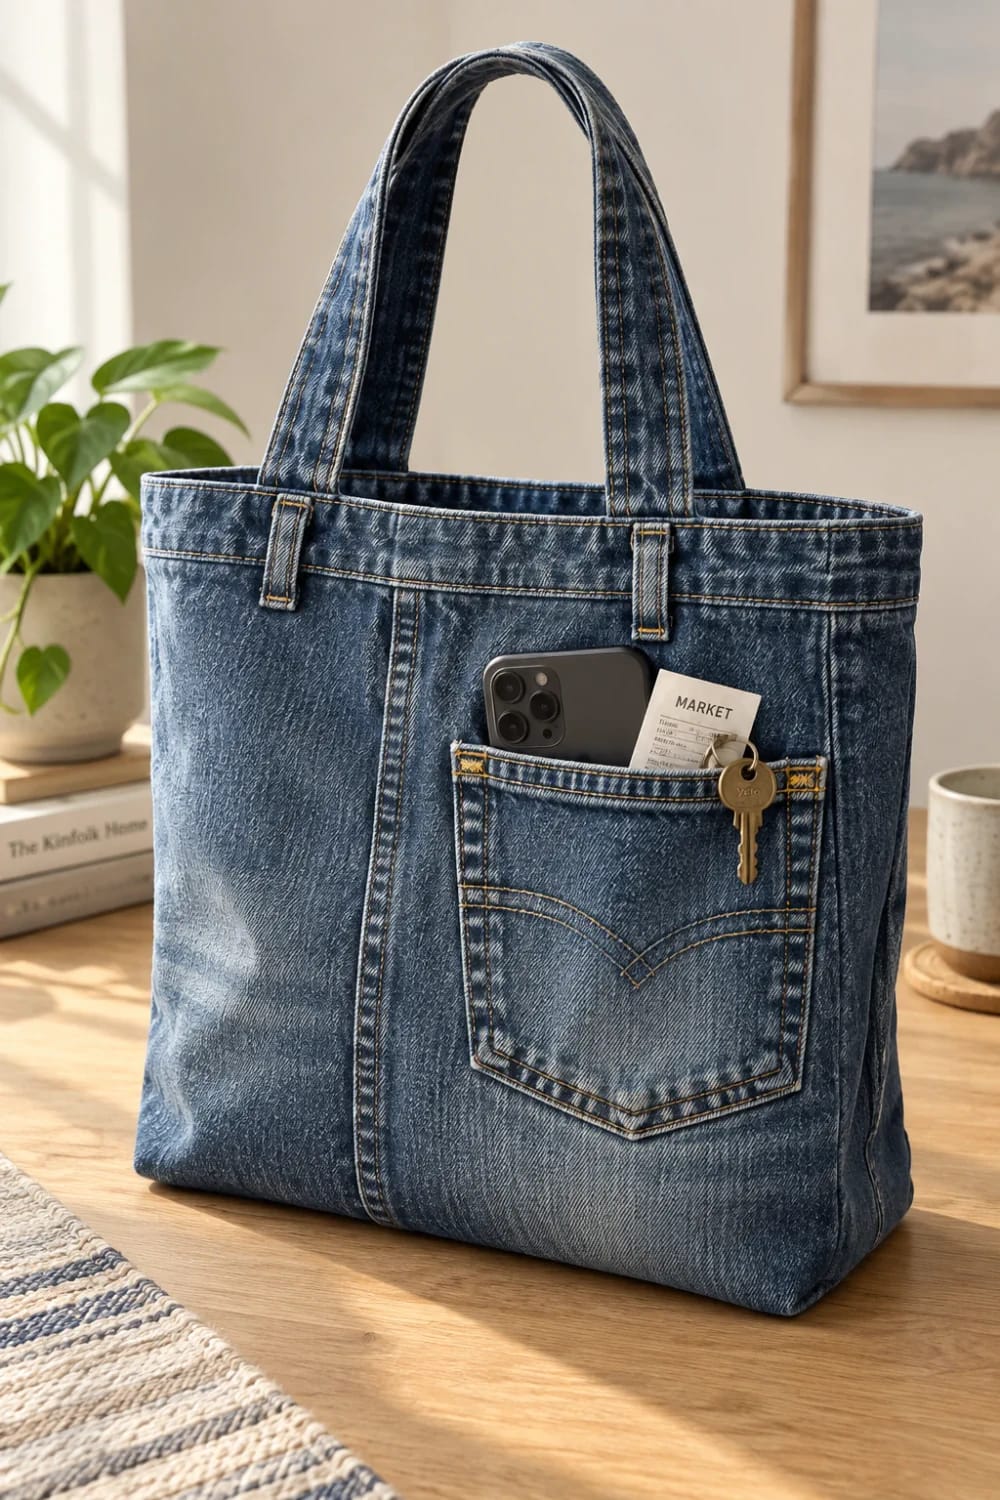
Measure the pocket before you plan your life around it. A men's back pocket runs roughly 6 inches square, which holds a hand, a set of keys, a folded list, or a phone that sticks out an inch at the top. It will not hold a water bottle, and there is no back pocket on earth that will. Remember too that a jeans back pocket is a patch sewn straight onto the seat with no separate pocket bag behind it, so a key dropped in there is resting against the single worn layer of denim that is now the outside of your bag. If your pair's seat has gone thin and chalky behind the pocket, fuse a rectangle of interfacing to the inside before assembly.
Whatever you do, resist adding a flap, a button or a snap to the front pocket. The arcuate stitching, the rivets and the wear shadow are already a finished design, and hardware bolted onto them is the single fastest way to make a denim bag look like a craft-fair table. The same restraint is what separates the denim stockings that use a back pocket as a working front pocket from the ones that pile trim on top of it.
One decision people make too late: the jeans' front slash pockets end up on the back face of the bag, and they are deeper and more useful than the back pockets, with their pocket bags fully intact. If you want the deep pockets facing forward and the flat riveted ones against your hip, simply build the bag the other way round. Most people choose the back pockets for looks, which is a reasonable choice as long as it was a choice.
Lining Is Optional and Usually Skippable
Skip it. A lining in a bag this stiff adds an hour, hides the felled seams that are half the appeal, and solves a problem denim does not have. Interface the band instead and finish the interior seam allowances with a zigzag if fraying bothers you.
If you do want one, an old pillowcase is the right weight, and you build it as a separate bag half an inch smaller in every direction, drop it in wrong sides together and topstitch it to the waistband. Readers who would rather not sew at all have other options with this pile entirely, including a set of scrap-fabric projects that need almost no stitching.
The Order to Work In
- The night before: wash the jeans hot and dry them hot. Shrinkage happens now or it happens later in the base of your finished bag.
- First 20 minutes: press flat, find the crotch point, chalk and cut the body and both band pieces.
- Next 15: fuse interfacing to the band pieces and join them into a loop.
- Next 30: trim and hammer the crotch seam, clip the band on, sew it, press and topstitch.
- Next 20: bottom seam twice over, box both corners, turn and press.
- Last 25: straps, the optional snap, the fly stitch, final press.
Roughly two hours at the machine plus the wash, and the wash is the part people skip.
Mistakes That Turn a Denim Tote Into a Sack
- Cutting before washing. The base puckers weeks later and there is no fixing it without unpicking the band.
- A universal needle instead of a 100/16 denim needle. You get skipped stitches across the flat areas and a snapped needle at the crotch junction. Coats rates its heavy thread for machine needles from 90 through 110, and the low end of that is optimistic for eight layers.
- Leaving the crotch seam untrimmed. The foot climbs the lump, the feed dogs lose grip, and you get a knot of bunched stitches exactly where the bag carries its load.
- Straps set too far apart. Anything wider than about 6 inches pulls the rim open and puts your groceries on display for the whole walk home.
- Skipping the topstitch above the band seam. The allowance flops inward, the join creases, and the bag develops a permanent horizontal dent within a month.
- Stretch denim. It goes soft, then baggy, then shapeless, in that order, and usually inside six weeks.
 11 Upcycled Jeans Decor Ideas for the Pile You Can’t Toss Eleven more ways to use the seams, rivets and faded knees rather than the blue fabric.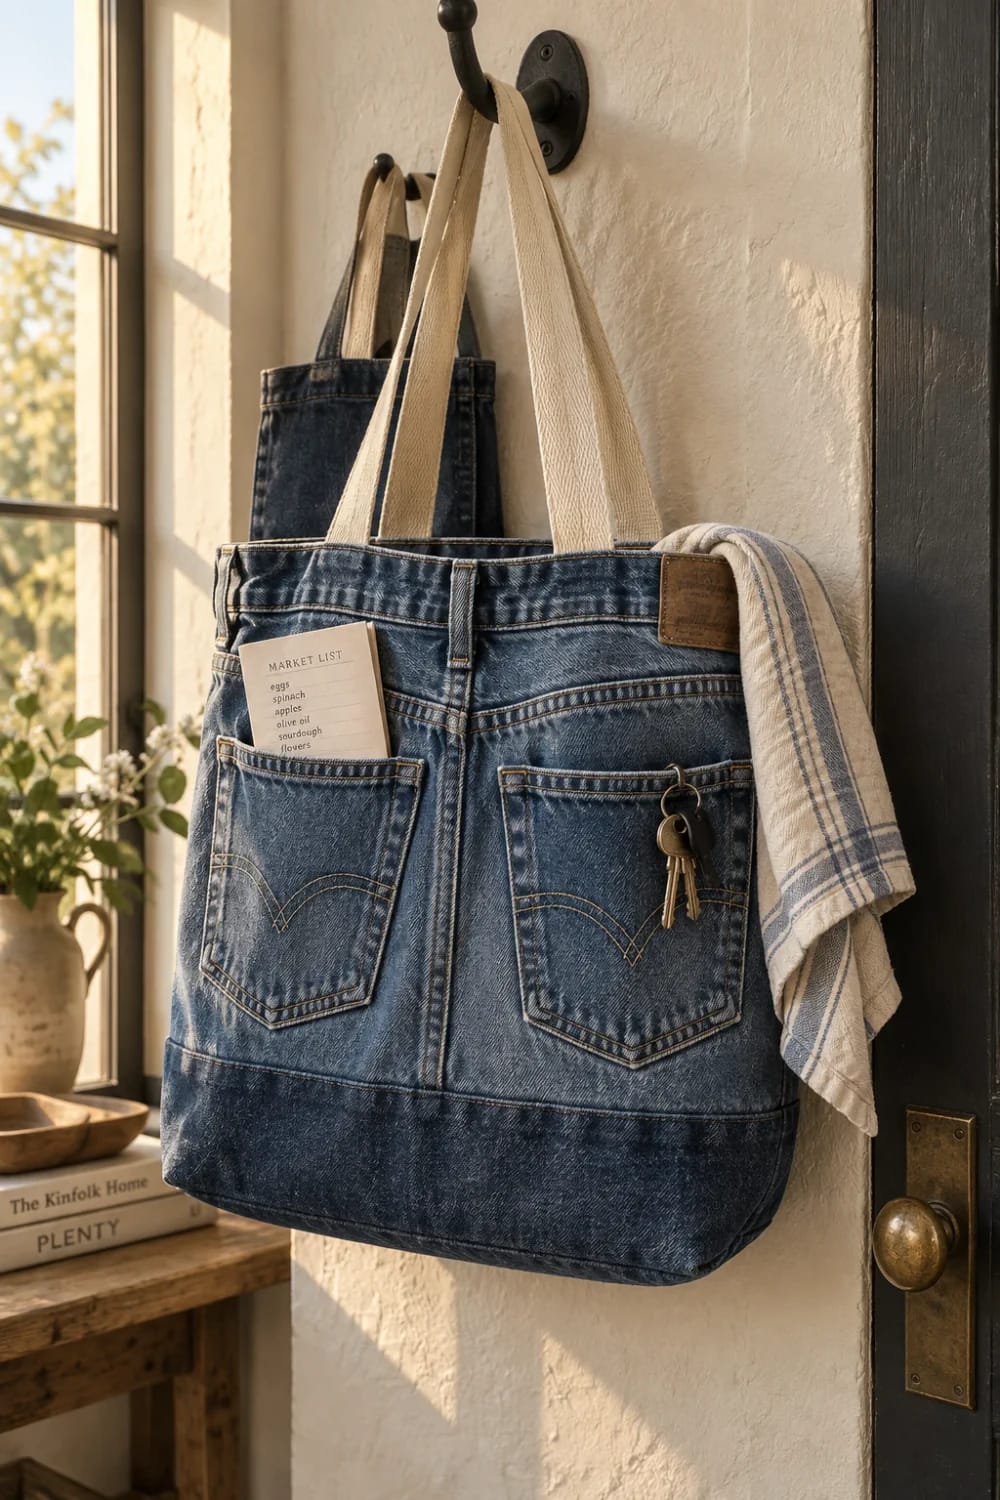
If Your Jeans Are Smaller Than a 34
Cut the band taller. A women's size 8 gives a body around 16 inches of circumference per face rather than 19, so the finished bag comes out narrow and slightly deep, which reads more like a bucket bag than a tote. Going from a 7-inch band to a 10-inch one restores the proportion, and the extra height comes free out of the legs you were not using anyway.
The part I would still change on my own version is the base. Four inches of boxing with a single layer of interfaced denim holds shape well enough empty and sags under a gallon of milk, and the honest fix is a piece of plastic canvas or a cut-down cutting mat dropped in as a removable base insert. I have not found a way to build that stiffness into the seam itself without the bag reading as stiff and lifeless everywhere else.
Worth keeping in perspective while you decide whether the pair is worth cutting up: the UN’s frequently quoted figure is about 7,500 litres of water for a single new pair of jeans, a high-end lifecycle estimate that other studies put closer to 3,800. Either number is enough that a pair which becomes a bag you actually carry has paid back more than one which becomes a shelf project.
Related Posts
- How to Make an Upcycled Jeans Messenger Bag From Old Denim
- How to Make a Braided Denim Rag Rug From Old Jeans
- 10 DIY Denim Christmas Garland Ideas to Make From Old Jeans
- Multi Wash Patchwork Jeans From Old Denim Scraps: The Decisions That Make the Pair
- Upcycled Denim Christmas Ornaments From Old Jeans
- 13 DIY Denim Christmas Stockings From Old Jeans