
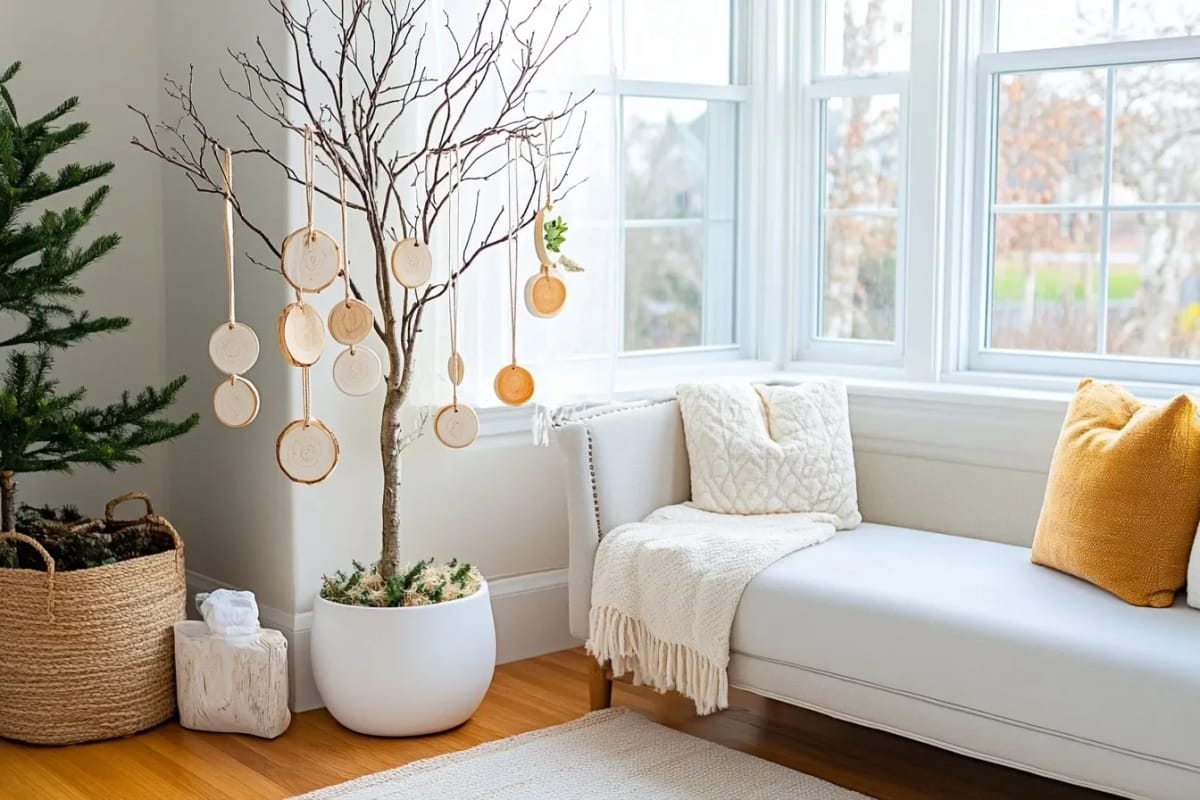
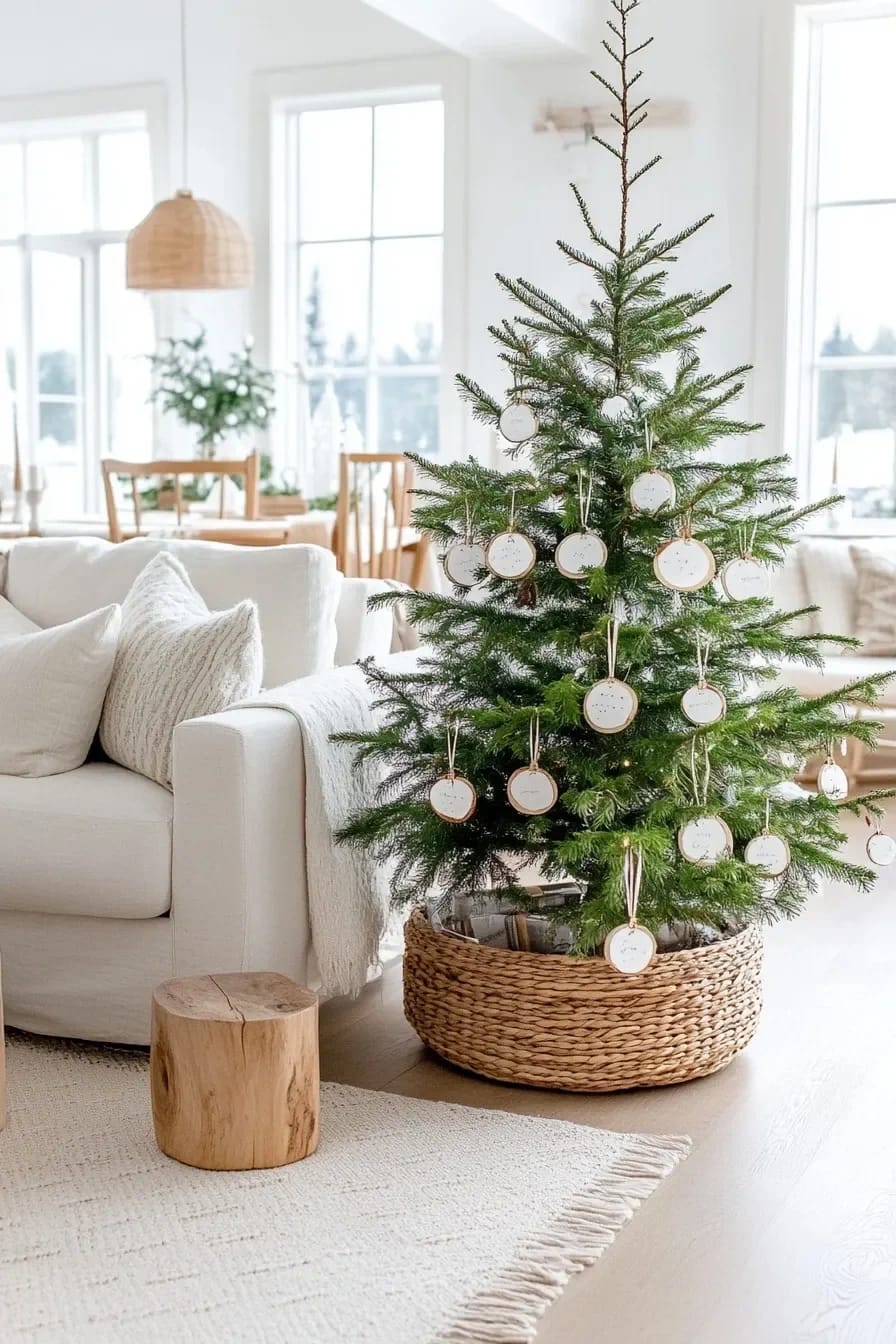
Most wood slice ornament designs are painted for a full tree, where forty pieces blur into texture and no single one gets looked at. A minimalist tree inverts that math: eight or ten ornaments on visibly spaced branches, each read on its own, at arm's length, against empty air. Detail that disappears into a crowded fir turns into noise on a bare one, which is why the snowflake-and-wobbly-script versions filling Pinterest look fussy the moment they hang on a sparse tree. The thirteen below are built for that condition, which mostly means one motif, one or two colors, and enough raw wood left showing that the slice still reads as a piece of a tree.

1. Half-dipped slices in one flat color

Start here if you make nothing else on this list. Tape a straight line across the slice about a third of the way up, paint everything below it in one flat color, pull the tape while the second coat is still tacky so the edge stays crisp. The line placement is the whole design decision: halfway up reads as an accident, a third up reads as a choice, and two thirds up starts to look like the wood is the accent rather than the material.

Color matters more than technique here because there is nothing else on the slice to look at. Black clay, muddy sage, or a grey blue with real pigment in it hold up against raw birch; anything in the red-and-green family fights the wood instead of sitting on it, and I'd skip that pairing entirely on a natural tree. Two thin coats of craft acrylic, roughly a dollar or two for a 2 oz bottle, will cover a dozen slices with paint left over.
| Paint | Behavior on raw wood | Finish | Where it earns its place |
|---|---|---|---|
| Craft acrylic (Apple Barrel, FolkArt) | Soaks into open end grain, so coat one looks blotchy | Flat to low satin after two coats | Dipped blocks and any wide field of color |
| Water-based paint marker (Posca PC-1M, PC-3M) | Sits on the surface; no feathering if the face is sanded to 220 | Opaque matte, slightly raised line | Numerals, initials, single-line drawings |
| Milk paint (casein powder, mixed fresh) | Absorbs fast and dries uneven, which is the point | Chalky, chips along the bark rim | Muted earth colors on thicker slices |
| Matte spray enamel | Buries the grain completely in one pass | Uniform, faintly plastic up close | Blackout slices where grain must disappear |
2. A layered mountain range on a single slice
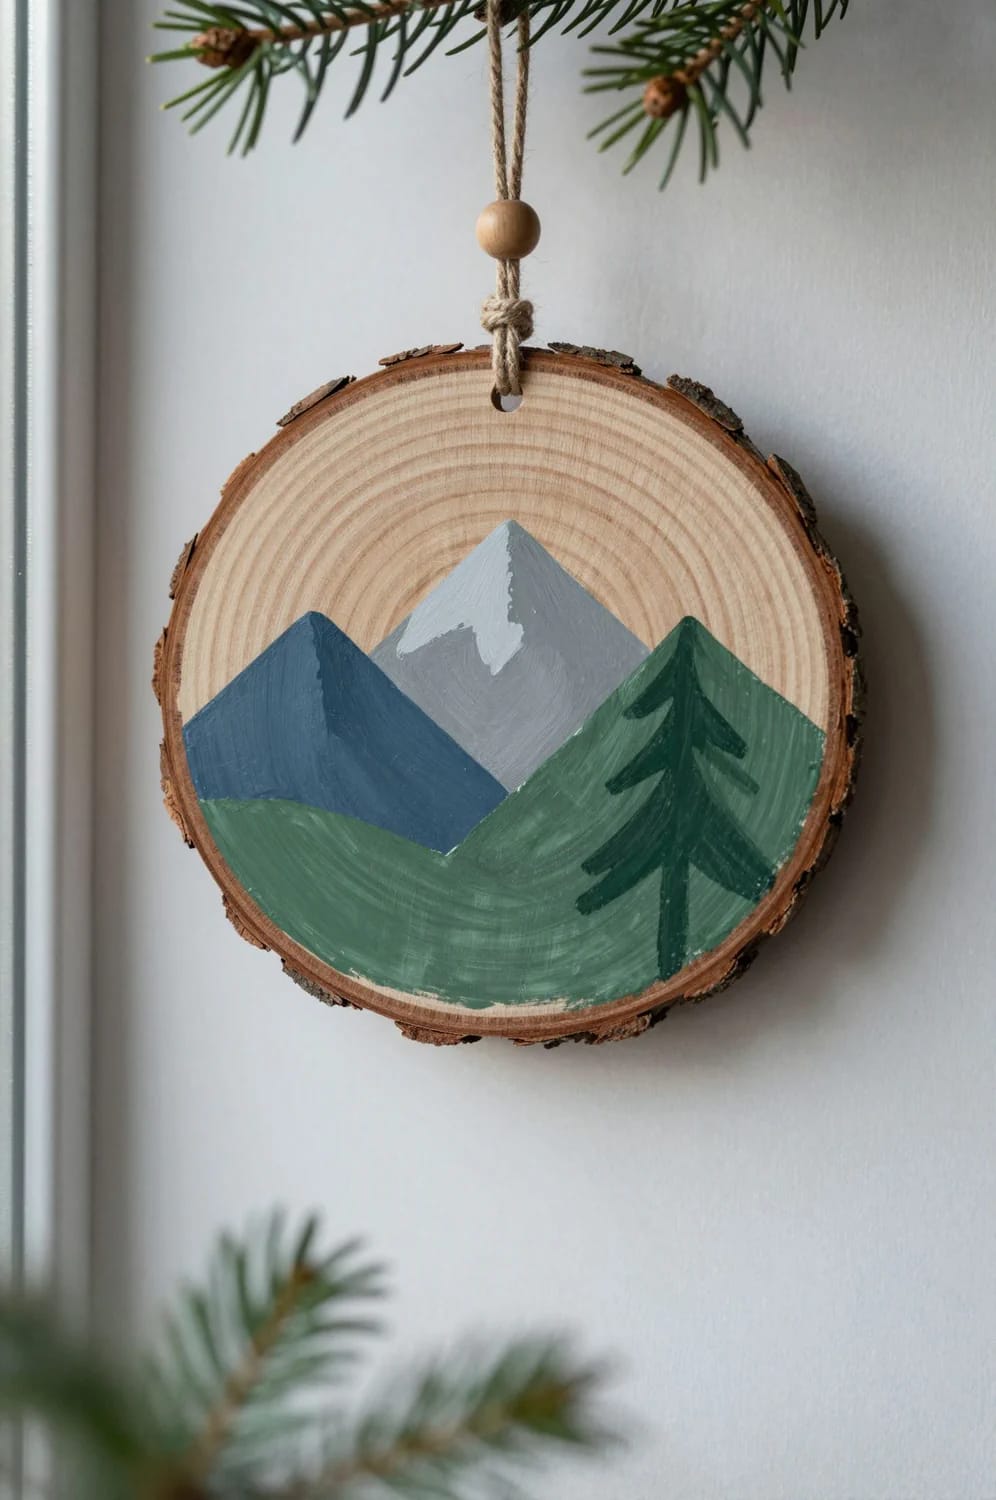
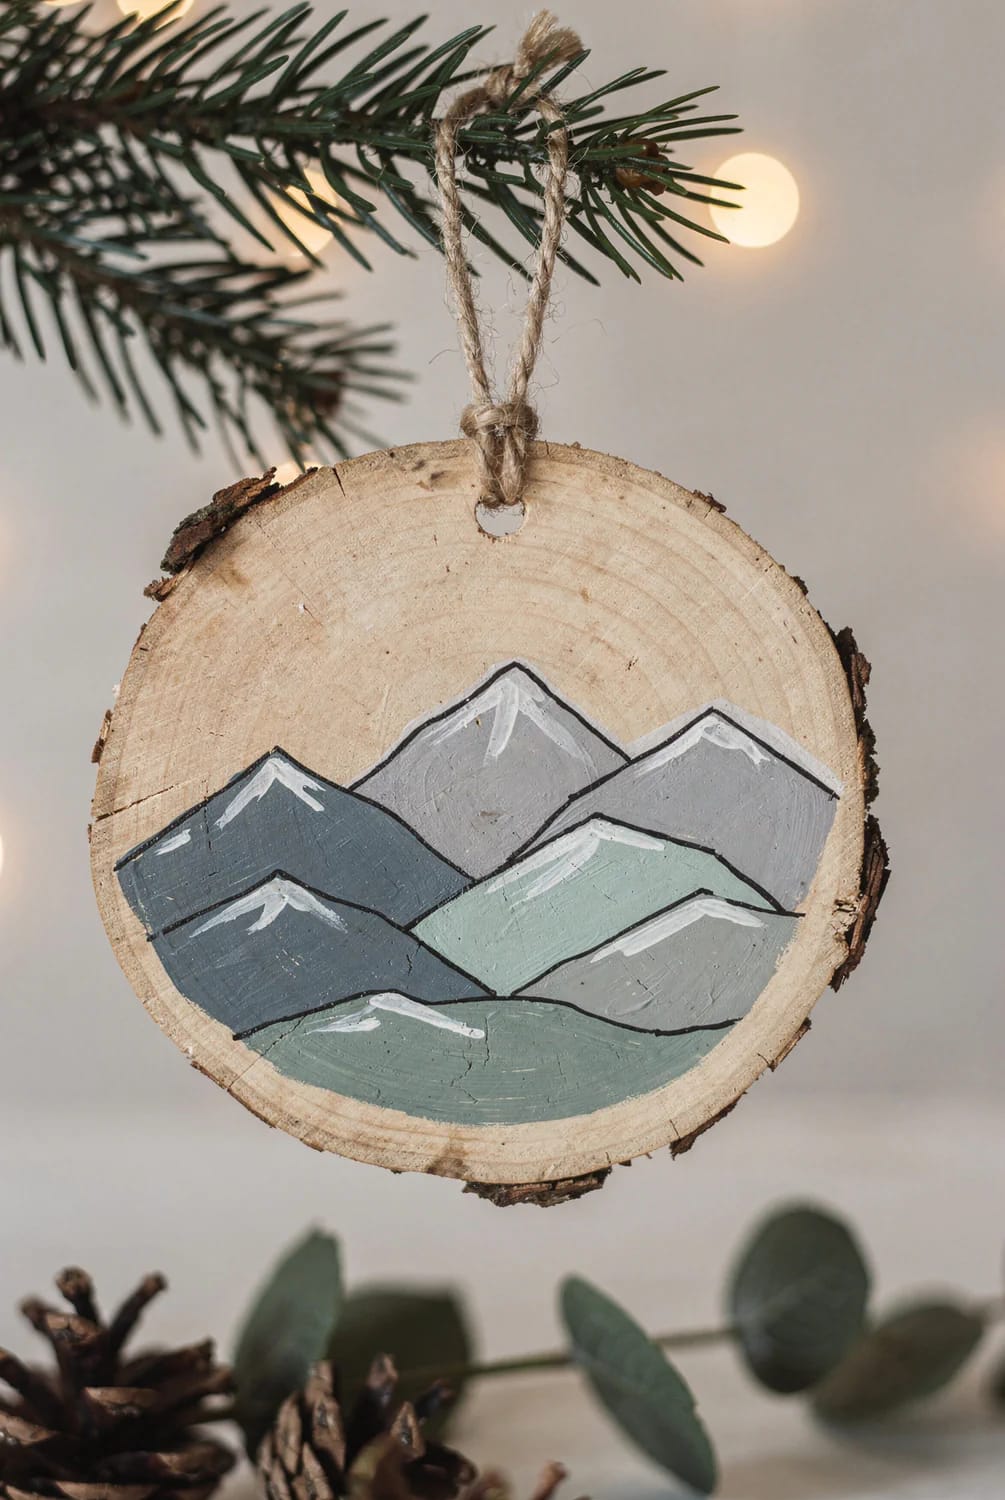
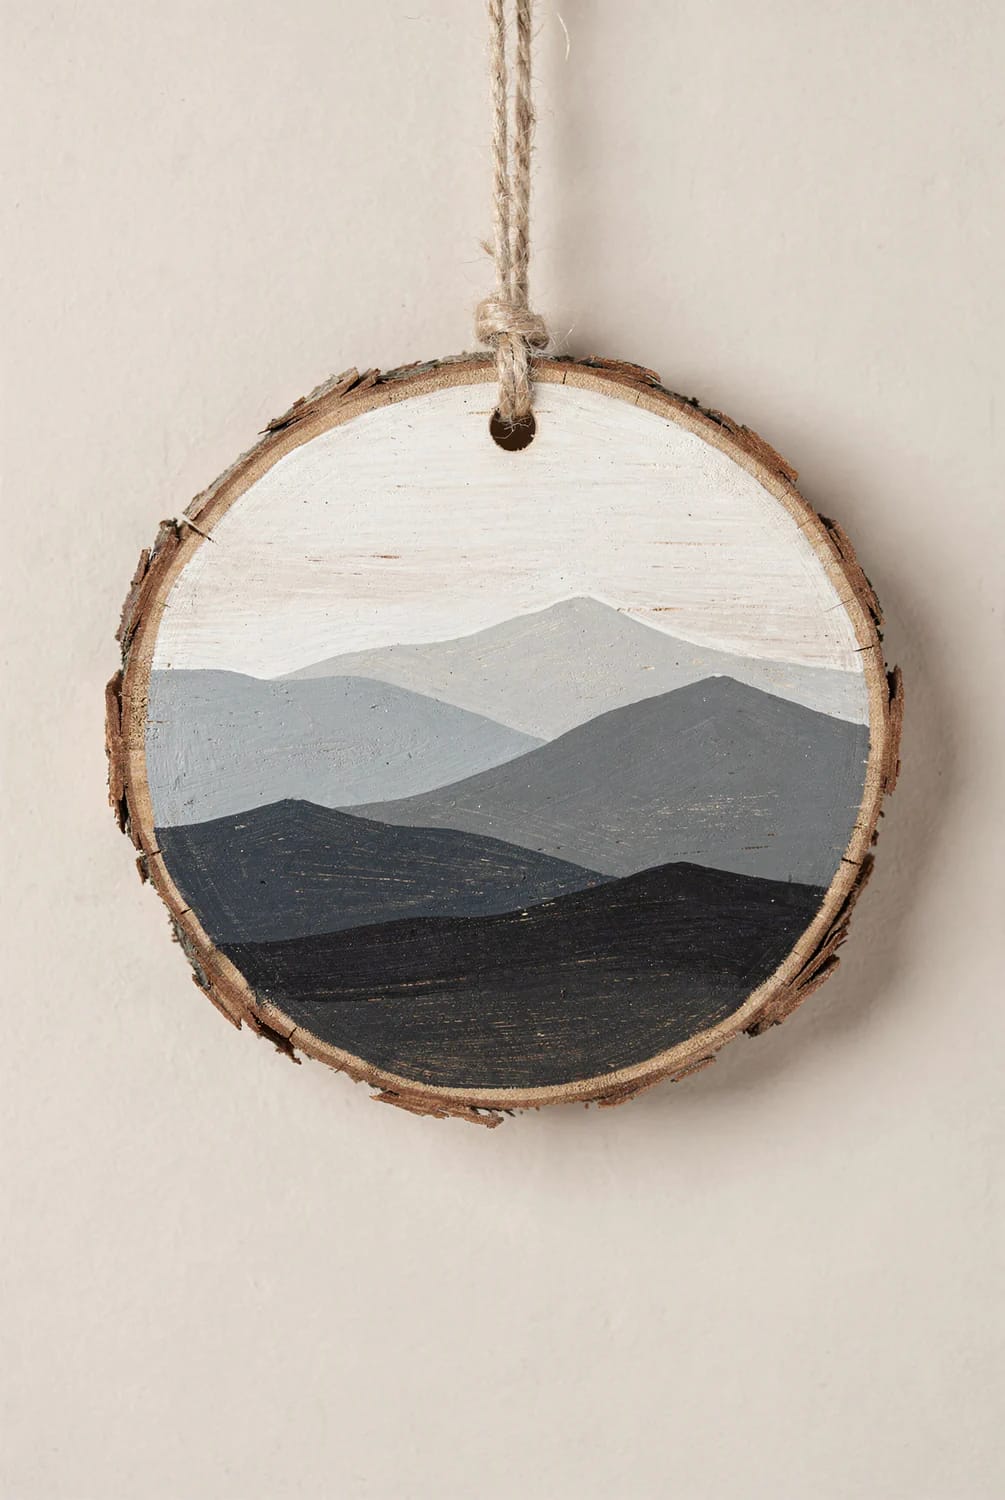
Three overlapping triangles in three values of one hue will outperform any detailed winter scene, and the reason is scale: at three inches, a painted cabin and a flock of birds turn to mush from four feet away, while a hard-edged silhouette stays legible across the room. Keep the horizon low, around 40 percent of the face, and leave the sky as raw wood rather than painting it pale blue.
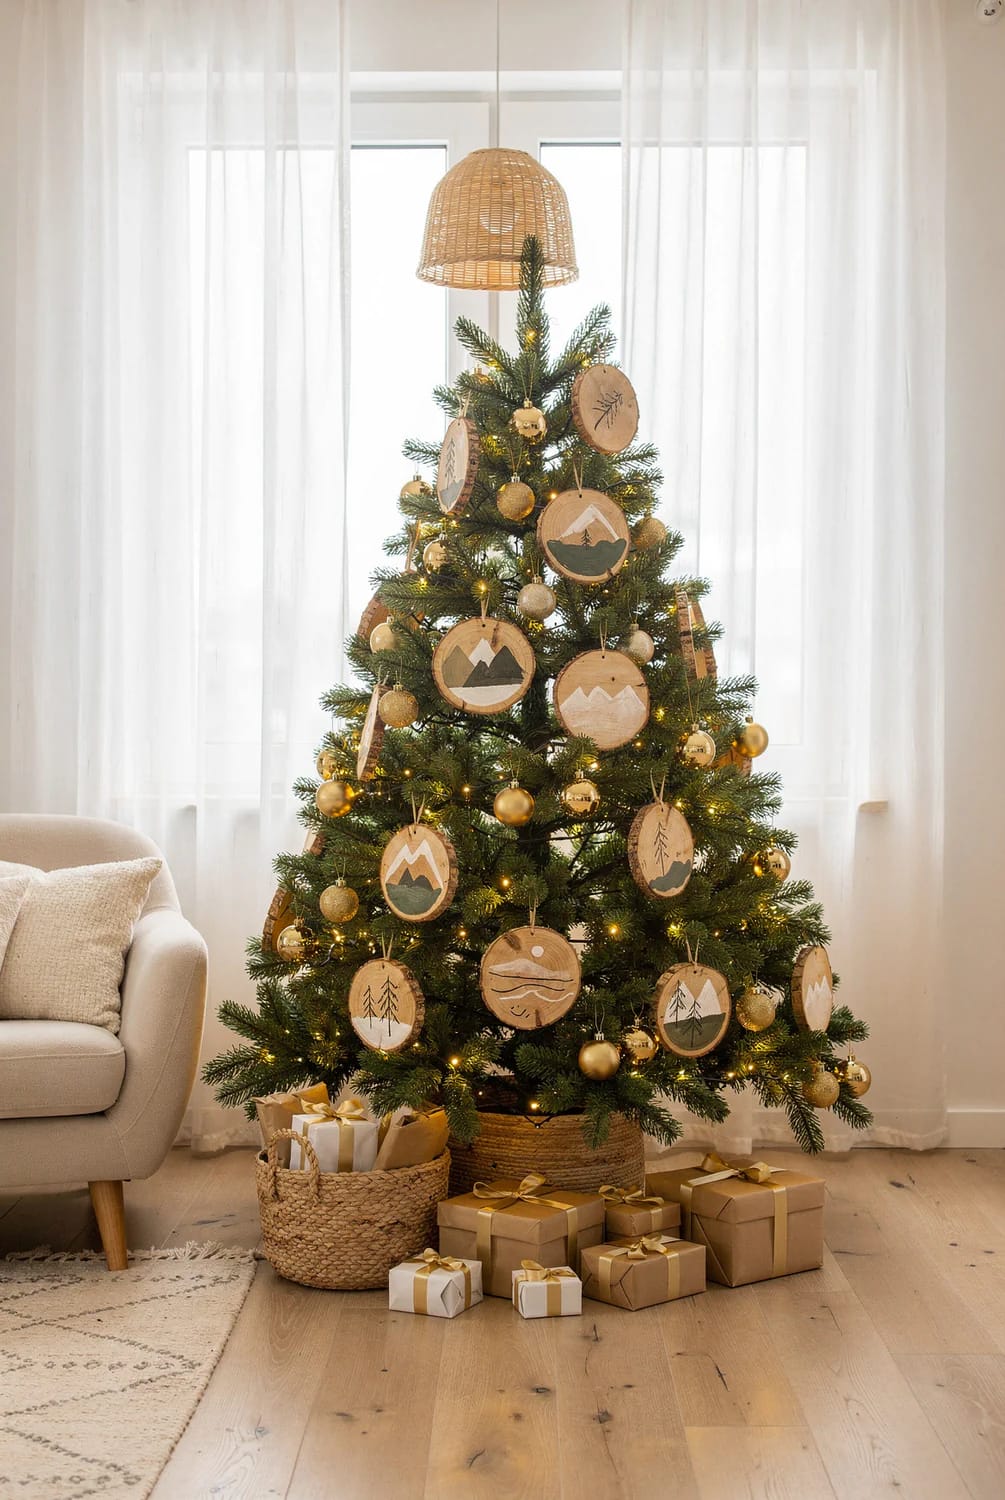
The mountain slice is also the design most likely to look bought, in a good way, and the fastest to batch: cut the three shapes freehand with a half-inch flat brush, don't sketch them first, and let the widths differ slice to slice so the set doesn't read as a stencil run.
Fresh pine and fir slices bleed resin straight through acrylic, sometimes weeks after they look dry, leaving amber halos in the middle of a painted field. They also check: as the outer rings shrink faster than the center, a radial crack opens from the bark toward the middle. Kiln-dried basswood or poplar rounds avoid most of it, and one coat of dewaxed shellac (Zinsser SealCoat is the common one) blocks the resin on slices you cut yourself. If a slice already has a hairline crack when you buy it, that crack will be wider by next Christmas.
3. Negative-space pine: paint the sky, leave the tree bare
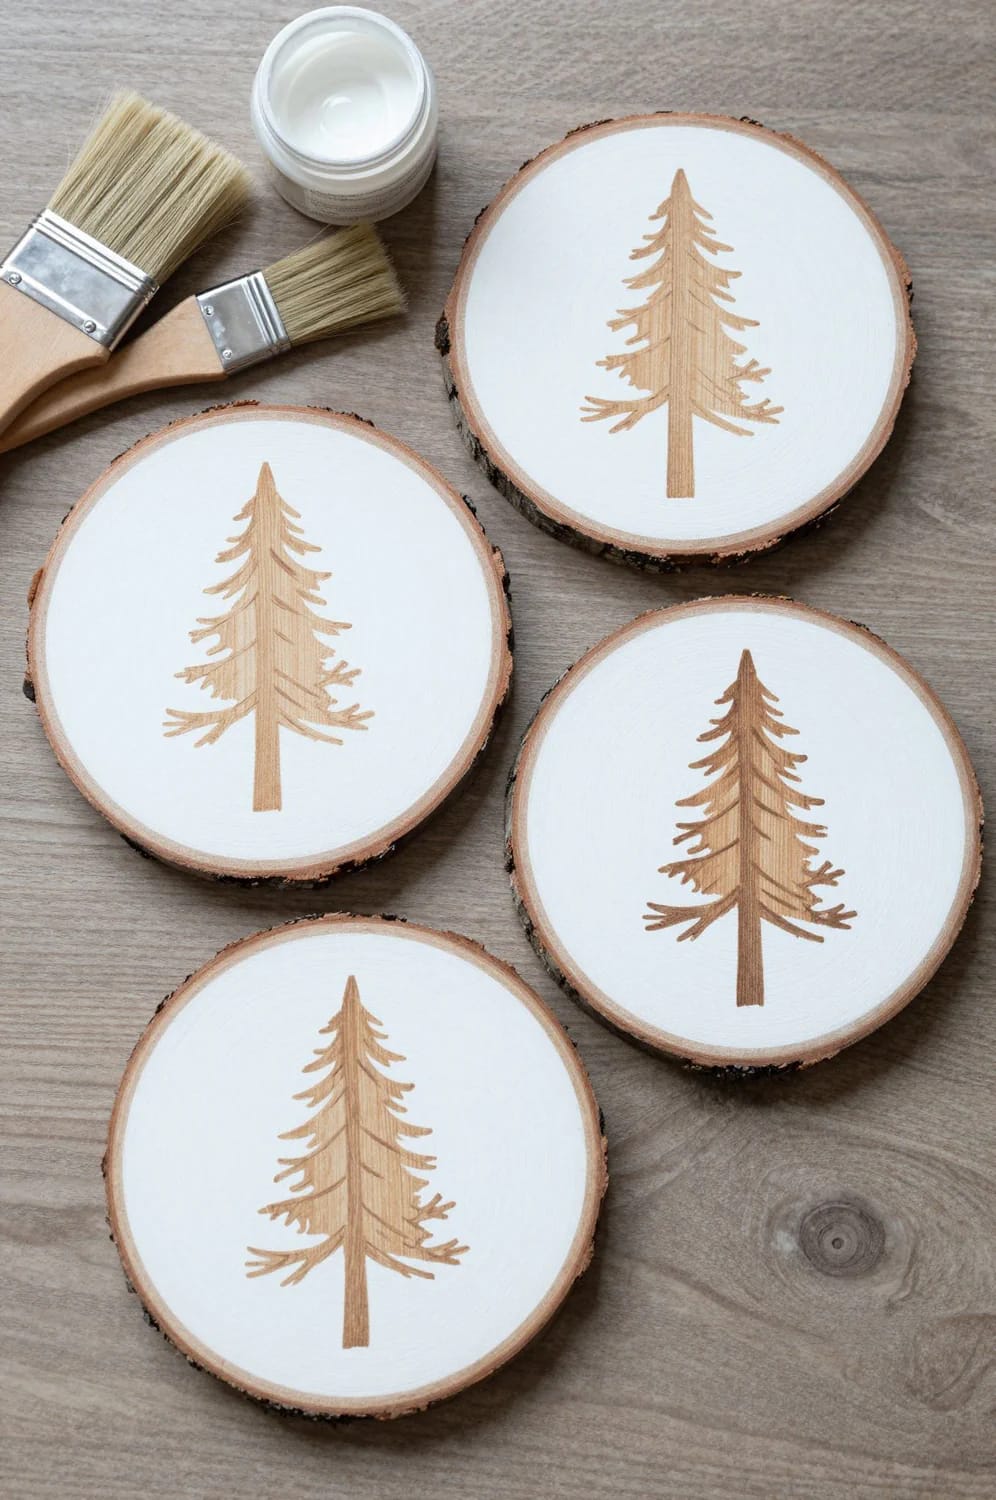
Reversing the figure and ground is the single cheapest way to make a wood slice ornament look designed rather than decorated. Paint the negative space around a simple tree shape in chalky off-white and the tree itself is the wood, grain and all, which is a detail nobody can reproduce with a stencil kit. It works with any silhouette that stays convex and simple, so a pine, an arch, a half moon; it fails with anything that has thin appendages, because keeping paint off a two-millimeter branch by hand is not happening.
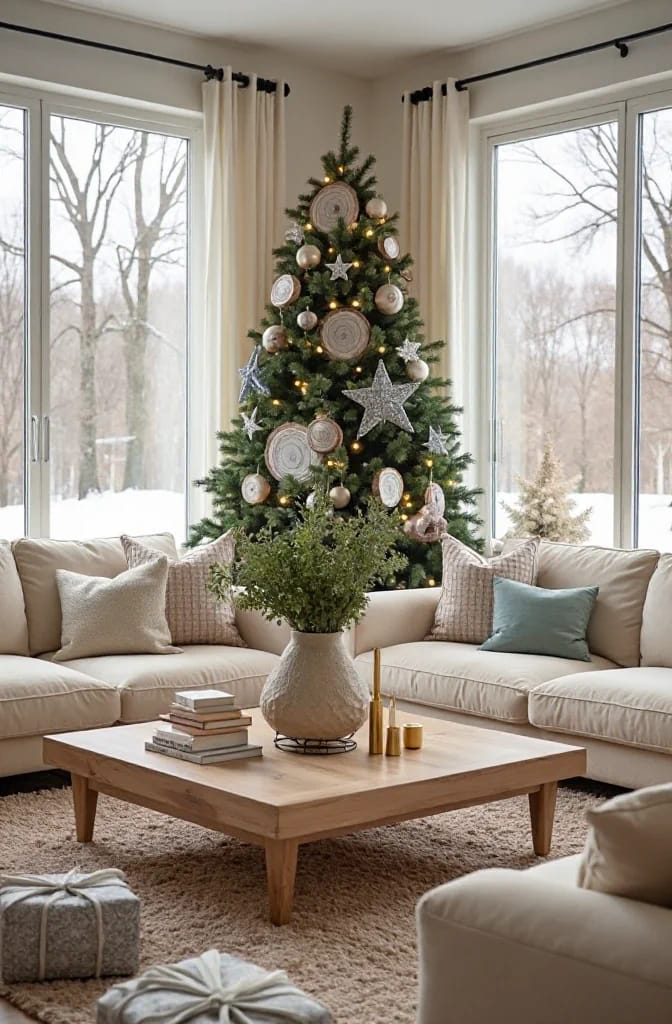
Nordic decorating has been running this trick for decades on flat-cut wood, and it is worth looking at how Scandinavian holiday decorating handles white against bare timber before you commit to a color, because the off-white you choose does most of the work here.
Do this
- Repeat one motif at two sizes rather than making thirteen different designs
- Leave at least a third of every slice unpainted, including the bark rim
- Hang the painted ones on the outer third of each branch, where there is air behind them
- Sand the face to 220 grit first. Two minutes per slice, and it changes how the paint sits.
Avoid
- Script lettering of any size or quality
- Glitter over paint, which manages to look mass produced and homemade at once
- Four colors on one three-inch face
4. Twenty-four numbered slices as an advent set
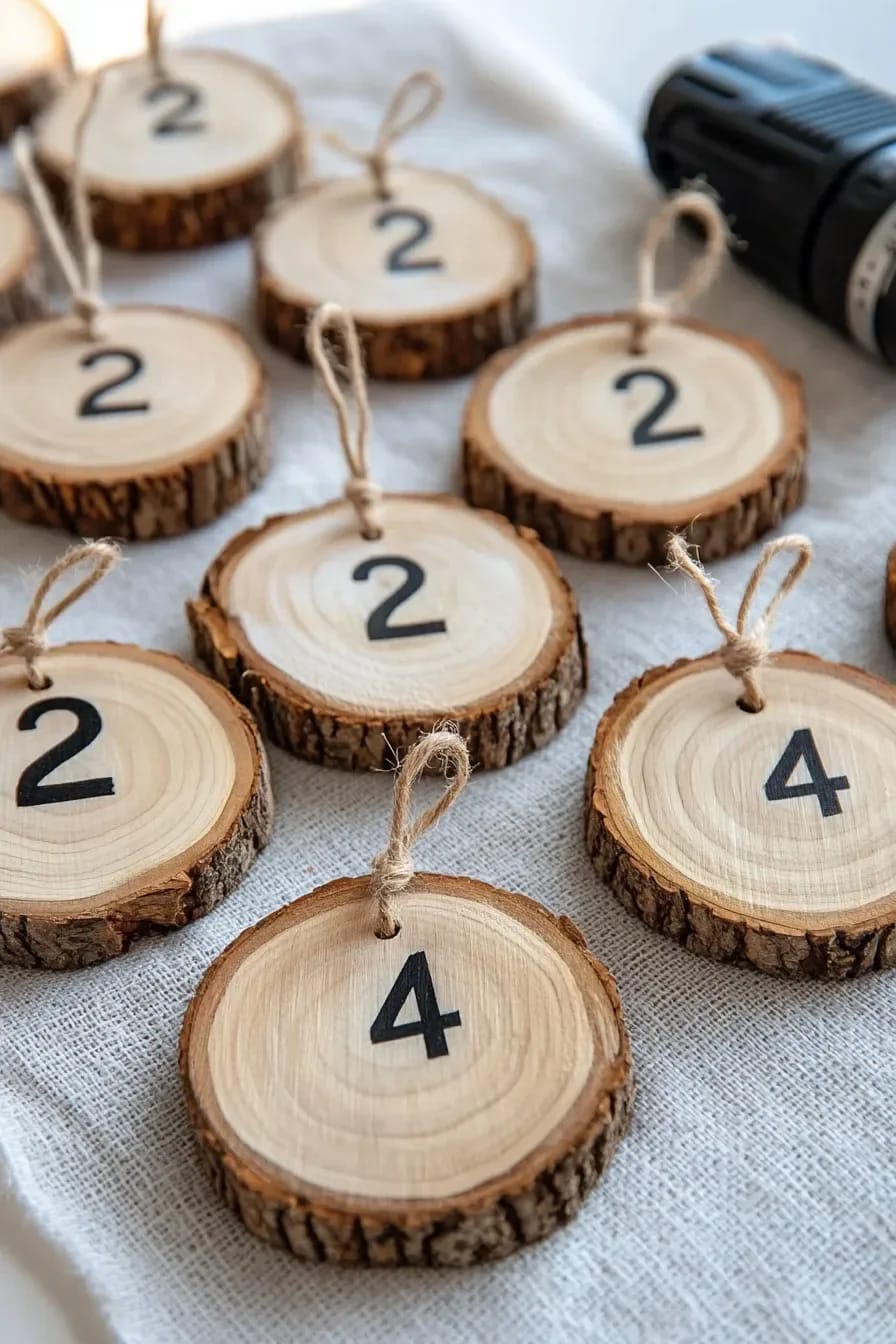
Numbers are the one place lettering belongs on these ornaments, because a numeral is a shape rather than a sentiment. Draw them with a fine paint marker on bare wood, keep them all in one plain sans serif, and accept that hand-drawn digits will wobble; twenty-four identical machine-perfect numerals would look printed, which is the opposite of why you are doing this.
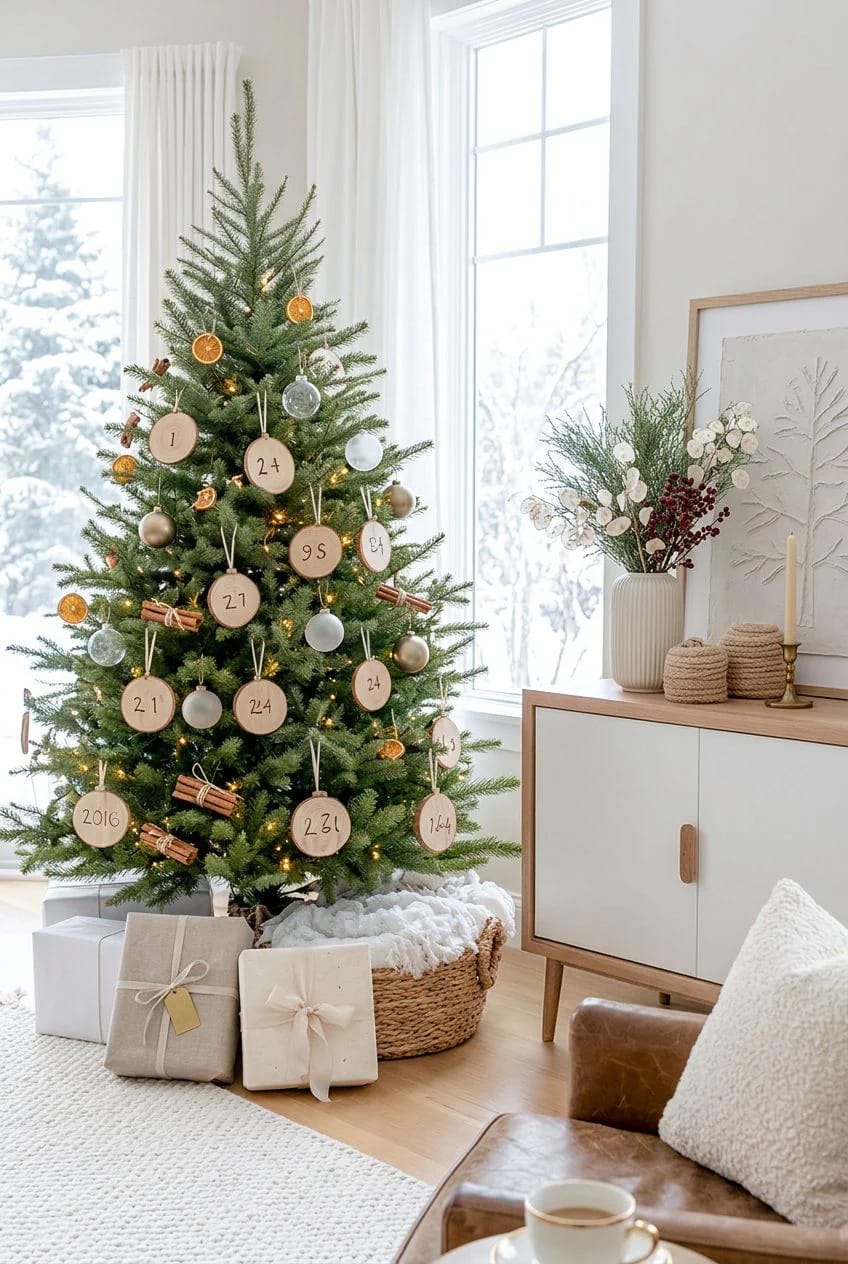
Fair warning: this is the project I'd talk most people out of. Twenty-four ornaments on a minimalist tree is a crowd, and the set only works if you hang one per day and let the tree fill in slowly, or if you string them as a garland somewhere else in the room and keep the tree at eight or nine pieces.
Sand both faces to 220 grit, then wipe with a dry cloth, never a damp one.
Drill the hanging hole before any paint touches the slice: a 1/16 inch bit, roughly a quarter inch in from the bark edge, backed with scrap so the exit side doesn’t blow out.
One coat of dewaxed shellac on resinous species only. Basswood and poplar don’t need it.
Paint or draw, two thin coats rather than one thick one, drying fully between them.
Matte topcoat over graphite and marker work, which smudges otherwise. Painted-only slices can skip it.
5. Matte black slices with a brass-leaf moon
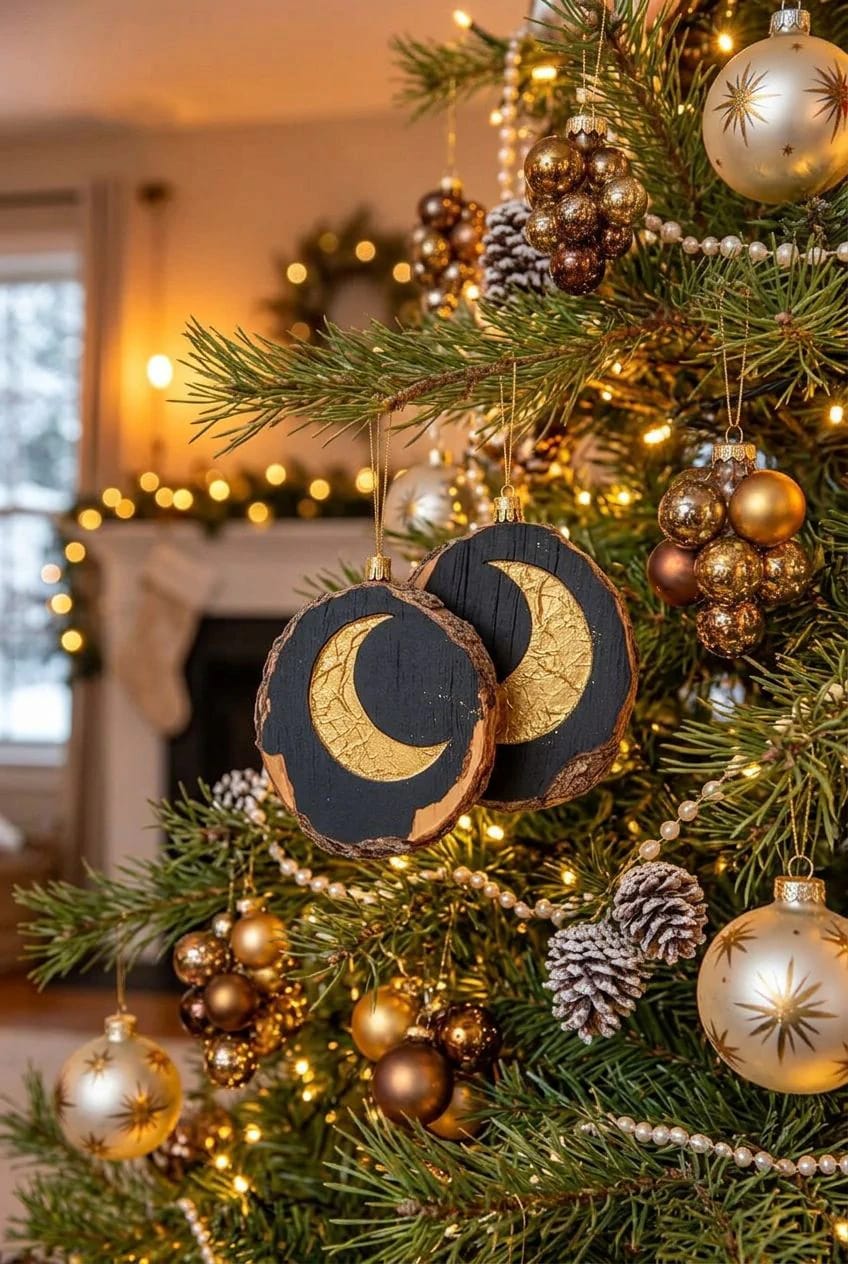
This is the lighting entry on the list, and it only pays off if you hang the pieces within about eight inches of a bulb. Matte black kills every reflection on the face, so the leafed shape becomes the only thing on the slice that moves light, and a warm-white string will make a crescent flare and dim as you walk past it. Multicolor lights ruin the effect, so if that's your tree, skip this one.
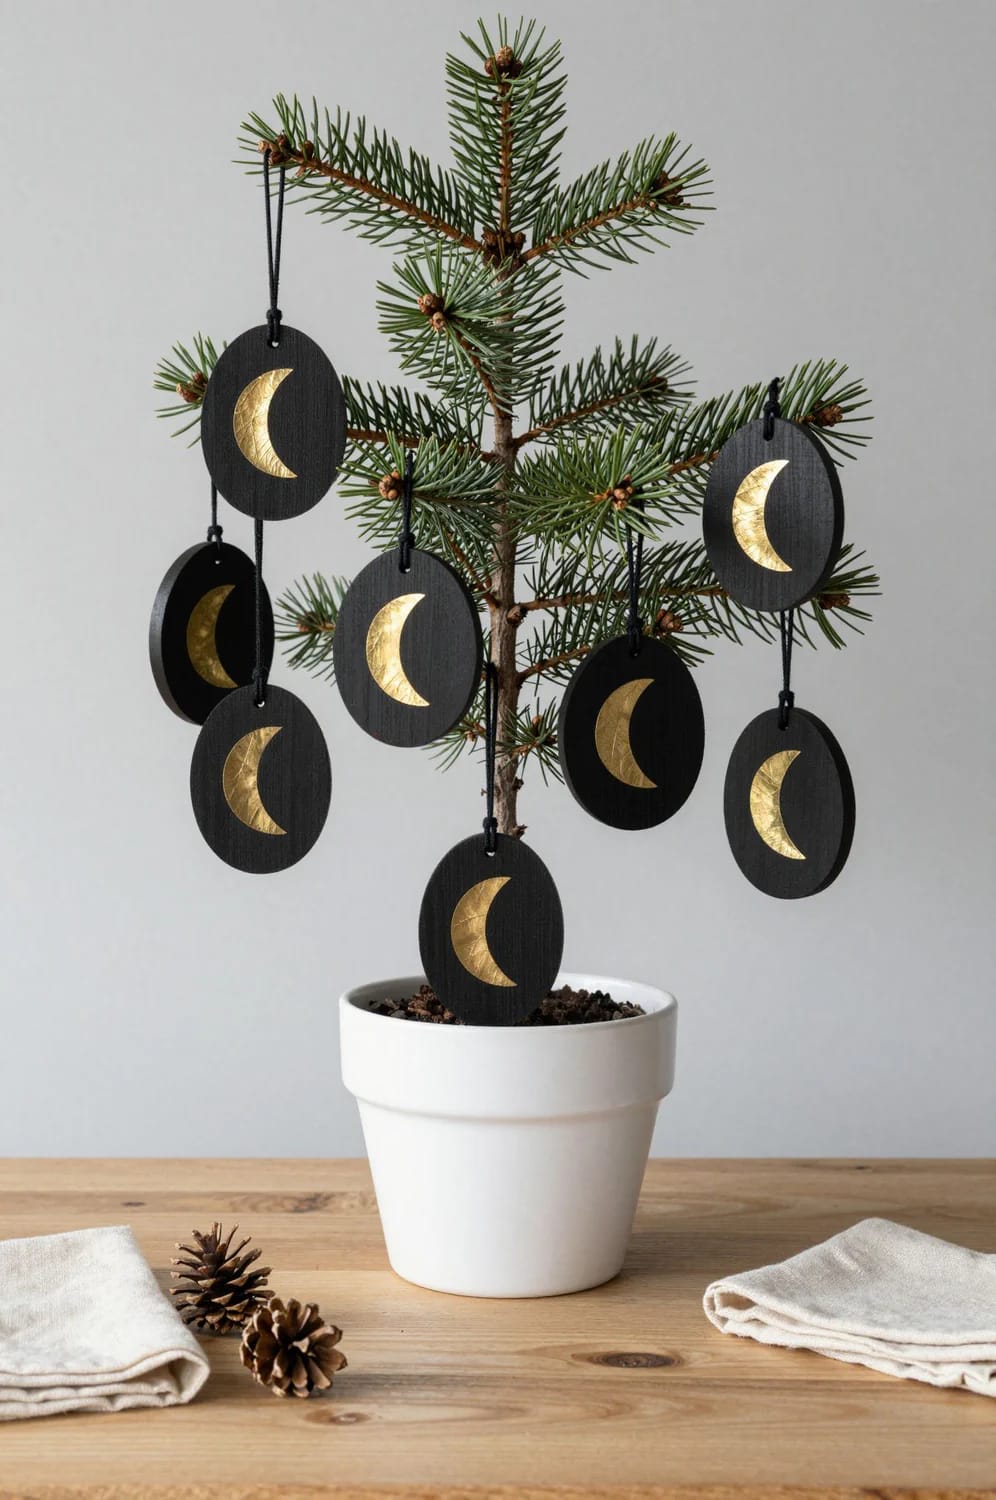
Use imitation gold leaf and water-based size rather than metallic paint. A book of a hundred sheets runs about ten dollars and will leaf far more slices than you will ever make, whereas gold acrylic reads yellow-brown at night and flat by daylight. Brush size onto the shape, wait until it goes tacky (fifteen to twenty minutes, and it must be tacky rather than wet), lay the leaf, then knock the loose flakes off with a soft brush.
Leave the torn edges torn. A gold circle with a clean vector edge looks like a sticker, while the ragged rim and the small gaps where black shows through are what tell a viewer at close range that someone laid this by hand. On a tree with a lot of visible air, close range is exactly how these get seen.
6. Growth rings traced in a single color
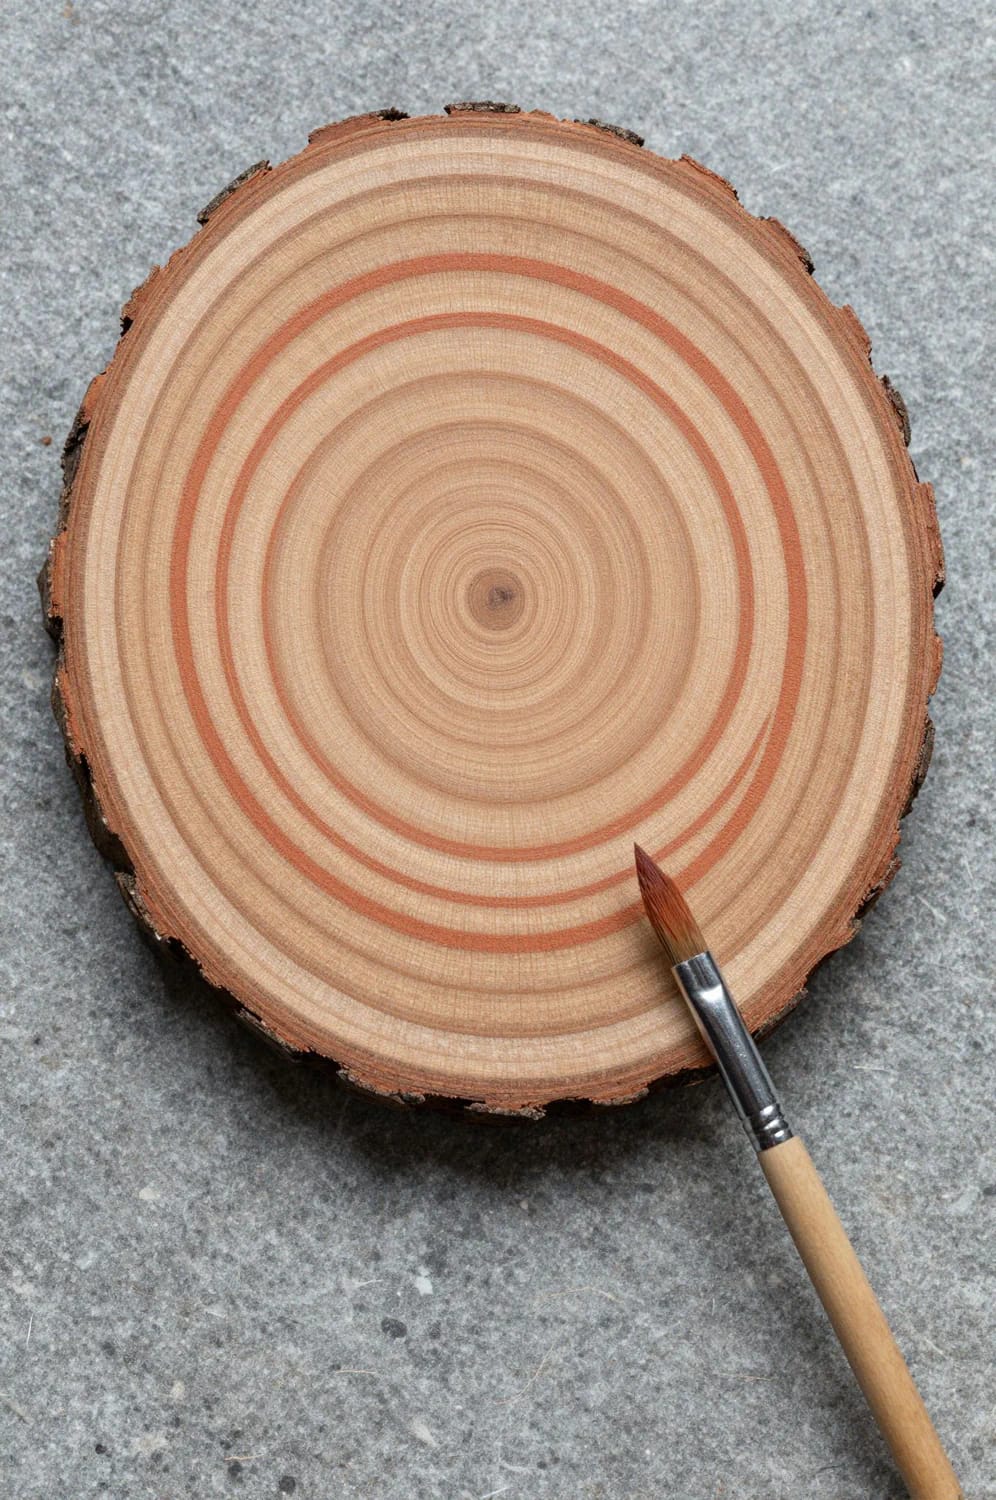
Trace what the tree already drew. Pick out every second or third ring with a fine liner brush in one muted color and the slice keeps its own pattern while gaining just enough paint to look intentional. Oak and ash have the boldest rings; basswood barely shows any, which makes it the wrong species for this one.

Slices cut from a fallen branch beat store-bought rounds here, because a branch four inches across gives rings that are tight, off-center and slightly oval, and that asymmetry is the design. The same instinct runs through most good crafts built from foraged natural materials, where the found object sets the composition instead of the other way round.
 Wood Slice Christmas Ornaments With Wood Burned Designs That Don’t Look Like a Kit The same restraint applied with a pyrography pen, plus which designs survive being burned into soft grain.
7. Speckled snow slices
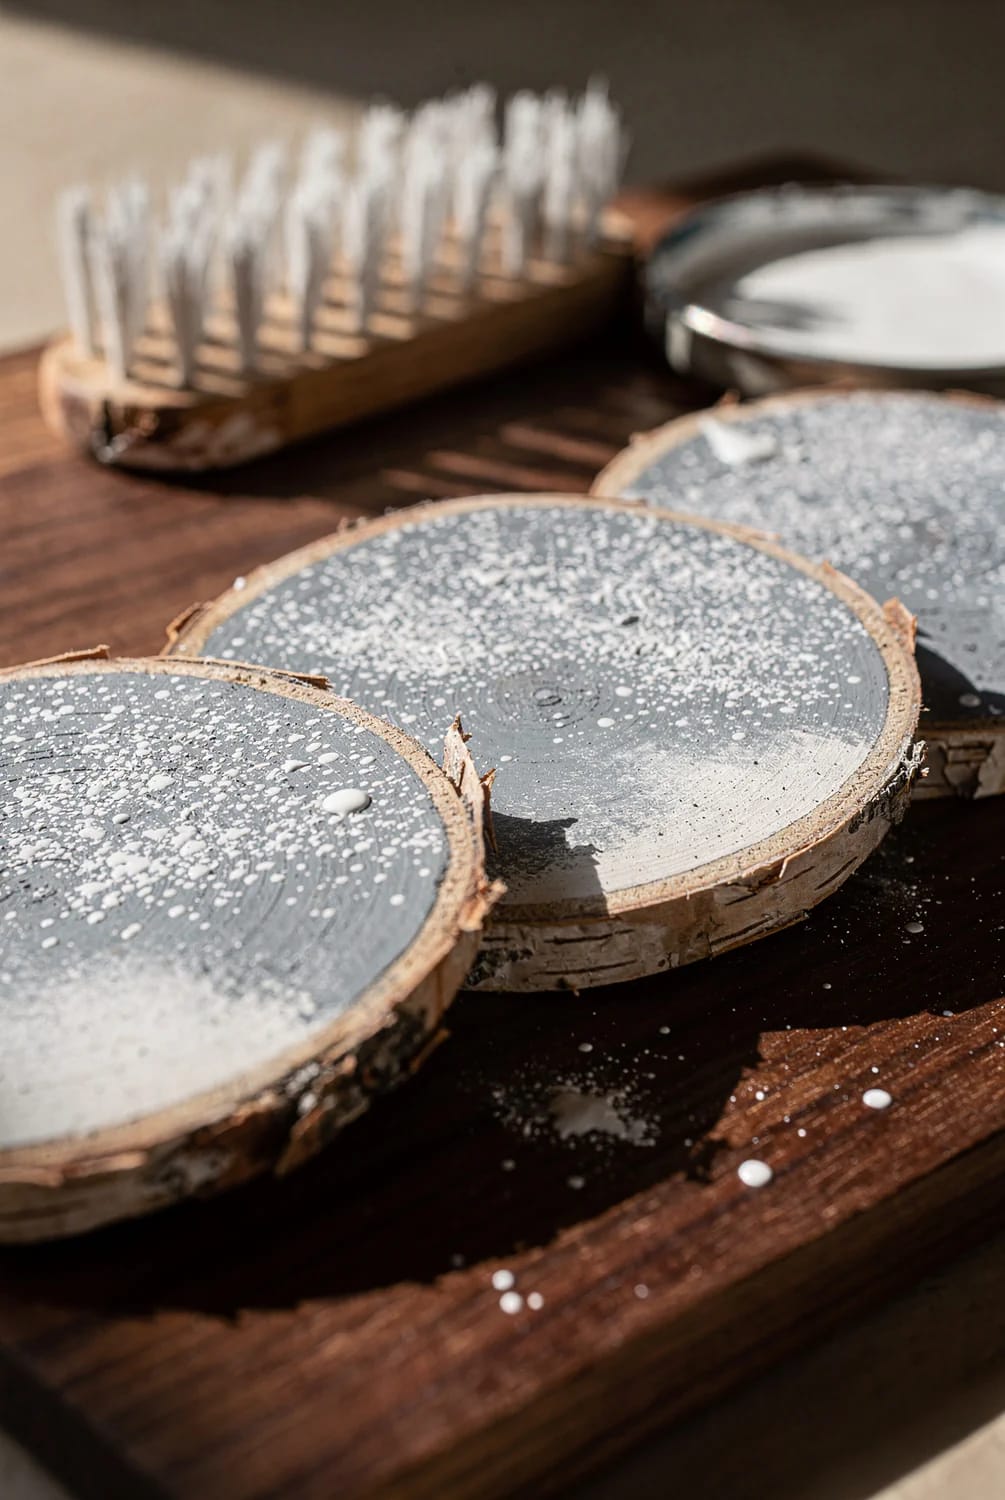
Flick, don't paint. Thin white acrylic roughly one to one with water, load an old toothbrush, and drag your thumb across the bristles about ten inches above a slice already painted in flat grey blue. The specks want to be uneven and mostly small; a few larger blobs at the top edge sell it, an even distribution looks like a printed texture.
Test on a scrap first, because the ratio is temperamental and paint that is too thin runs down the face in grey tears. This one also plays well beyond the tree, and it slots neatly into the wider pared-back holiday decorating a minimalist tree usually sits inside, on a mantel or a table run.
8. Single-initial slices that double as gift tags
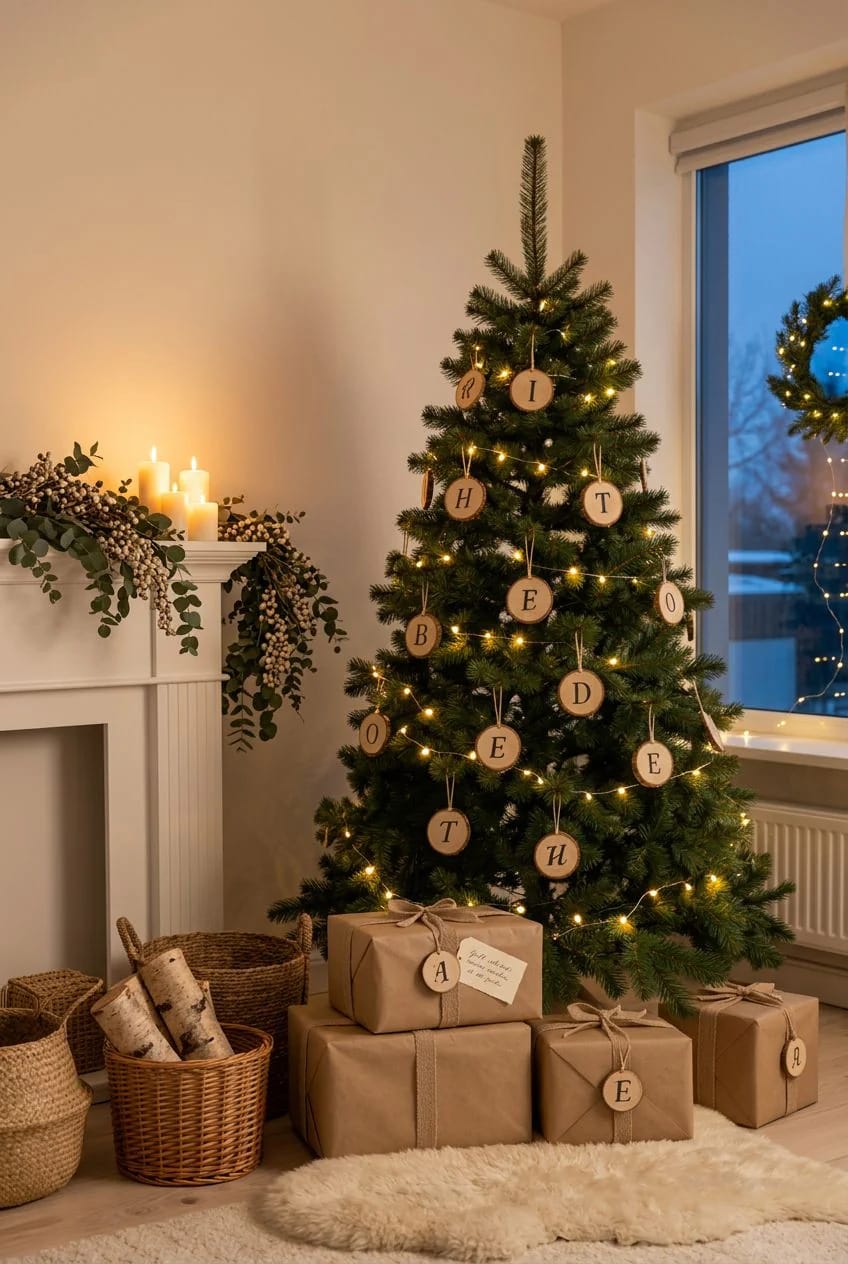
One capital letter, sized to fill about half the face, is the only lettering that survives on a minimalist tree. Tie it to a gift in the morning and hang it on the tree that evening, which is the whole argument for making these instead of buying paper tags nobody keeps. A geometric sans serif holds up best; anything with serifs or a swash starts to look like a wedding favor.
Pencil a baseline and a rough box first, then fill with a paint marker, then erase what still shows once the paint has cured. If you want more shapes than circles in the same family, there are other wooden ornament forms worth borrowing from, though rounds are the ones that cut cleanly from a branch.
9. A three-value tonal set in one hue
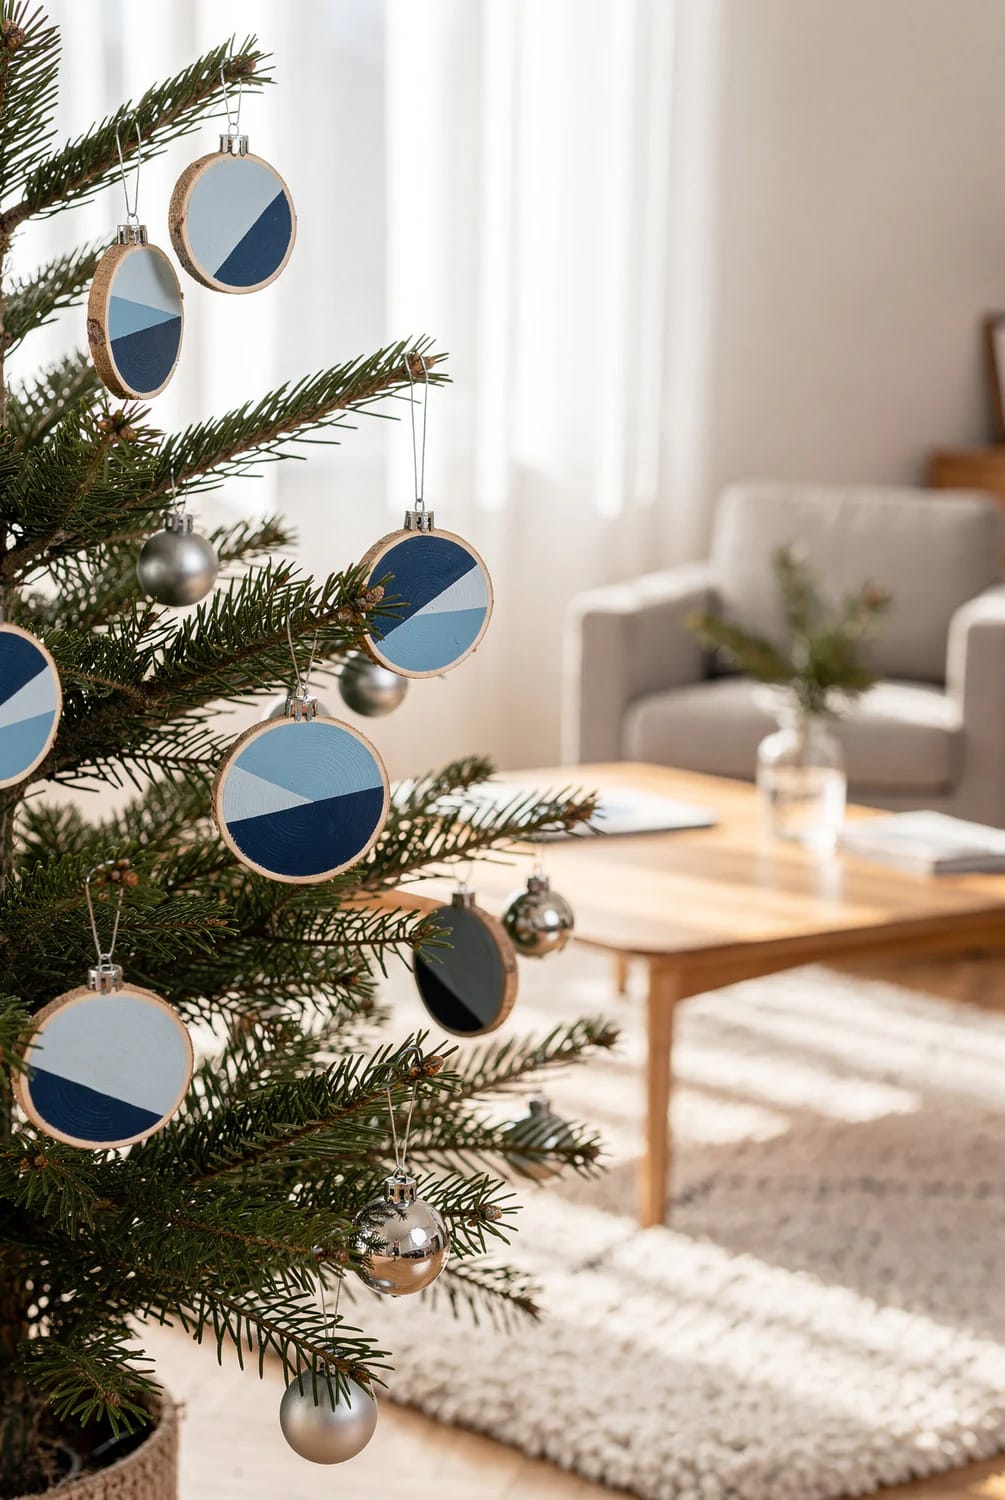
The palette entry, and the one that changes a tree the most for the least effort. Mix one color, then split it into three values by adding titanium white in two steps, roughly a quarter more white each time; paint five slices in each value and hang the deepest ones low, the palest ones high. The tree gains depth without gaining a second color, and the eye reads the whole set as one object rather than fifteen ornaments.
Values are easier to judge wet than dry, which is a problem, since acrylic dries about half a step darker than it looks in the puddle. Mix all three before you paint anything and let a test dab on scrap dry fully, or you'll end up with two values that are functionally identical.
- Clay pink to soft brick reads warm against green fir and holds up under warm-white bulbs.
- Grey blue in three values is the safest set on a flocked or white artificial tree.
- Ochre. One value only, on maybe five slices, because at three values it goes camp.
- Deep green is the exception to the no-Christmas-colors rule, provided the palest value stays close to sage and never reaches mint.
10. Edge-painted slices with a bare face
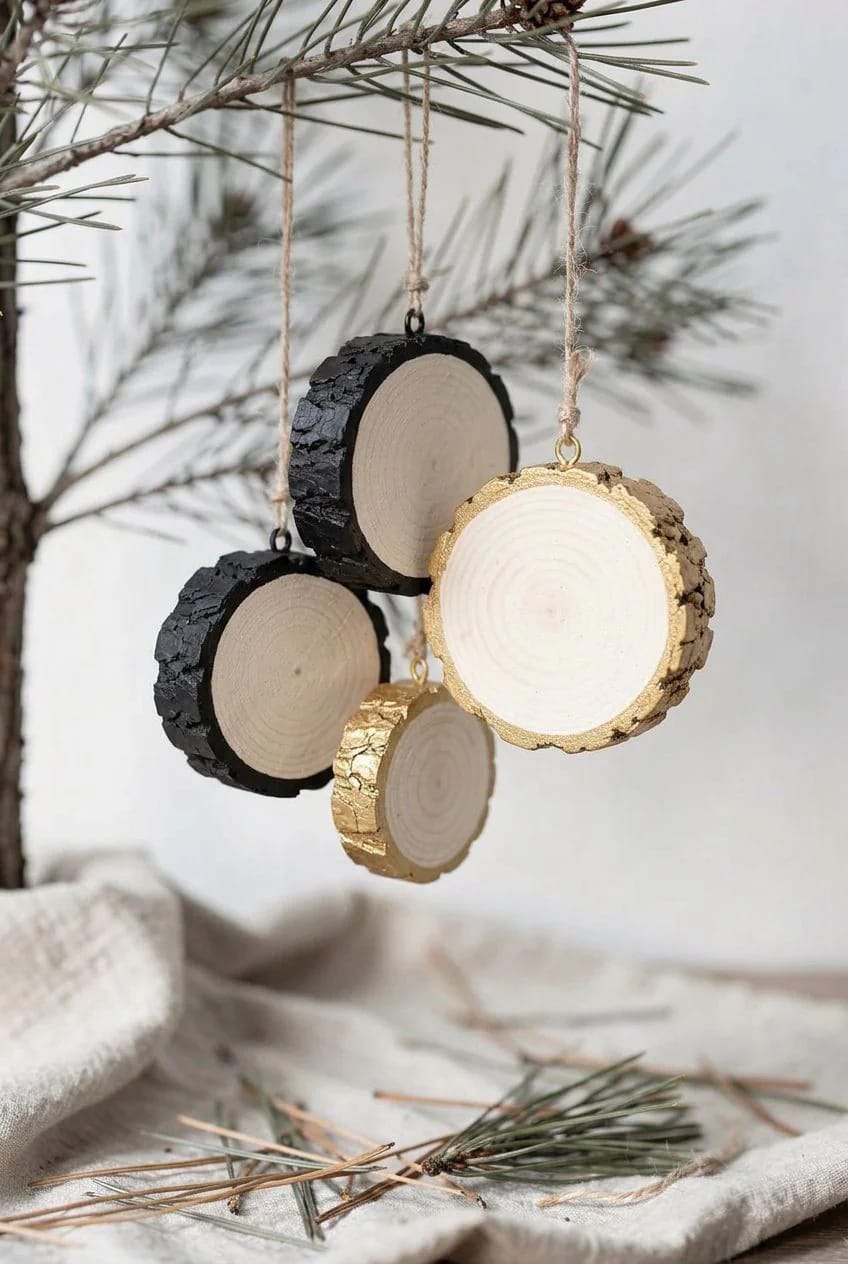
Paint the rim, leave the faces alone. From the front the ornament is a plain wood disc; from any angle off-center, a line of color appears around the edge, and on a tree where branches sit far apart you see plenty of ornaments at an angle. Use an angled brush, keep the paint off the face, and stop worrying about the bark flaking, since the color reads through the gaps anyway.
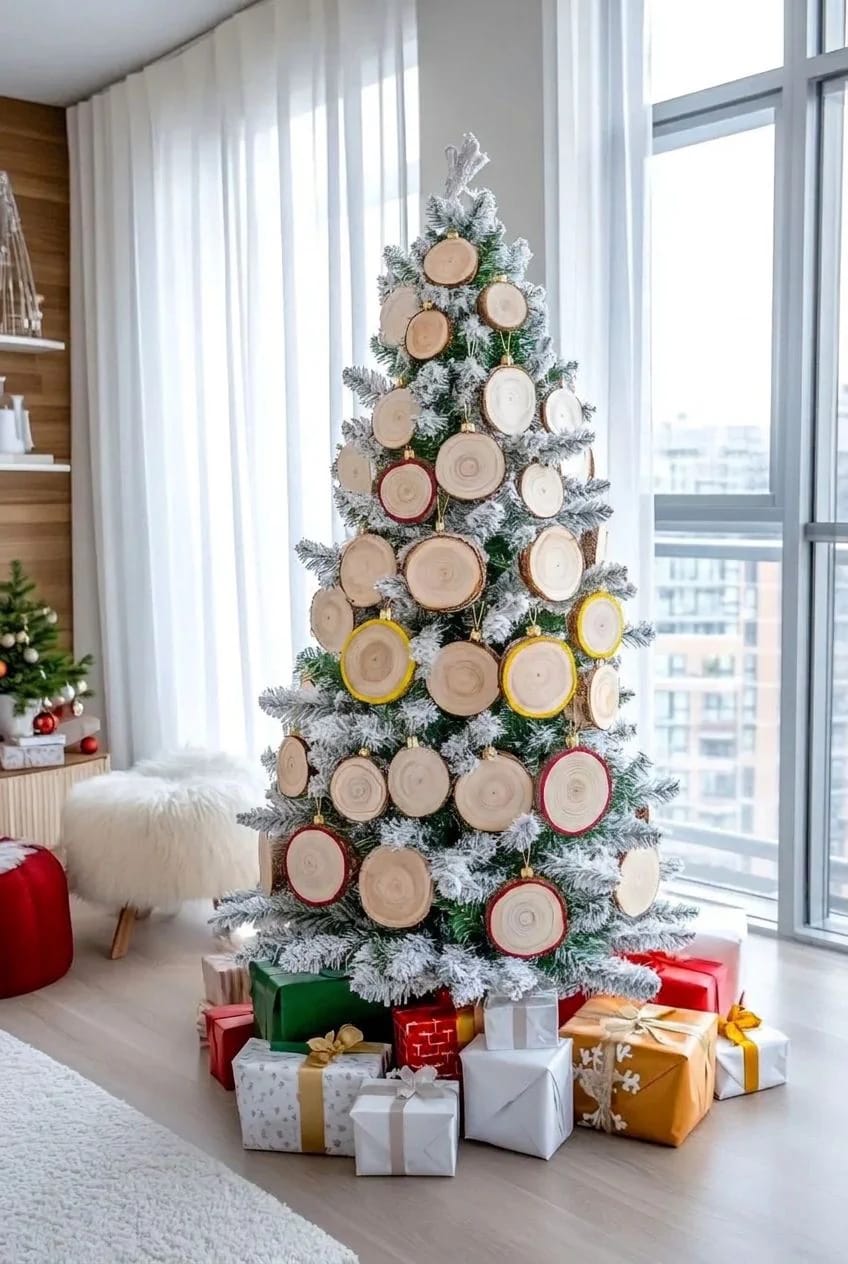
It is also the entry with the lowest material cost, since it works fine on offcuts and cracked slices you would otherwise bin, and salvage-first thinking is the same instinct behind most art projects built from materials headed for the scrap pile.
11. A vertical strand of five graduated slices
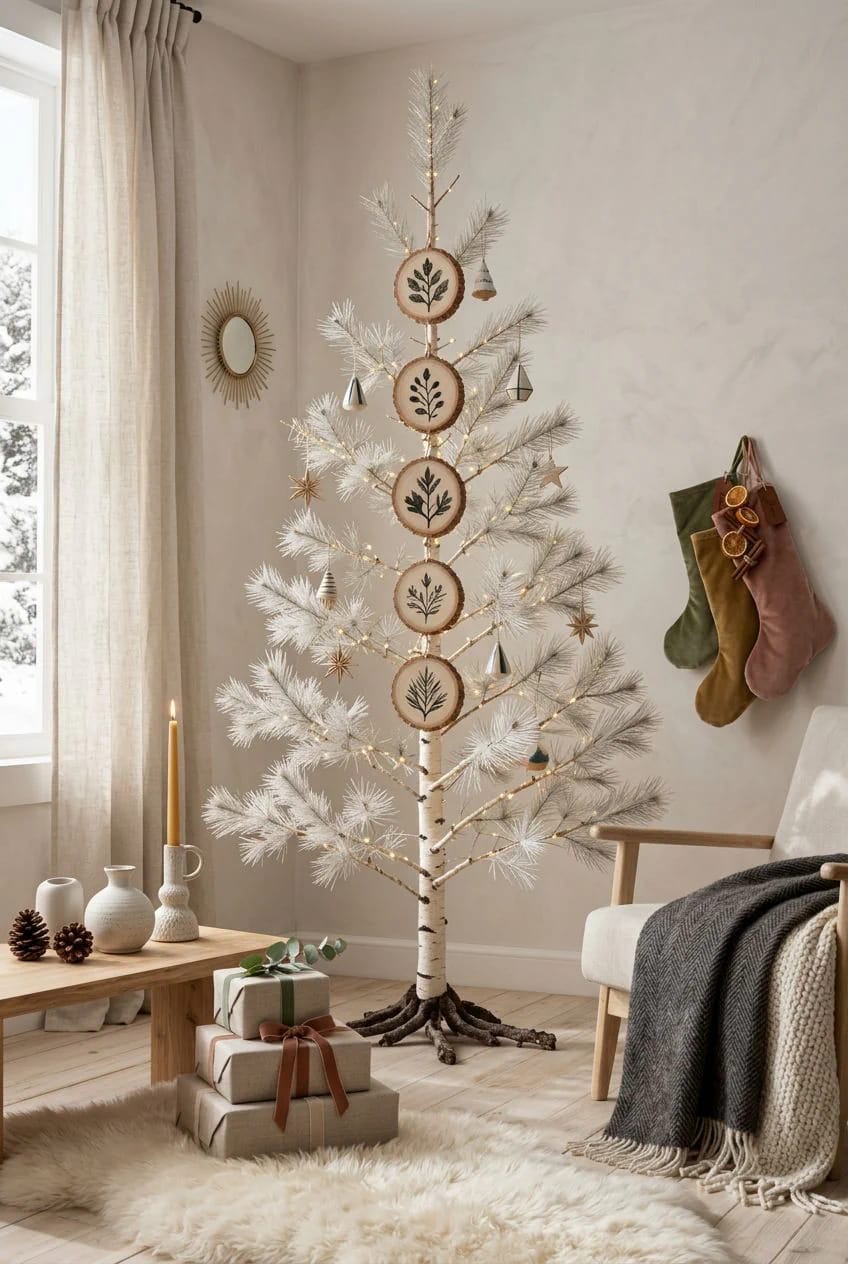
Five slices on one length of twine, largest at top, gives a minimalist tree the vertical line it usually lacks. Space them about three inches apart with a knot above and below each so nothing slides, and let the painted band step slightly lower on each slice down the strand.
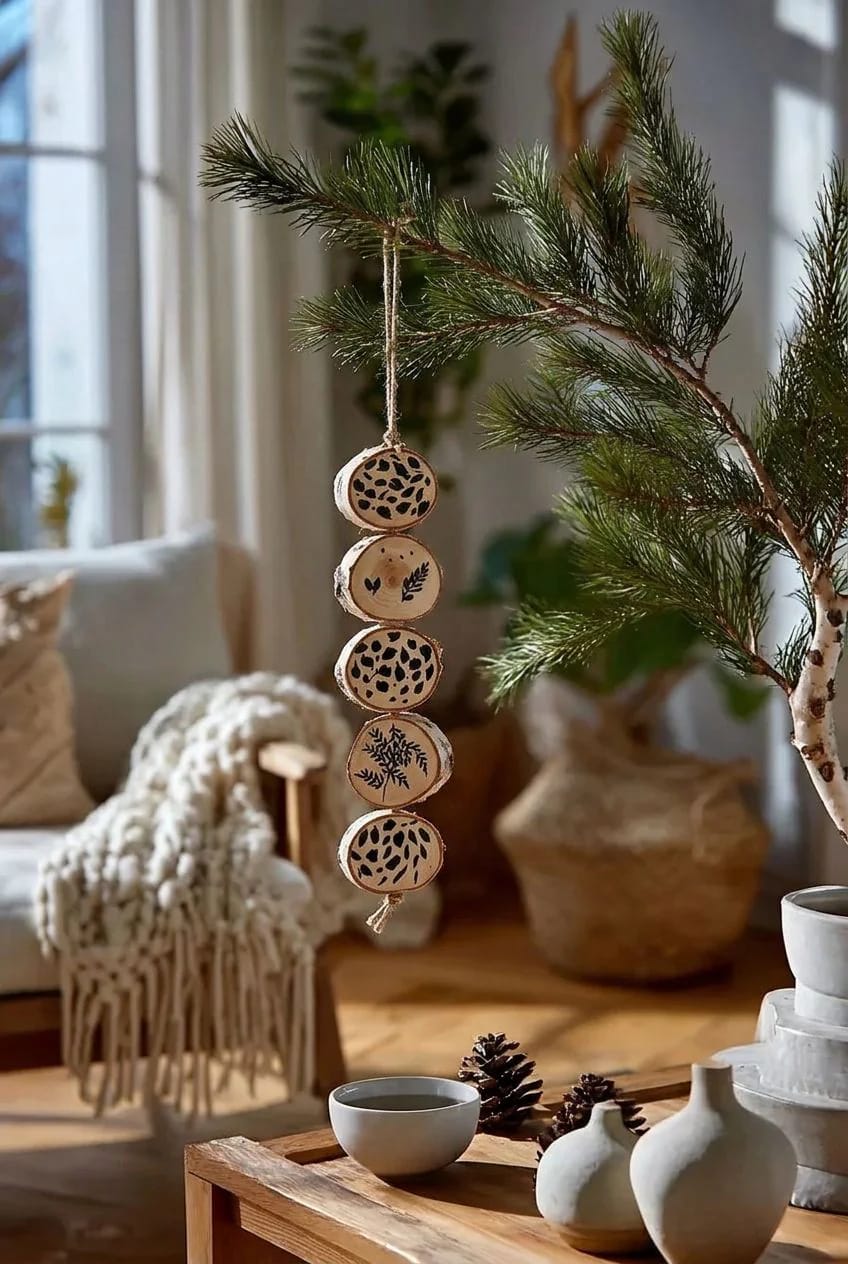
Hang one strand, not four. A single vertical element on an otherwise sparse tree reads as a deliberate feature; several of them turn the tree into a curtain of beads, which is a different look entirely and not this one.
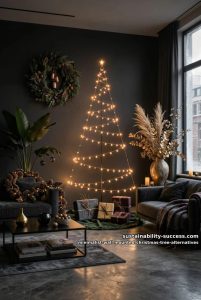 Minimalist Wall-Mounted Christmas Tree Alternatives for Small Spaces Seven spare wall-mounted setups these slices hang on beautifully, from foraged branches to a single light strand.
12. Whitewashed slices with one-line graphite drawings
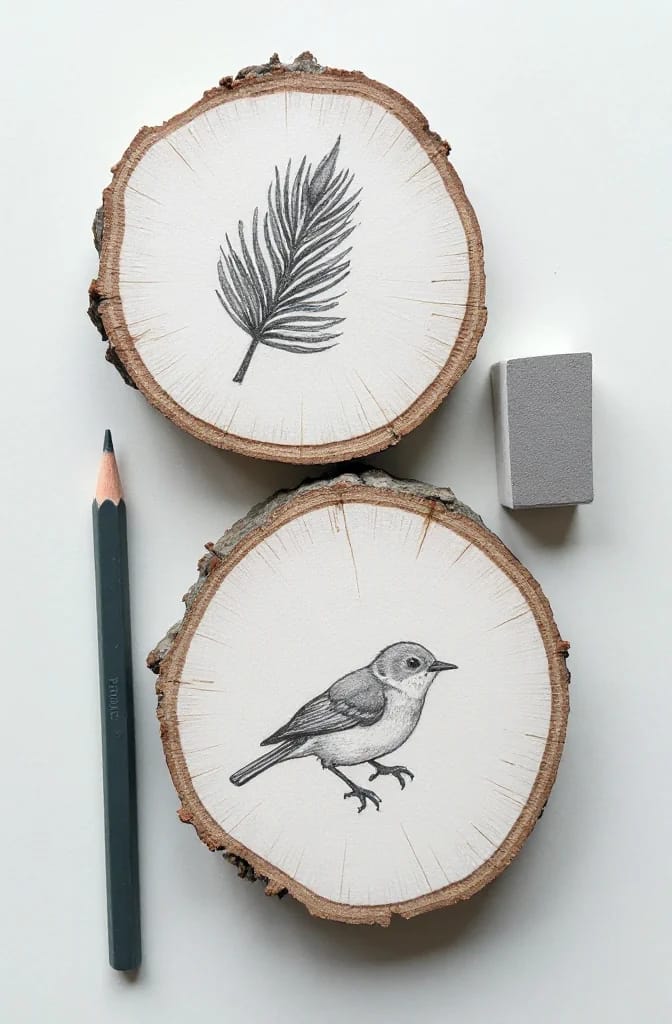
A wash instead of paint keeps the wood legible: acrylic thinned about half and half with water leaves the grain and knots showing through a milky film, and graphite drags across that surface beautifully. Draw with a 2B pencil in one continuous line without lifting, so the drawing has the wobble of a hand rather than the confidence of a print.
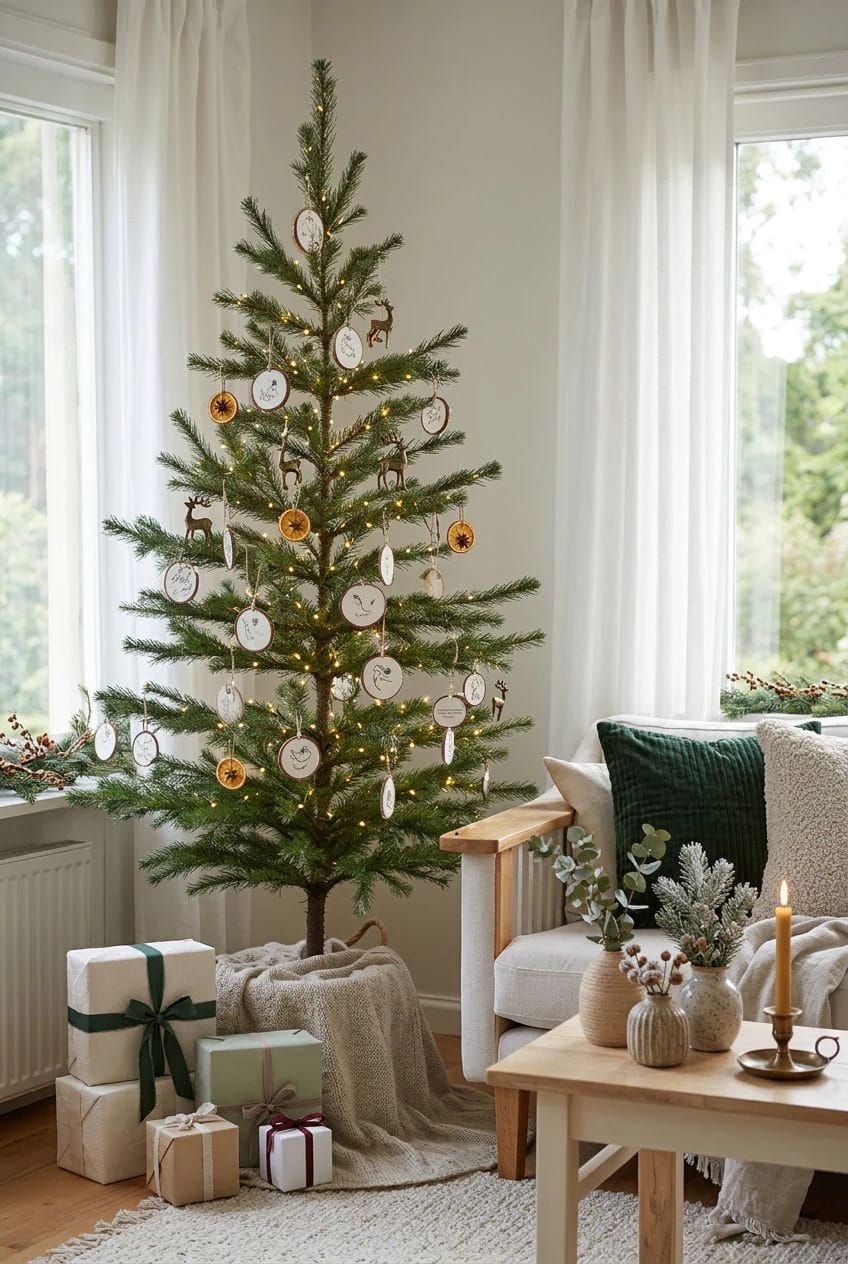
Seal it, or the whole thing smears the first time somebody handles it. A light matte spray is enough, and it will darken the graphite about a shade, which is worth knowing before you draw twelve of them.
13. One oversized painted slice and nothing else like it
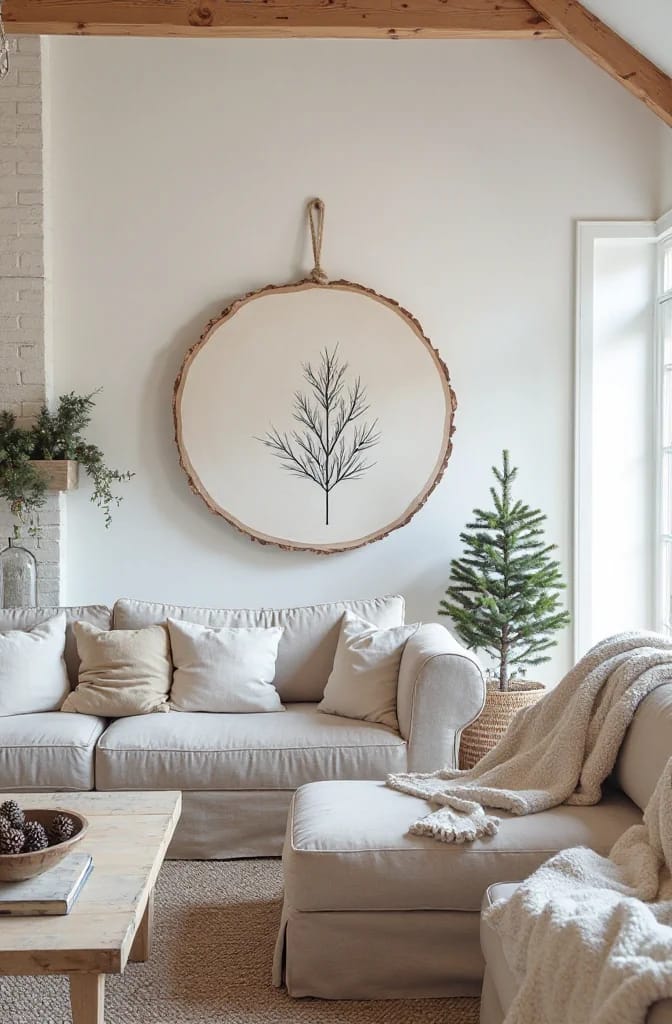
Make one slice at six or seven inches across, paint it with the most committed design you have in you, and hang it at eye level slightly off-center. Everything else on the tree stays small, raw, or barely painted. This is the reverse of how most people decorate, which is to distribute interest evenly so no branch feels neglected, and it is the single decision that separates a sparse tree that looks styled from one that looks unfinished.
A slice that size needs a real hanger. Jute twine through a 1/8 inch hole will hold, but the weight pulls a thin branch down and tips the face toward the floor, so hang it where a branch meets the trunk rather than out at the tip, or use a short length of leather cord and let it sit lower against the interior of the tree.
The design deserves more than a scaled-up version of the small ones, too. A six-inch face is enough room for the mountain range with an actual horizon line and a leafed moon above it, or for a whitewash with a drawing that has some detail in it, since at this size the viewer is standing close enough to read it.
If you only make three of these
Start with the half-dip, in whatever muted color your room already contains, and make eight of them; that alone will change the tree more than any other project here. Add the three-value tonal set second, since it uses the same paint and the same technique and just splits the color into steps. Hold the oversized slice until the tree is already up and dressed, so you can see where the gap is before you commit to a design that big.
One honest gap: I couldn't pin down consistent pricing on kiln-dried basswood rounds, because bag prices swing hard with diameter and thickness and the listings rarely say which they are. If you have a branch four inches thick and a hand saw, cut your own and seal them, and check them for radial cracks in a week before you paint anything.
Related Posts
- 11 DIY Cork Reindeer Christmas Ornaments for a Rustic Tree
- Wood Slice Christmas Ornaments With Wood Burned Designs That Don’t Look Like a Kit
- 25 Stunning Wooden Christmas Ornaments to Inspire Your Holiday Decor
- 31 Elegant Minimalist Christmas Decor Ideas to Inspire
- 31 Creative Upcycled DIY Christmas Decorations for a Cozy Holiday
- 11 Wine Cork Christmas Ornaments for Beginners (That Won’t Fall Apart)