

The white threads that show through a ladder knee were in the jeans the whole time. Denim is woven from indigo warp running down the leg and undyed cotton weft running across it, so every pair in your closet is already carrying the ladder somewhere under the surface, and cutting one is mostly a matter of removing blue and leaving white. That is also why a mill does not need to charge $90 to $200 for the look. What follows are seven ways to put a shredded ladder knee into denim you own already, from the slow tweezer method to a double knee trick that only works on workwear, plus the fabric specs that decide whether the thing survives its third wash.
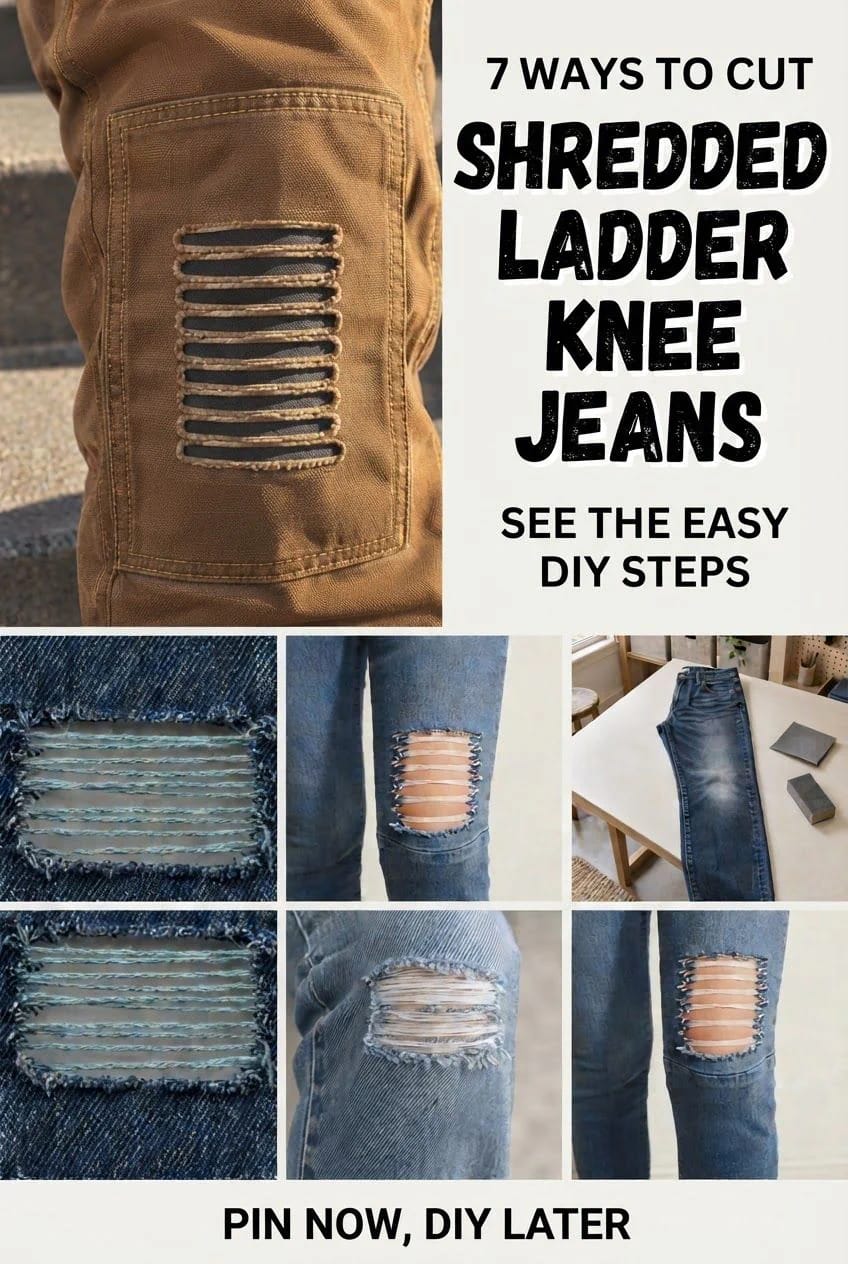
1. The tweezer ladder: pull the blue warp, leave the white weft
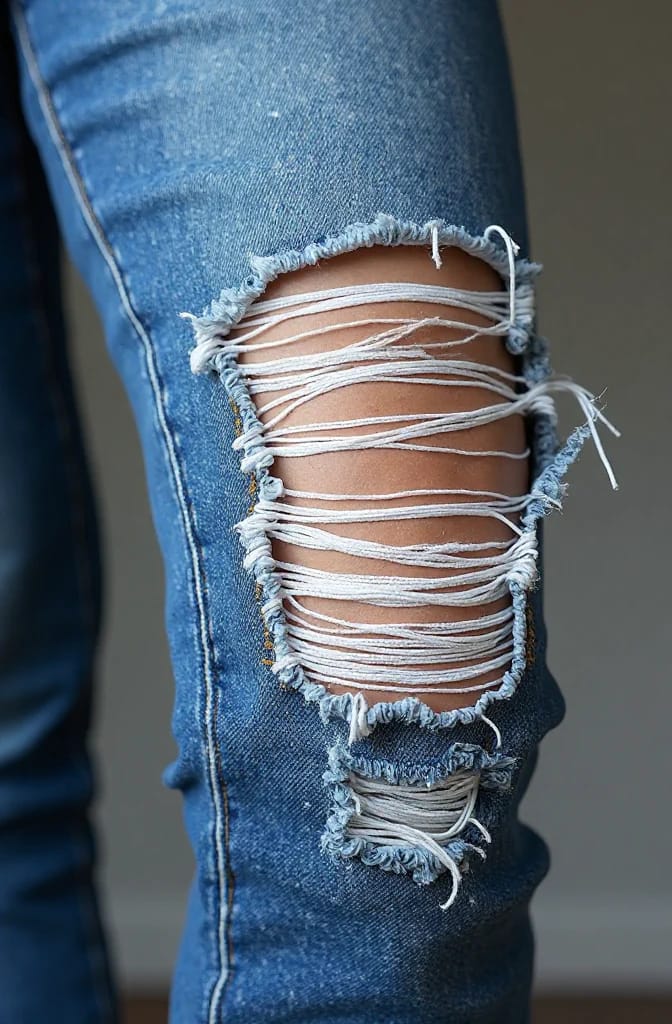
Work with tweezers and a seam ripper, not scissors, because scissors cut in both directions and you only want to cut one. The finished ladder is a set of intact white weft threads bridging an opening where the indigo warp used to be, and the difference between that and a plain slash is entirely in which threads you leave alone. Plan on 45 minutes to an hour for a first knee. The second one goes faster, and it will also look better, which is a reason to start on the leg you photograph less.
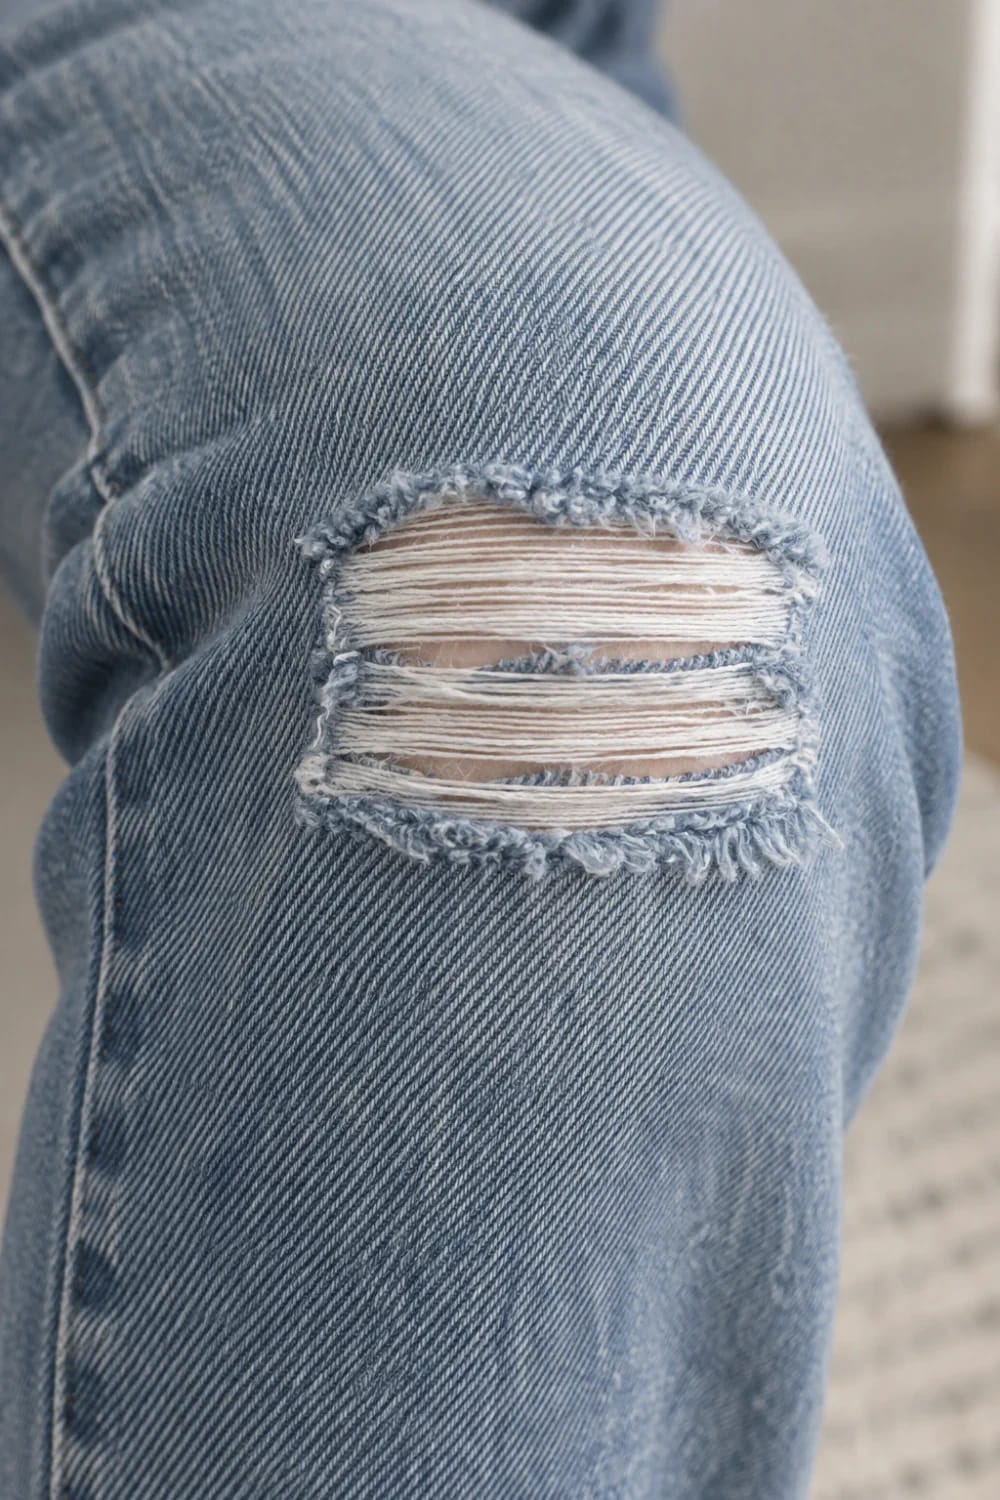
Warp: the indigo threads running the length of the leg. On a standard 3×1 twill each one floats over three wefts before ducking under one, which is why the face of the cloth reads blue and the back reads pale.
Weft: the undyed cotton threads running across the leg, sitting mostly on the back of the cloth and carrying almost none of the dye.
The ladder: remove warp, keep weft. What is left is the inside of your own jeans, held flat by tension between the inseam and outseam.
Cut two lines, not one
Mark the top and bottom of the opening first and cut along both, parallel, with the seam ripper riding on the weft. A single cut gives you a mouth that gapes and frays in every direction; two parallel cuts define the rungs before you have removed anything, so the ladder has a top and a bottom from the start. Three inches wide is plenty on a slim leg. On a wide leg you can go to five before the opening starts to sag open when you stand.
Pulling the warp without snapping the weft
Get under a single blue thread at the cut edge, lift, and pull it out along the full width of the opening; it will come away as one long strand if the denim is rigid cotton. Then repeat, fifty or sixty times. That is the whole technique, and the reason it takes an hour is that the denim between the two cuts holds roughly 60 to 70 warp ends per inch.
Blunt drugstore tweezers will not get under a single end without taking two or three of its neighbors, which is how a clean ladder becomes a ragged one. Fine points matter more here than anything else on the table.
Hand-filed points that actually meet, which is the difference between lifting one warp end and grabbing four.
Tweezerman Stainless Steel Point TweezerOne judgment call before you start: a pair that is already thin across the whole knee panel is not a ladder candidate, it is fabric. The rungs will pull straight out of denim that has lost its body, and you will spend an hour producing a hole. Cut those legs off and let them become strips for a braided denim rag rug instead, where softness stops being a fault.
2. Set the ladder above the kneecap, not on it
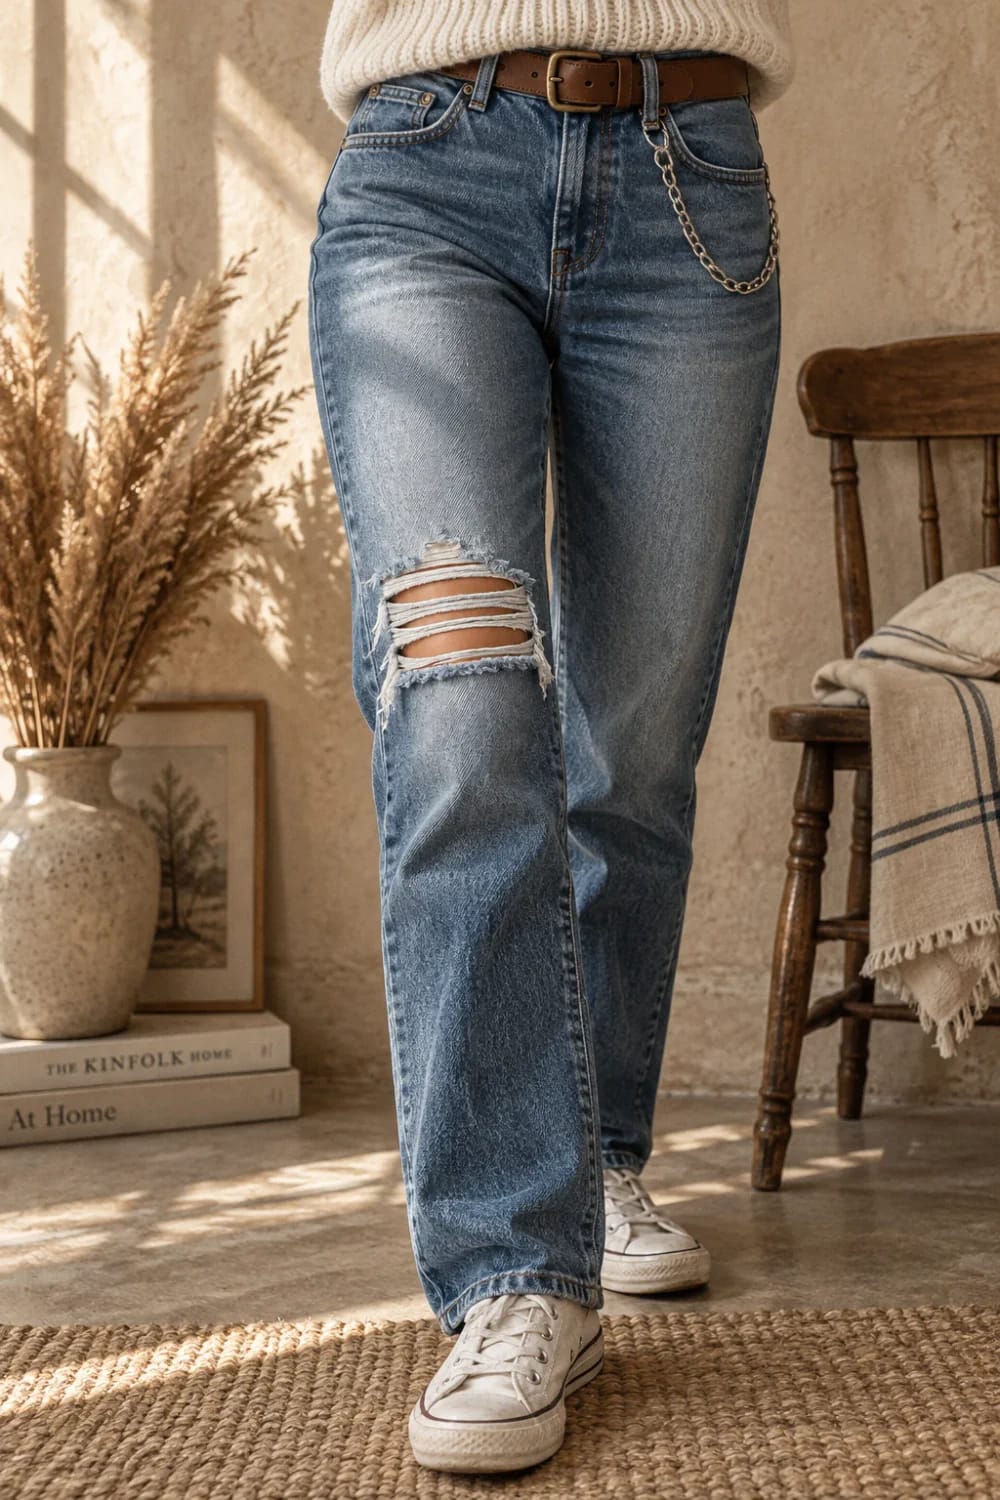
Measure from the kneecap, not from the hem, and put the opening roughly half an inch to an inch above the center of the cap. Denim rides up when the knee bends, so an opening cut level with the cap while you are standing ends up below it the moment you sit down, which reads as a shin rip. Everything a factory does to place a rip is built around this, and it is the single decision most home attempts get wrong.
Both legs do not have to match. Real knee wear is asymmetric because most people kneel on one side, and a ladder on the left at an inch above the cap with a shorter, lower one on the right looks earned in a way a mirrored pair never does. That said, keep them within about an inch of each other vertically, or the pair just looks badly cut. If you are building a wardrobe where one modified pair has to carry several looks, this placement is also the one that survives being worn with boots, which is not true of a rip that sits low on the shin; there is more on that logic in these sustainable outfit combinations built around a few reworked pieces.
3. Back the ladder so it stops growing
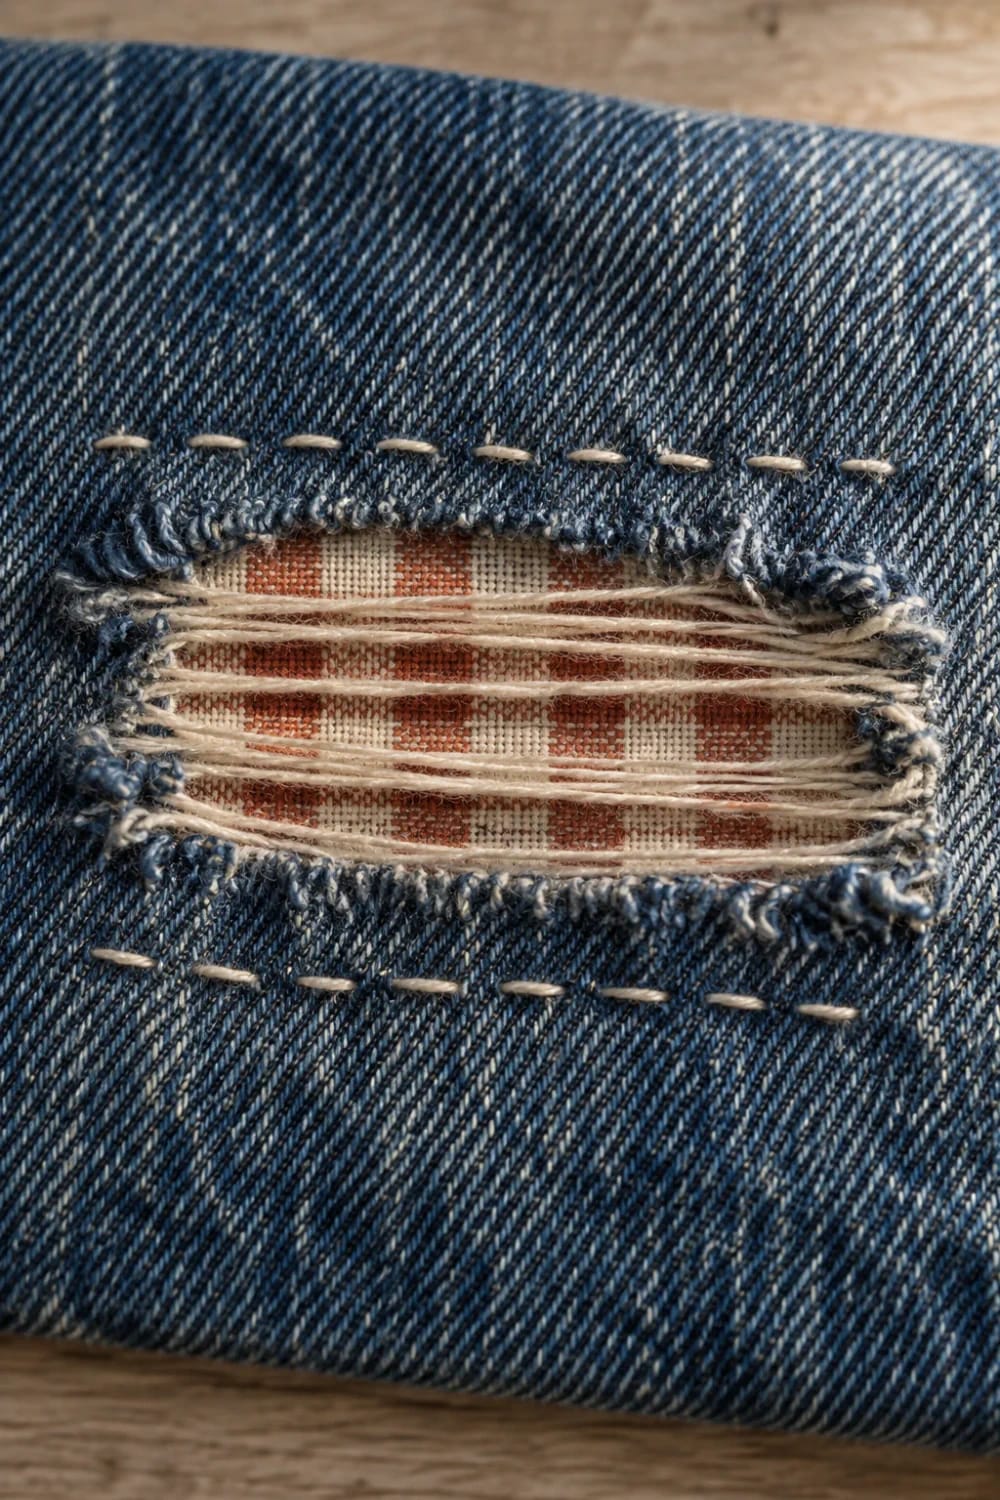
An unbacked ladder is a countdown. Each rung carries the load the warp used to, and when the first one snaps the next one takes more, so the opening that started at three inches is at five by spring. Backing it is the difference between a modification and a slow failure, and it is also the step that decides whether you still have these next winter.
What to back it with
| Backing | How the ladder reads | What happens under strain | Use it when |
|---|---|---|---|
| Nothing | Crisp white rungs against skin | Rungs snap one at a time; opening roughly doubles within a season of regular wear | You want the pair to keep changing |
| Fusible interfacing only | Rungs flatten slightly against a matte film | Adhesive edges lift after five or six washes, then peel in sheets | A fast fix on a pair you rarely launder |
| Cotton shirting, stitched | A pale field behind the rungs, low contrast | Holds; the stitching carries the load instead of the rungs | You want the ladder to stay the size you cut it |
| Denim scrap, stitched | Reads as a mend rather than a rip | Holds longest, at the cost of bulk across the kneecap | Heavyweight denim and workwear |
Fuse it if you must, but stitch it either way
Iron-on backing alone is a temporary answer, and anyone who has peeled a curling patch off a knee in a bathroom knows it. Use it the way it works properly: fuse the patch to position it, then run two rows of stitch through patch and denim together, above and below the opening, so the adhesive is holding nothing structural. Cut the patch with rounded corners; square corners are where the lifting starts.
Cotton faced rather than synthetic, and supplied in a spread of blue and black shades so you can match the wash instead of announcing the repair.
ZEFFFKA 100% cotton denim iron-on patches, 10 pieces, assorted blue and blackIf the jeans have any stretch in them
Back them before you cut, not after. Elastane is the thing that ruins a ladder: the weft in a stretch denim is usually core spun around an elastic filament, so the rungs recoil into little curls instead of lying flat, and the opening loses its shape the first time you bend the knee. If you have a choice at the thrift rack, take the 100 percent cotton pair over the one with 2 percent elastane every time, even if it fits worse on the hanger.
 Multi Wash Patchwork Jeans From Old Denim Scraps: The Decisions That Make the Pair How to read the four different shades hiding in one worn pair, and which one to put behind a hole.
4. Sand the knee before you cut a single thread
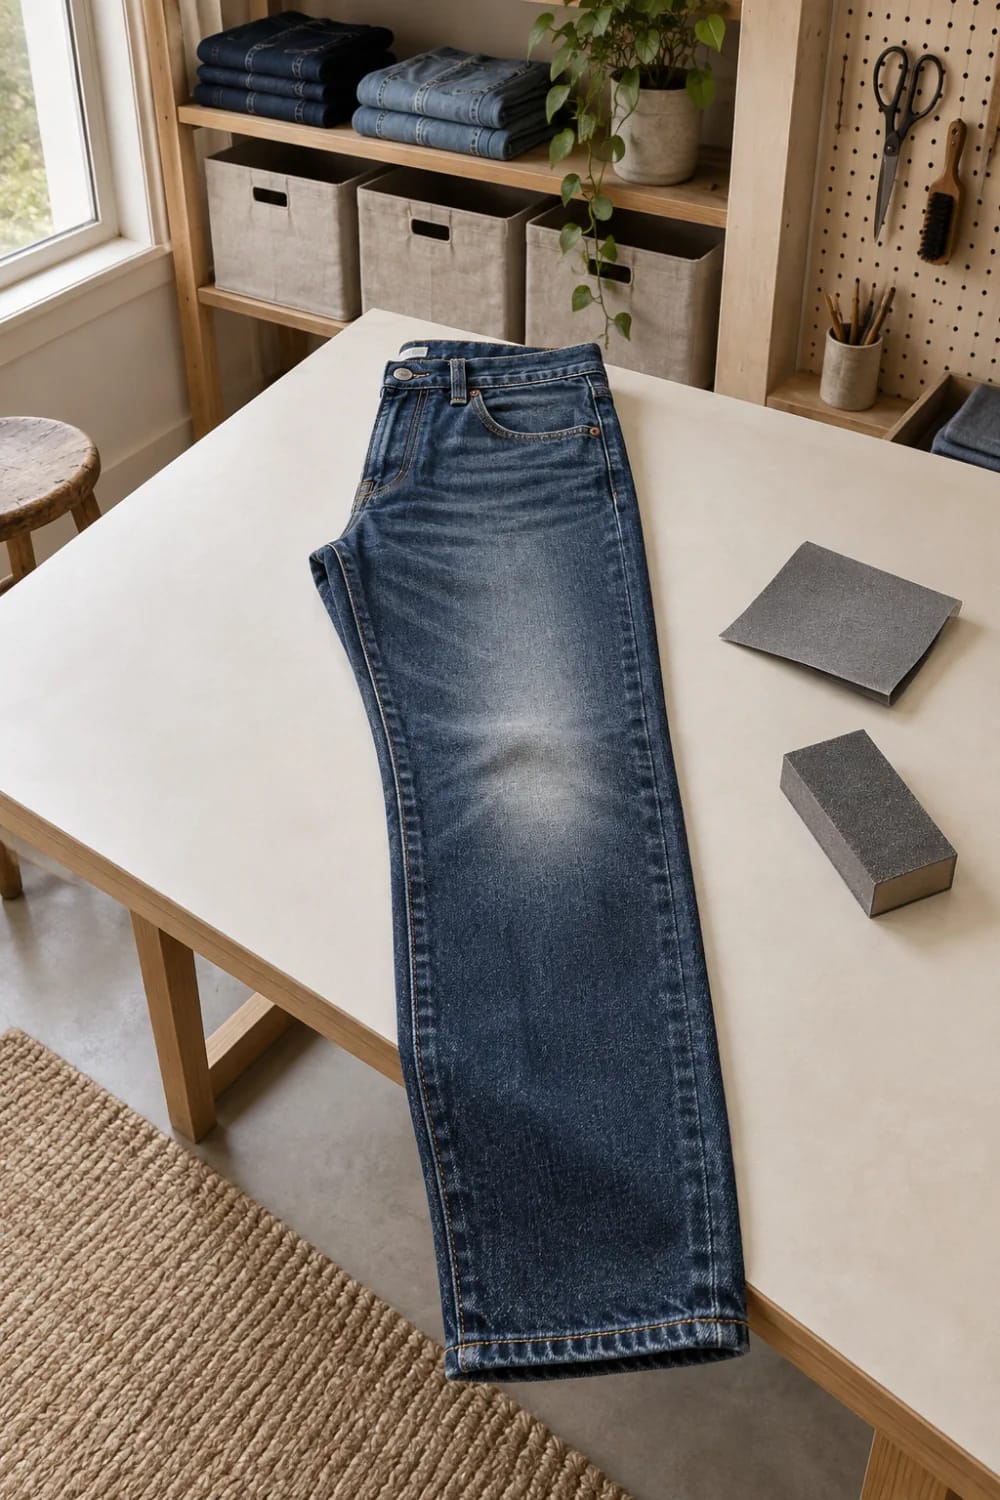
A ladder cut into fabric that is still full-strength indigo looks like what it is, which is a hole somebody made on a Tuesday. Sand the surrounding area first with 150 to 220 grit until the twill grain breaks up and the surface goes chalky, then cut into the middle of that faded patch. Fifteen minutes of sanding buys more realism than any amount of care with the tweezers.
Where a real knee actually wears
Not in a circle. Knee wear runs as a horizontal band across the cap with vertical creases feeding into it from above, because the fabric folds along the same lines every time the leg bends. Sand along those lines, harder at the fold peaks and lighter in between, and stop while there is still some blue left; the areas that go fully white on a worn pair are narrow.
Worth knowing what you are opting out of by doing this at home. Commercial distressing was built on sandblasting, which drove silica dust into workers’ lungs and caused an outbreak of silicosis serious enough that Turkey banned the practice outright in 2009 and a long list of brands pledged to drop it. The industry’s replacement is laser abrasion, which Jeanologia first put into production in 1999 and which removes indigo by sublimating the dye rather than blasting it off. That shift is real and it is genuinely better, and it is also the cleanest argument for keeping an old pair in rotation rather than buying a new distressed one; the same logic runs through what sustainability in fashion actually means in practice.
5. Tint the white wefts instead of leaving them bright
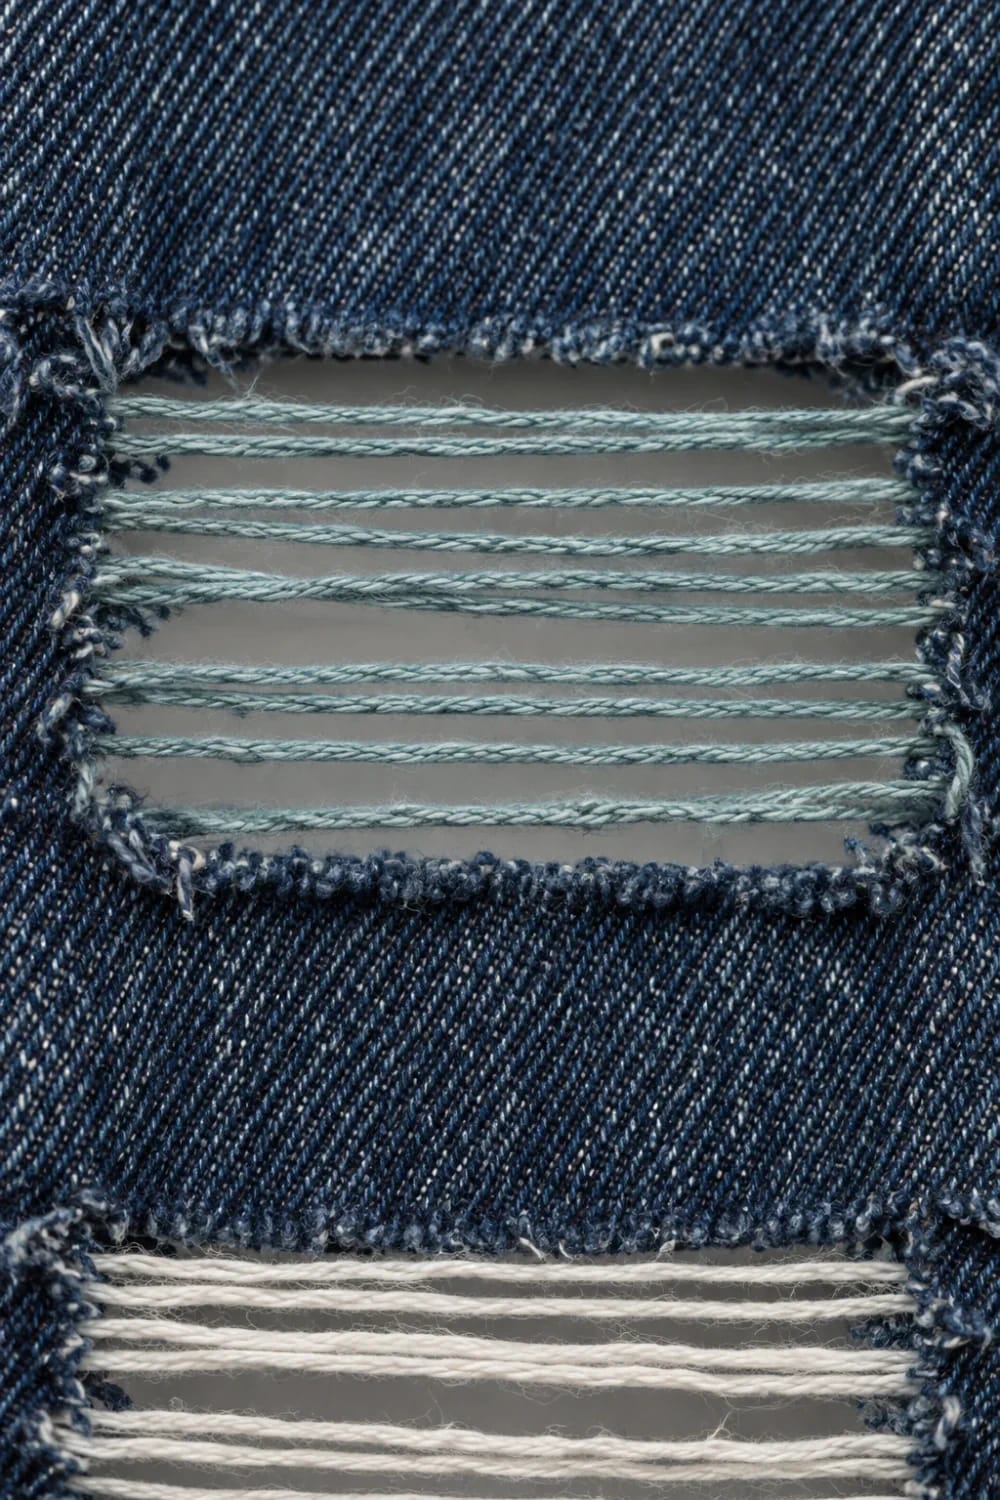
Chalk white rungs against dark indigo is the loudest version of this and it dates the pair to whichever season it was cut in. A weak dye bath knocks the wefts back three or four shades and the whole thing stops shouting. Tea works if the target is warm sand; for anything blue or grey you need real fabric dye, since the wefts are cotton and will take it readily while the indigo warp barely shifts.
Mix at roughly a quarter of the strength on the bottle, dip only the knee area with the rest of the leg held clear, and check every 30 seconds, because cotton takes color fast and you cannot go back. A dilute bath of Rit all-purpose liquid dye in denim blue gets rungs that read as shadow rather than highlight.
Chlorine bleach breaks down cellulose, and after you have pulled the warp out the rungs are the thinnest cotton anywhere in the garment. There is no margin in a single exposed thread. People reach for bleach to brighten the wefts and end up with lint in the machine filter and a knee that is now a hole. If you want the rungs lighter than they are, sun the jeans damp for a few days instead; it is slower and it will not dissolve anything.
6. Sashiko the ladder in place and let the stitches show
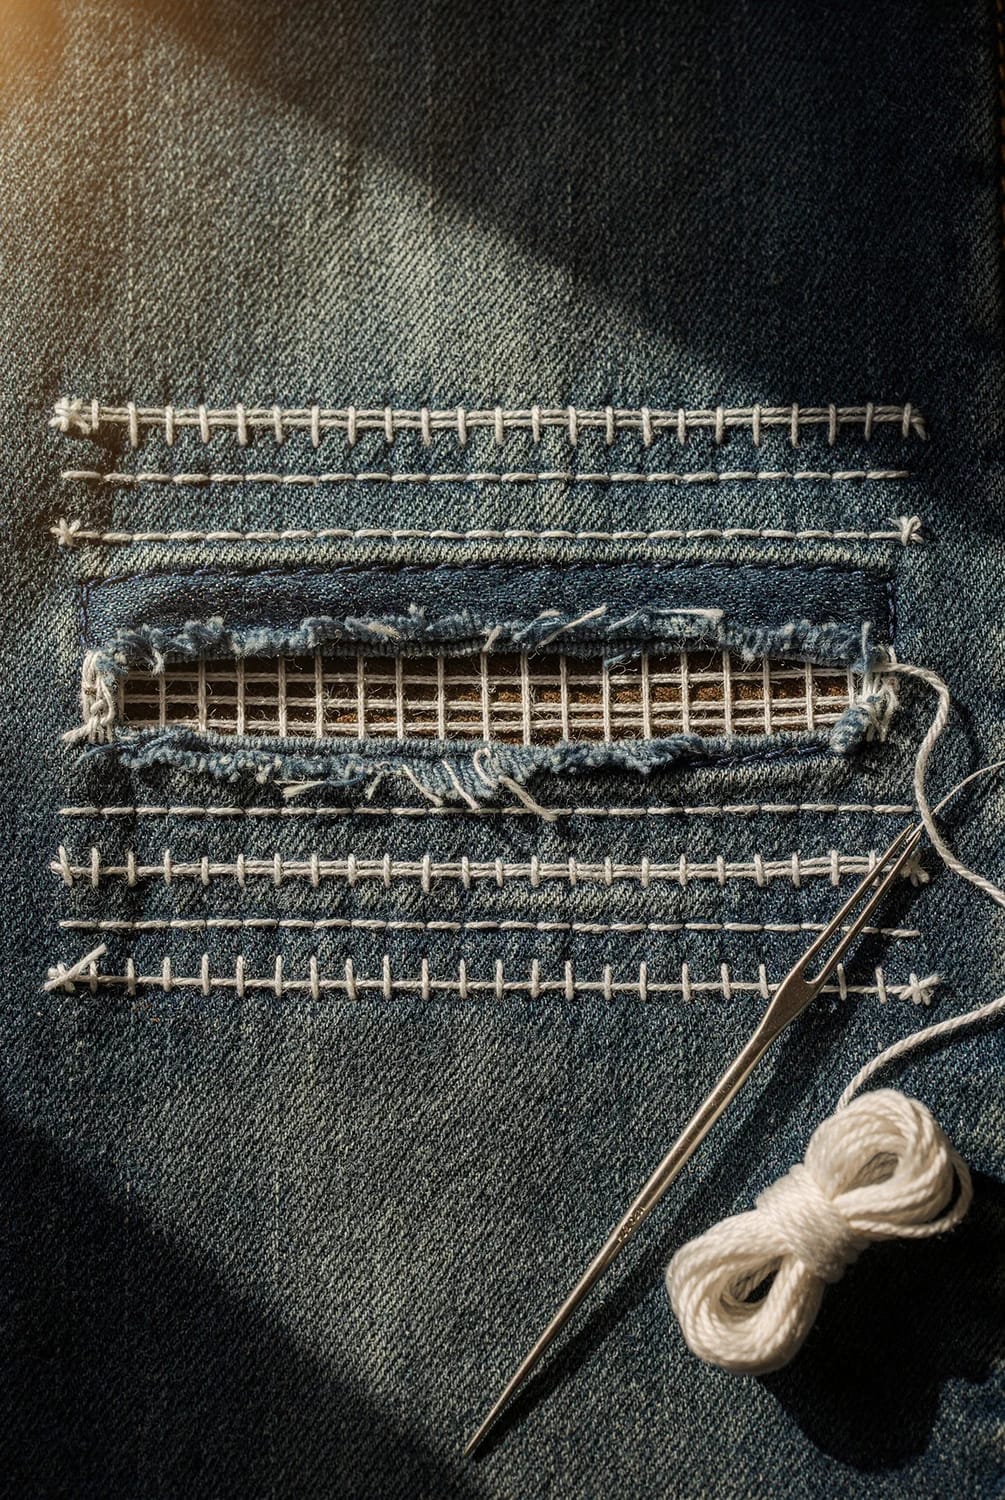
This is the version that lasts and the version that looks least like a trend, because you are building the reinforcement into the visible design rather than hiding it under the leg. Rows of running stitch above and below the ladder take the strain off the rungs, and the contrast thread makes the whole area read as deliberate. Visible mending has been mainstream for several years now, so a stitched knee no longer announces anything in particular about the person wearing it.
Stitch direction matters more than pattern
Run the rows horizontally, parallel to the rungs and to the weft. Stitch lines that cross the opening vertically pull against the direction the knee flexes and they will snap, taking a rung with them each time. Start and finish each row at least an inch into sound denim; a row that terminates inside the thin zone is an anchor point sitting in fabric that cannot hold it.
Do this
- Chalk the row lines before you thread the needle. A sashiko row that wanders is more visible than a crooked seam, and tailor’s chalk brushes out.
- Load four or five stitches onto the needle and pull the whole run through at once, which is what the length of the needle is actually for.
- Leave the rungs standing proud of the stitching so the knee still reads as a ladder and not as a patch.
Avoid
- Pulling tight enough to pucker. The row should lie flat with the denim unstressed around it.
- Backstitching at the row ends. It stiffens one spot, and that spot becomes the next thing to fail. Weave the tail back under the last few stitches instead.
Thread weight, and what not to use
Sashiko thread is a thick loosely twisted cotton that sits on the surface of the cloth instead of burying itself, which is why a row of it reads from across a room. Six-strand embroidery floss does the opposite: it separates inside the fabric and goes fuzzy after two washes. If you are buying one thing for this, buy long needles, because a sashiko stitch is loaded four or five at a time on the needle before you pull through, and a short quilting needle cannot do it.
A tube of assorted lengths, so you can find out which one suits your hand before committing to a pack of one size.
Tulip long sashiko needles, assorted tube of 6One aside: white thread on dark indigo is the obvious pairing and it is fine, but ecru or a faded mustard sits better against a pair you have already sanded, since nothing else on the knee is bright white anymore. The offcuts from all of this, incidentally, are worth keeping; there is a long list of things to do with denim scraps that starts with the strips you just trimmed off a backing patch.
 Butterfly Embroidery Jeans: Ideas Worth Stitching Onto Denim You Already Own Placement rules for stitching onto a knee that has already gone thin, so it reads as part of the garment.
7. Ladder only the outer layer of a double knee work pant
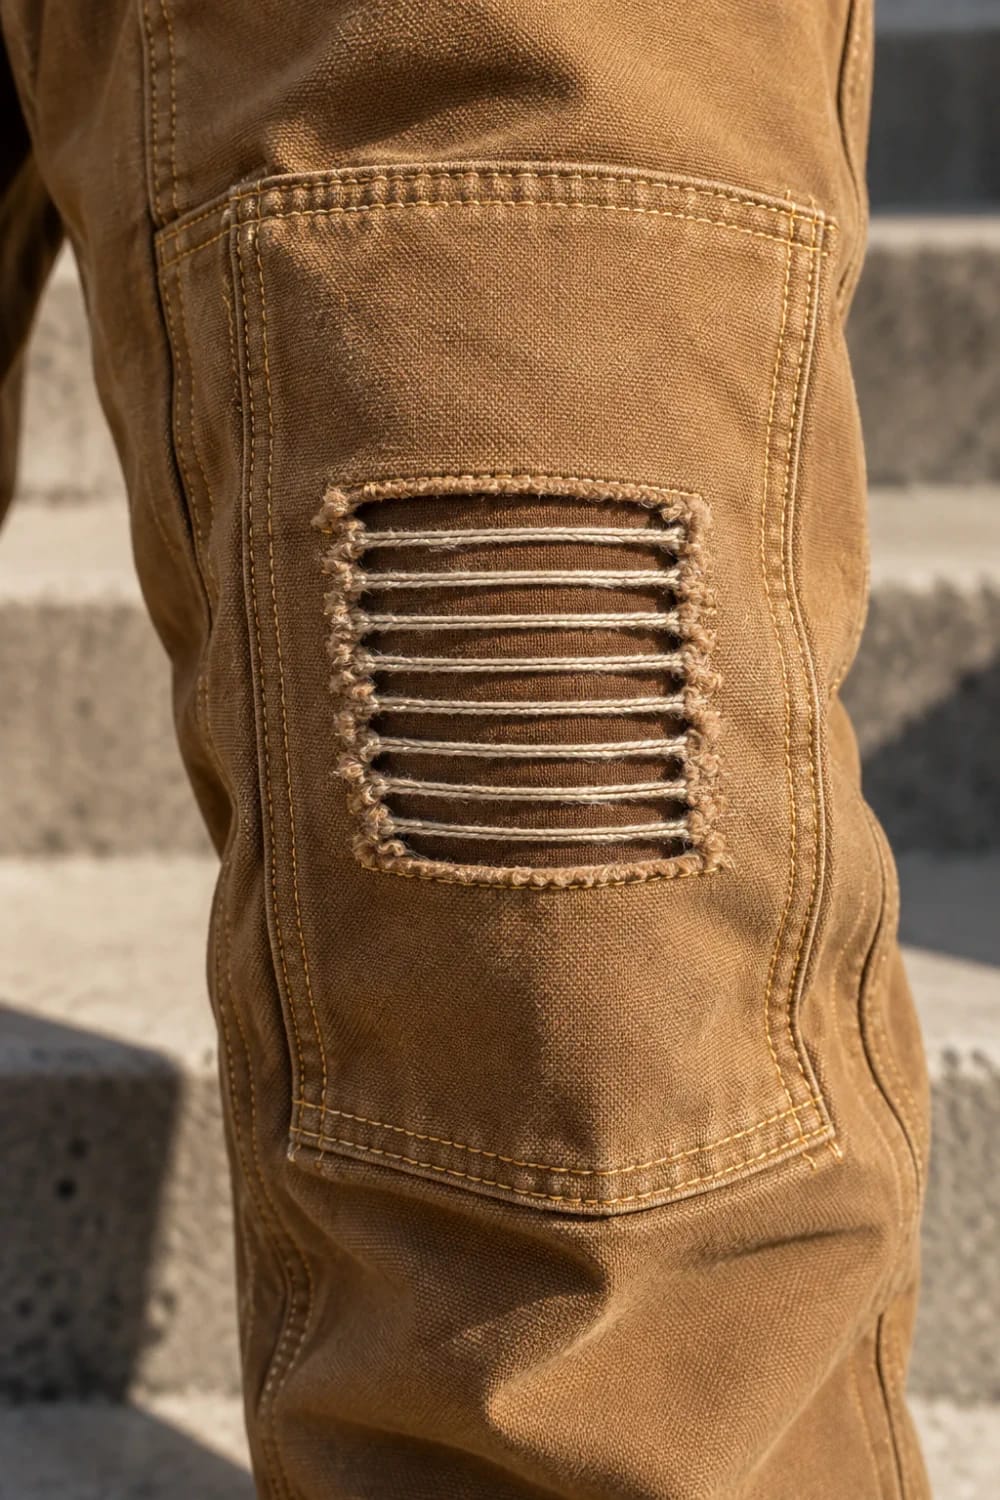
Carhartt-style double knee pants carry a second panel stitched over the knee, and that panel is the one thing in this whole article that lets you cut a ladder with no structural consequence at all. Open the outer layer only and the inner one stays intact behind it, so you get the texture without the draft and without the countdown from item three. It also solves the problem of a ladder you cannot wear to work.
The catch is that duck canvas is not twill and it does not ladder cleanly; the threads are plied and stubbier, so expect rungs that look chunkier and less regular than denim gives you. On tan duck against a tan inner layer the contrast is low enough that the effect is subtle, which some people will read as the point and others as a waste of an afternoon. I lean toward the first. If the pant is genuinely past wearing, there are better uses for it than practice, and most of them are in this list of things to build out of dead denim.
Order matters more than technique on all of this. Sand first, cut second, back third, wash last, because every one of those steps changes what the one before it looks like and there is no undoing a cut. The washing machine is not optional either: a fresh ladder looks manufactured until a cold cycle has settled the cut fibers and softened the edges.
What I could not find was any reliable figure for how many washes a backed ladder actually survives. The people making claims about it are selling either patches or jeans, and the range they quote is wide enough to be useless. My own rule is that a stitched cotton backing outlasts a fused one by a long way, which the peeling corners on any fused repair will demonstrate for free.
And if you are choosing a pair at the thrift rack specifically to do this, take weight over fit. A 12 to 14 ounce rigid denim ladders cleanly and holds its rungs; anything under 10 ounces gives you threads too fine to survive the pulling, which you will discover about 40 minutes in.
Related Posts
- Butterfly Embroidery Jeans: Ideas Worth Stitching Onto Denim You Already Own
- Multi Wash Patchwork Jeans From Old Denim Scraps: The Decisions That Make the Pair
- 11 Upcycled Jeans Decor Ideas for the Pile You Can’t Toss
- 57 Innovative Upcycled Jeans Ideas: Transform Your Old Denim into Chic Fashion and Home Decor
- 12 Denim Christmas Tree Skirt Ideas to Make From Upcycled Jeans
- 13 DIY Denim Christmas Stockings From Old Jeans