

Most of what gets sold as a terracotta ornament is not terracotta. It is white air-dry clay tinted a dusty pink, rolled thin, and sealed with a gloss varnish that turns the whole thing slightly plastic under a string light. Real terracotta reads differently: it is opaque, faintly orange-brown, matte to the point of chalkiness, and it absorbs light instead of bouncing it. That difference is the entire reason this material works on an earthy tree, and it is why the nine ornaments below are built either from actual fired clay you already own or from air-dry clay handled so it stops imitating something else.
Worth setting expectations on durability first. Unless you have kiln access, everything here is an indoor ornament with a life measured in years rather than decades, and the sections below say plainly where that matters.

Broken Pot Shards Are the Terracotta You Already Own
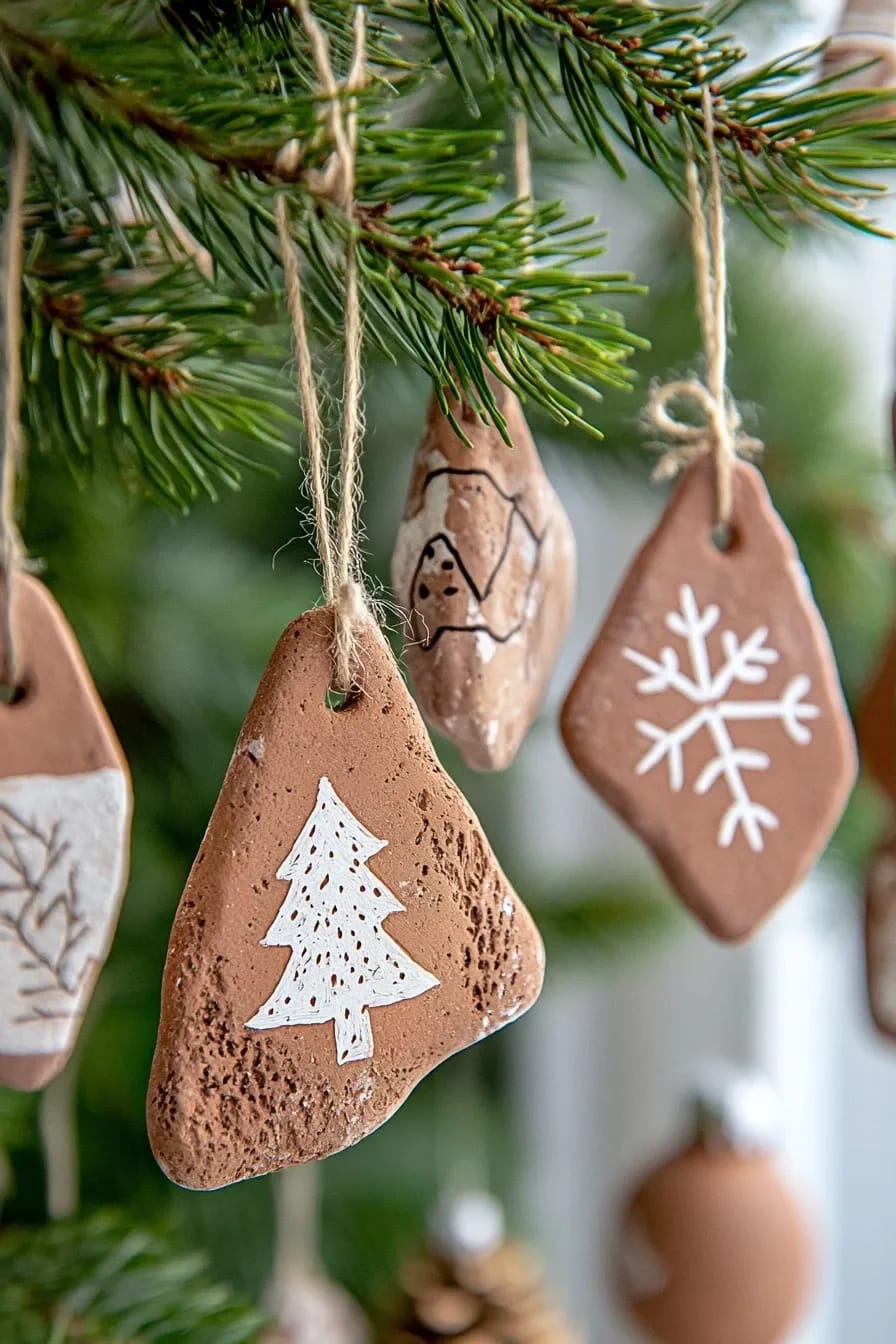
Granted, this only appeals if you already have a cracked pot in the garden, but most people do, and a single broken 10-inch pot yields somewhere between eight and fifteen usable pieces. The material is genuinely fired terracotta, which means it has the density and the weathering the air-dry versions spend three steps trying to fake: lime bloom, a chalk line where the soil sat, the slight colour shift on the buried half. You cannot buy that finish. It takes a pot two seasons outdoors to develop it.
Curvature is the thing that makes these read as deliberate rather than salvaged. A flat disc of clay looks like a coaster with a hole in it; a shard from the shoulder of a pot has a compound curve that catches light on one edge and holds shadow on the other, which is why they photograph better than anything else on this list.
Which shards to keep and which to bin
Keep anything with a section of the original rim on it, since the rolled lip gives you a finished edge to hang from and reads as intentional design. Keep the curved wall pieces roughly two to four inches across. Bin the base pieces, which are flat, thick, and dull, and bin anything under about an inch and a half thick at the fracture, because those chip further while you are drilling. Pieces with a hairline crack running off the fracture will split; that crack spreads the moment a bit touches it.
Drilling the hanging hole without losing the piece
Use a diamond or carbide tile bit at the drill's slowest speed, tape the spot first so the bit cannot skate, and keep water on the contact point the entire time. Never use the hammer setting. Speedy Hire's guidance on drilling terracotta planters is worth borrowing here: soak the piece for around thirty minutes beforehand, since saturated terracotta is measurably less brittle than dry. Support the shard on a folded towel, start the bit angled to cut a divot, then bring it upright. A quarter-inch hole is plenty, and it should sit at least half an inch back from any edge.
Mini Terracotta Pot Bells With a Wooden Bead for a Clapper
The 2-inch nursery pot, upside down, is already a bell shape, and it costs well under a dollar in a multipack at any garden centre. Thread jute up through the drainage hole, knot a large wooden bead inside so it swings against the wall, and knot again on top for the hanger. That is the whole build, which is why it survives being handed to a seven-year-old.
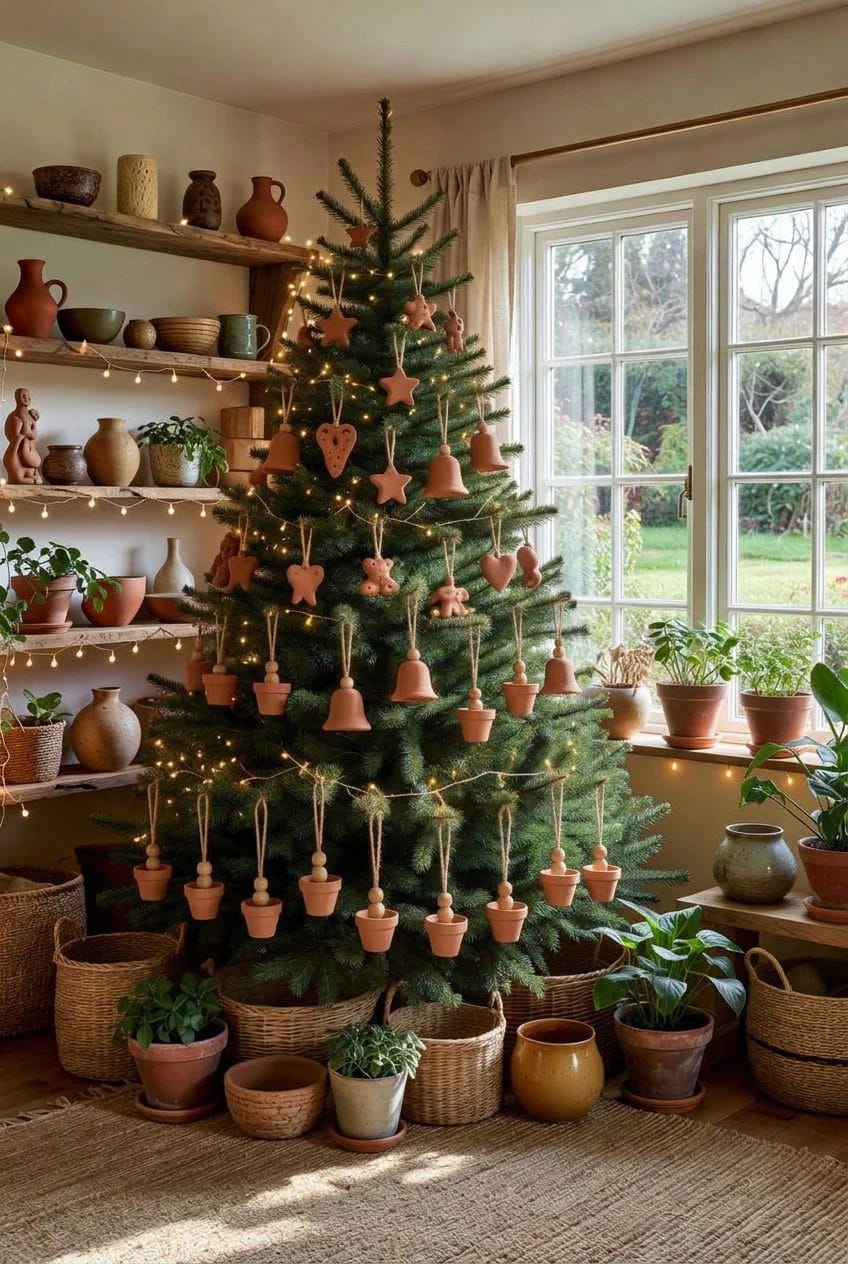
Two details separate this from the version that looks like a school project. Use a bead wide enough to actually strike the wall, around 20mm, because a small bead just hangs there silently in the middle. And leave the pot unpainted. Every tutorial that reaches for white paint and a snowflake stencil at this stage is undoing the material.
Stamped Clay Medallions With White Slip Rubbed Into the Lines
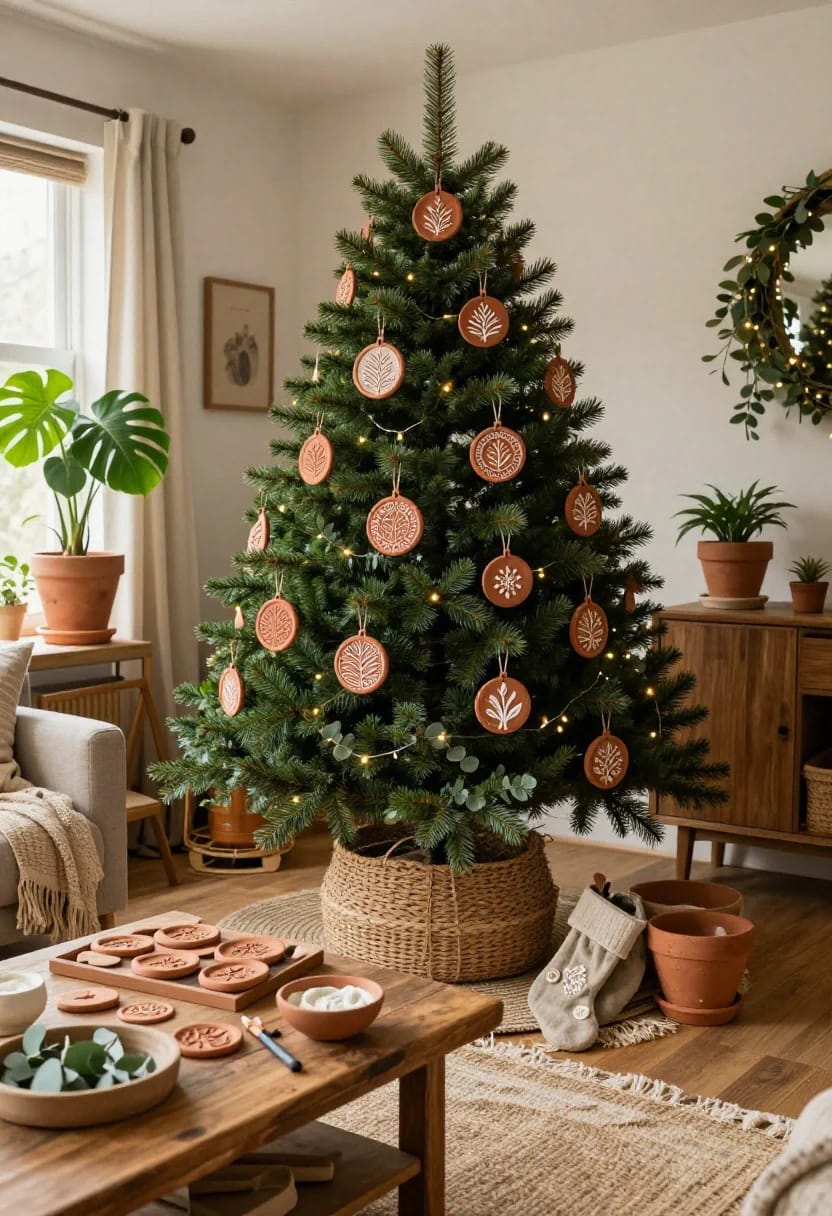
This is the technique that gets the most out of air-dry clay, because it works with the material's porosity instead of covering it. Roll to about a quarter inch, press a pattern in with anything textured (a bolt head, a length of hardware cloth, the edge of a carved wooden butter stamp), let the piece dry to leather-hard, then brush thinned white slip or watered-down chalk paint across the face and wipe it back with a damp cloth. The pigment stays in the recesses. The raised clay comes back orange.
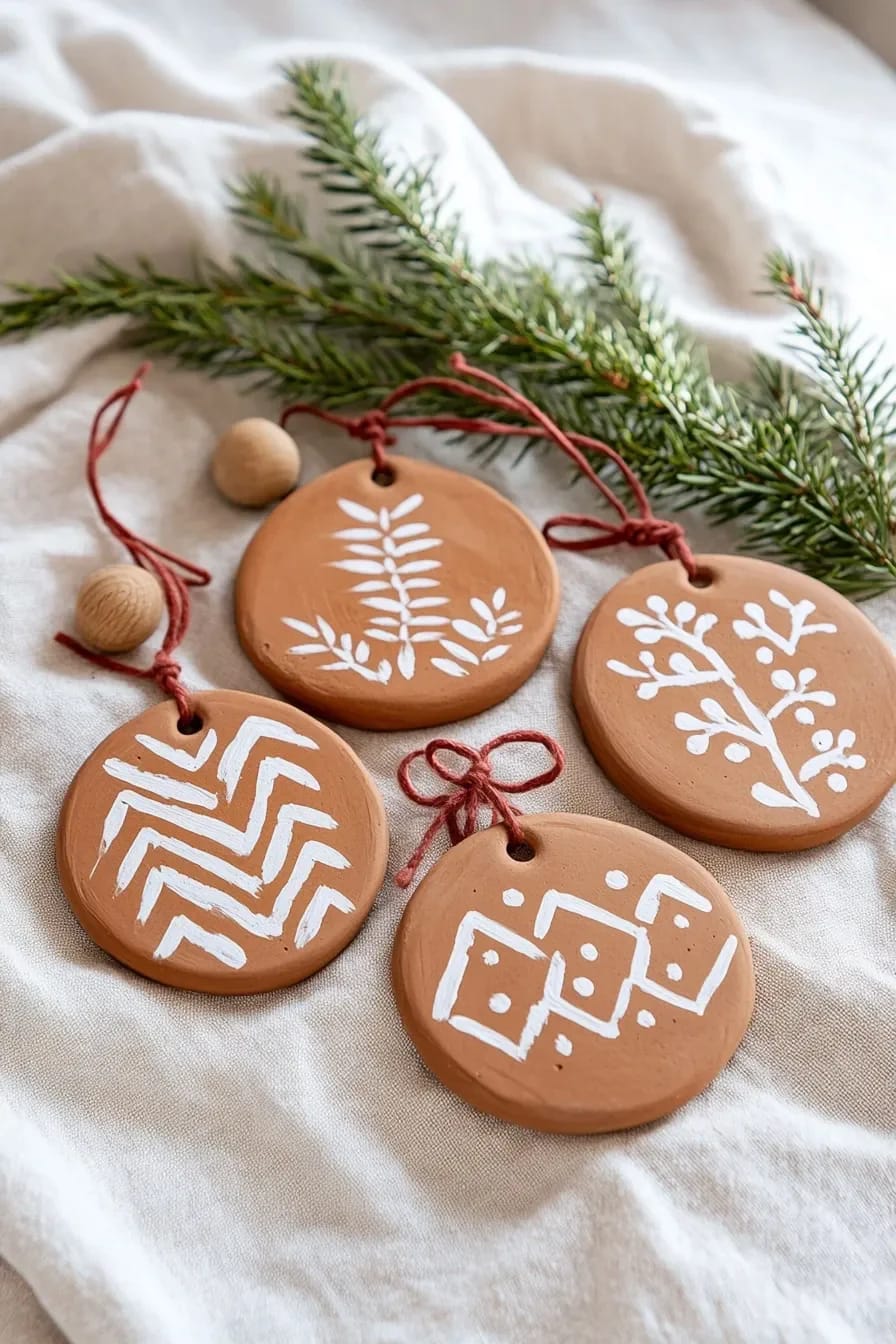
The reason to reach for this rather than a botanical imprint is control of contrast, though pressed botanicals are the better-looking option when the plant matter is handled correctly, and the pressing-and-removing sequence that keeps a fern imprint from rotting into a brown smear is the part people skip. Stamped patterns are more forgiving. You can make thirty of them in an afternoon and they will all match.
On clay choice: DAS Terracotta, the Italian air-hardening clay, dries in roughly 24 hours per centimetre of thickness and comes out of the bag close to the right colour, so a quarter-inch medallion is dry overnight. AMACO's terra cotta air-dry clay is the other reasonable option, and it has an advantage worth knowing about if you ever get kiln access: the same clay can be fired to cone 04, which converts it from a fragile decoration into permanent ceramic. Neither is waterproof as-is. Varnish and PVA give water resistance; only epoxy resin makes air-dry clay genuinely waterproof, and epoxy on an ornament looks exactly as bad as it sounds.
 25 Earthy Christmas Decor Ideas for a Warm, Natural Home Where the clay palette goes once it leaves the tree: mantels, table, doorways.
Pierced Terracotta Lanterns That Hang Over a Tree Light

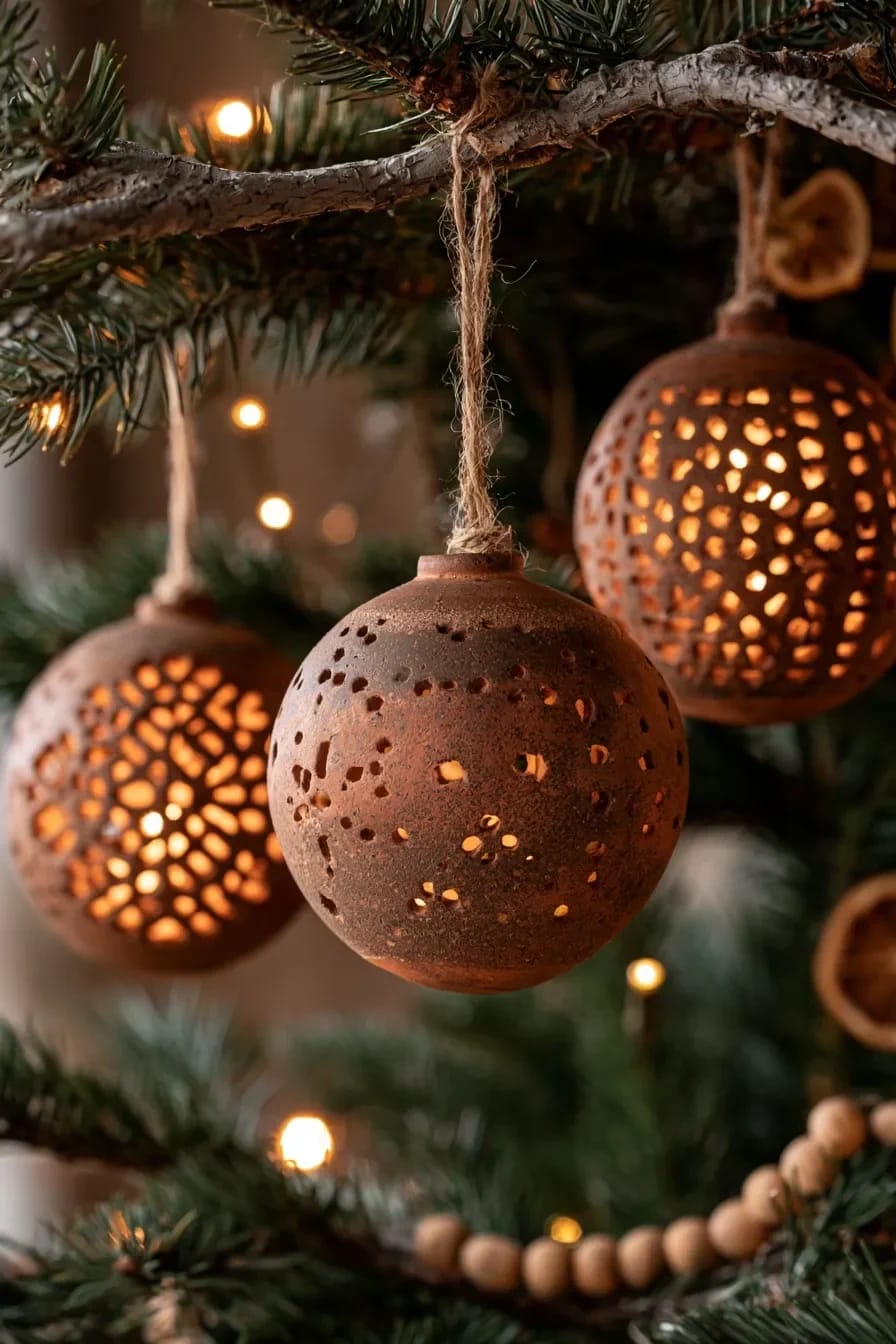
Hollow the ornament, pierce it, and hang it so an existing bulb from the string sits inside. This is the one idea here that changes what the tree looks like at night rather than adding another object to it, and it borrows its whole logic from the restraint that makes a punched tin can throw a readable pattern instead of a blur: fewer holes, better spaced, in a pattern that survives being scaled down.
Form it over a small balloon or around a crumpled paper core you can pull out later, keeping walls around three-eighths of an inch. Thinner cracks; thicker never dries through the middle.
Pierce at leather-hard, not before
Wet clay tears and drags around a hole; bone-dry clay chips out the far side. Leather-hard is the window, usually somewhere between eight and twenty-four hours in, and the test is that the surface takes a fingernail mark but no fingerprint. Use a drinking straw for the round holes and a craft knife for the slots. Twist the straw rather than pushing it.
LED bulbs only, and why that matters here
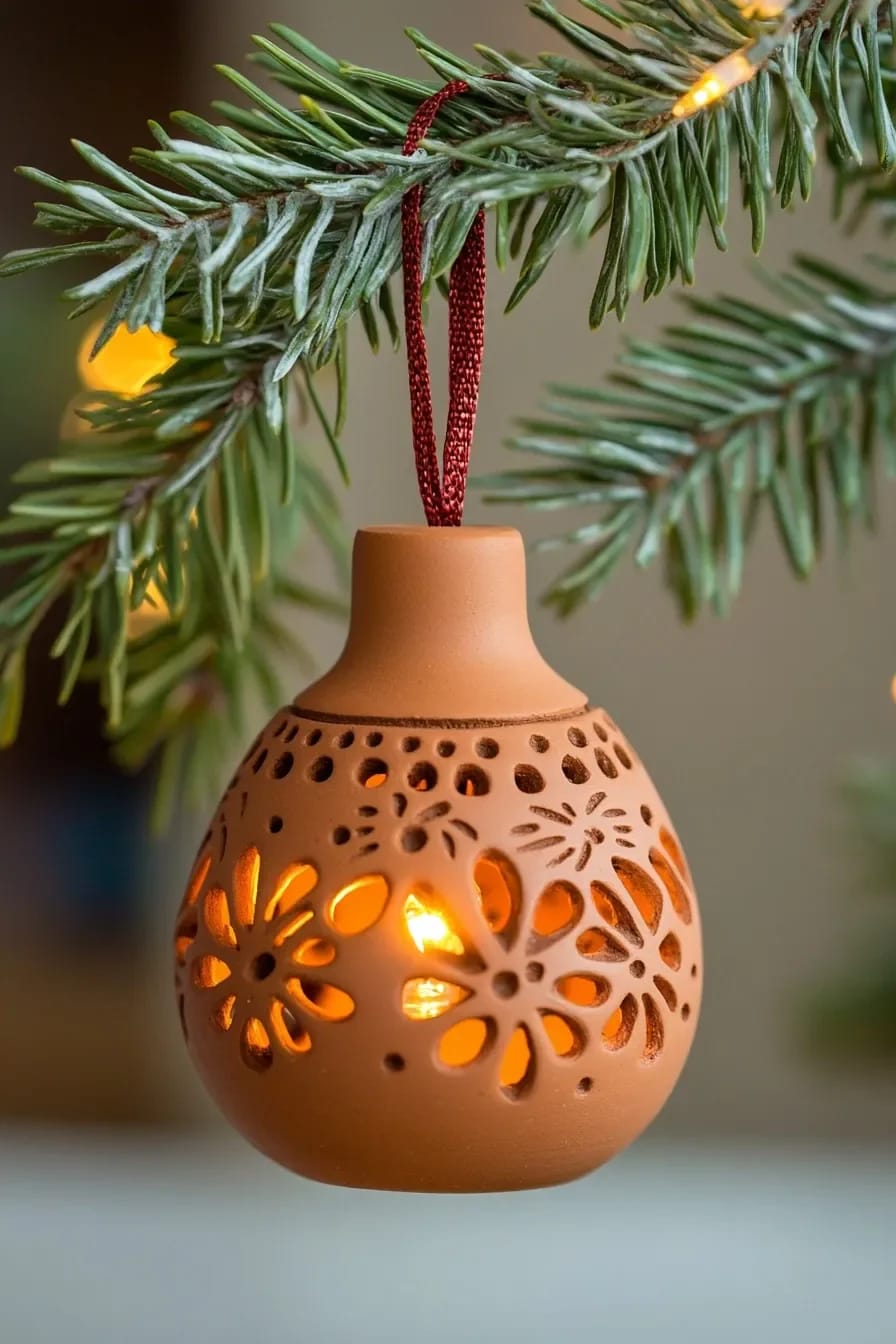
Incandescent mini bulbs run hot enough that I would not enclose one in anything, and a hollow clay shell is an oven wall. LED strings run cool, which is what makes this workable at all. Check the string first: if the bulbs are warm to hold after ten minutes, do not use them for this. Hang the lanterns on the outer third of the branches, where the clay is not touching needles.
Unglazed Clay Drops That Hold Scent for About a Week
Unglazed terracotta is porous, which is usually a defect and here is the point: three or four drops of fir or clove oil soak in and release slowly for roughly a week before it needs topping up. Commercial makers already sell this, listing handmade terracotta ornaments as essential oil diffusers, and the material does the work without any mechanism at all.
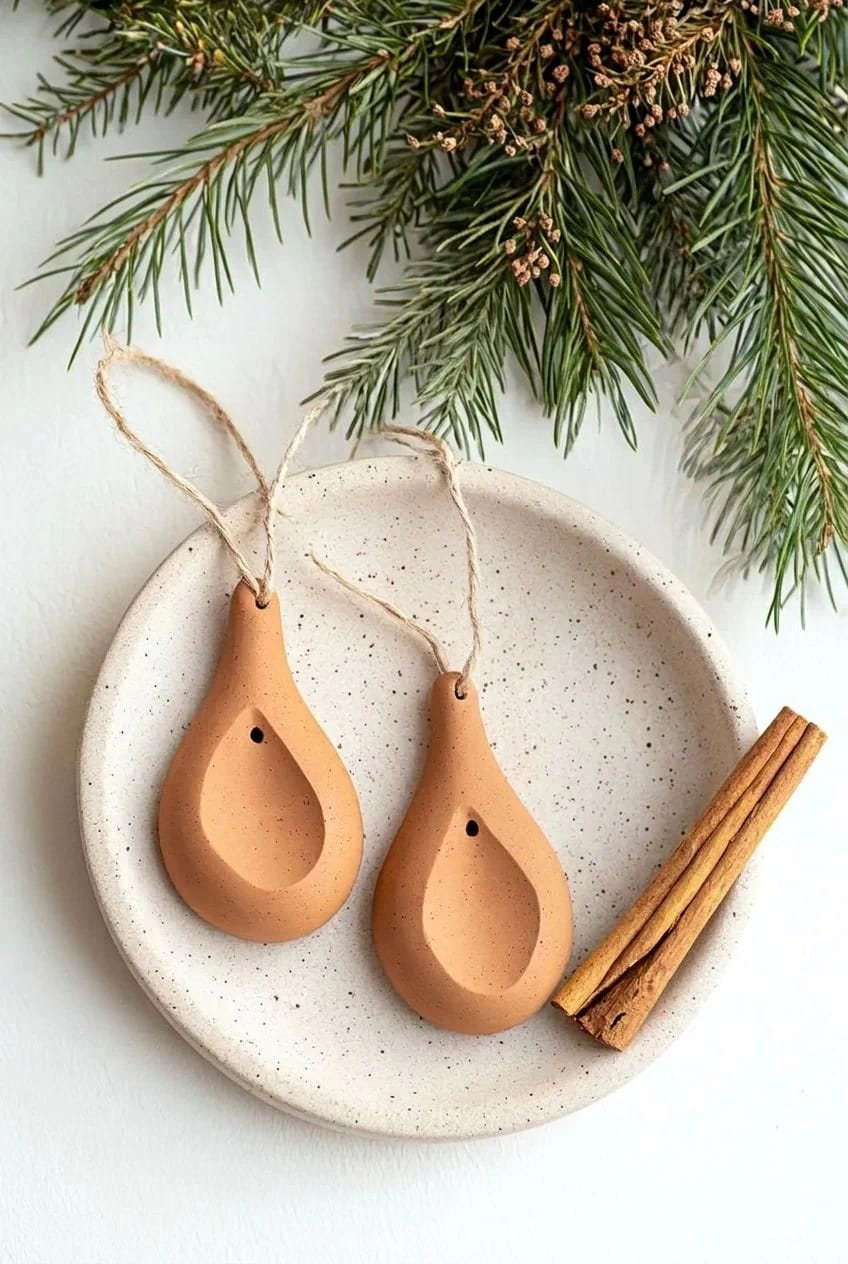
Keep these plain and keep them thick. A thin disc holds almost nothing; a half-inch-thick drop holds enough to notice. They also solve the scent problem for anyone with an artificial tree, which is the same job dried citrus does on a tree that has no smell of its own, only without the slow browning.
Tapered Terracotta Icicles Hung in Threes
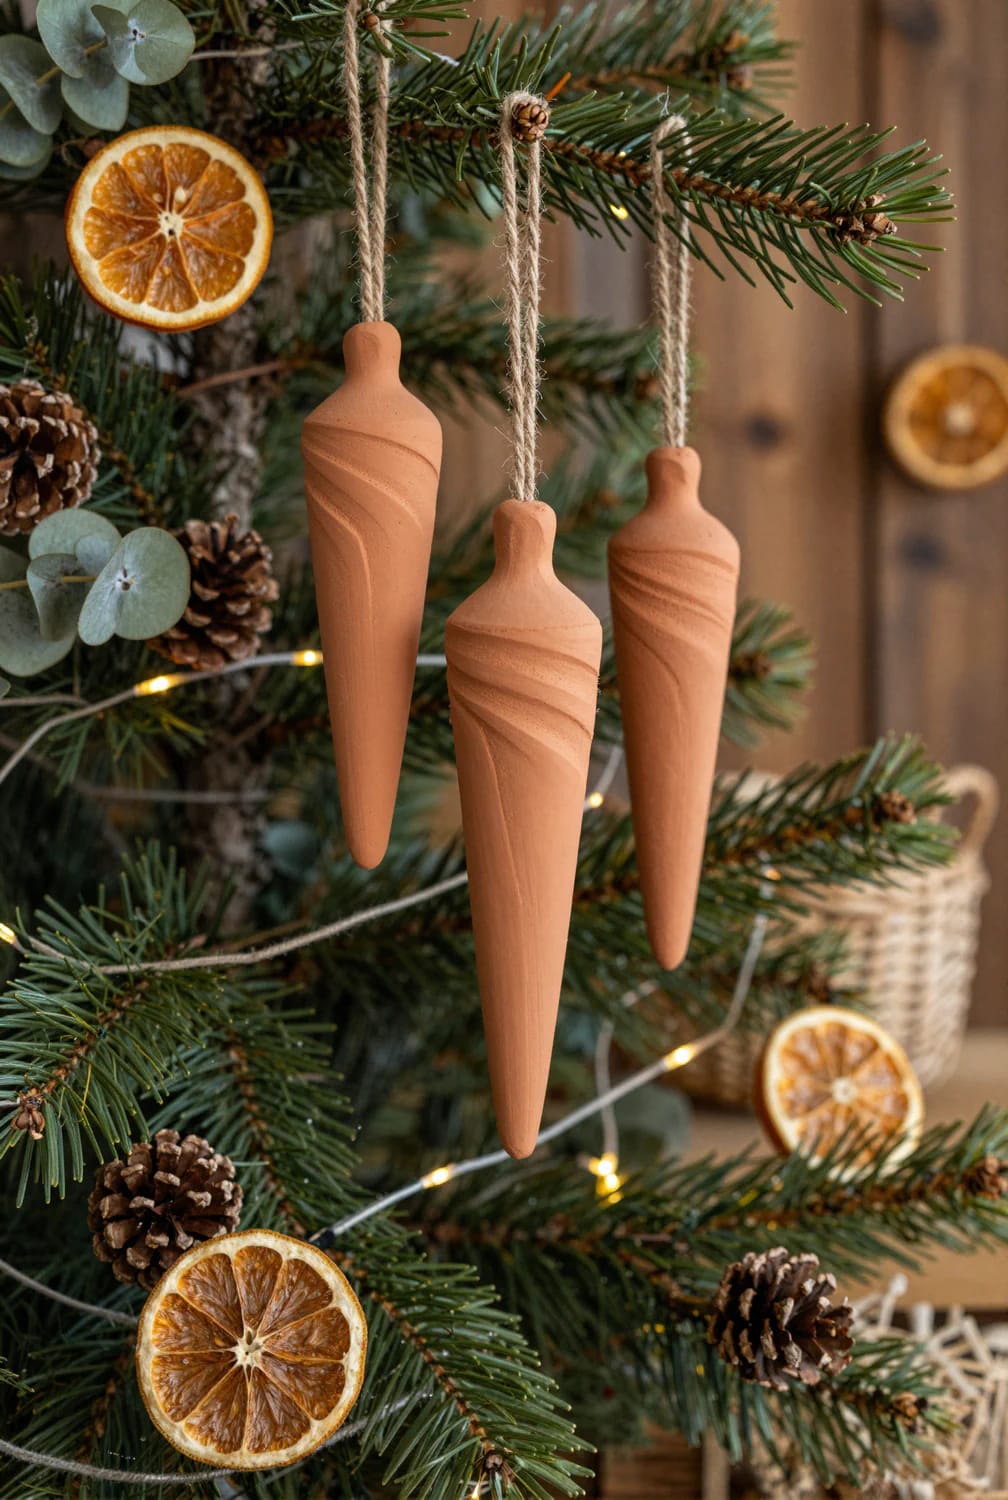
Roll a coil, taper one end between your palms, and leave the finger ridges in. Hung as singles they disappear; hung in threes at staggered lengths from one branch tip, they give the tree vertical lines it otherwise only gets from ribbon. Three is the count that works, and five reads as a mobile.

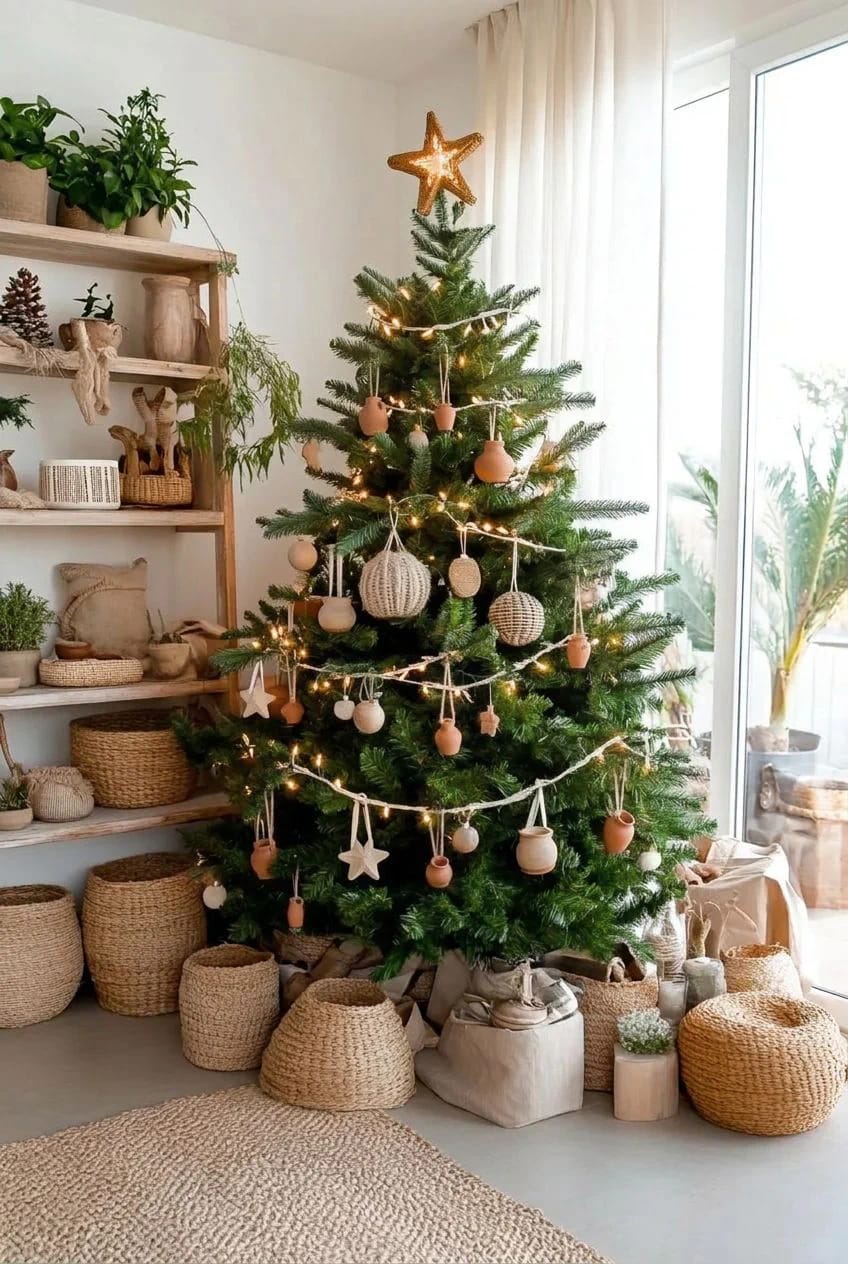
Star and Snowflake Tiles Finished With a Raw Wood Bead
The wood bead at the top of the cord is not decoration, it is a colour bridge. Pale unfinished beech or birch against orange-brown clay is the pairing that stops a tree of terracotta from reading as monotone, and it is the same logic behind wood slice ornaments where the burn is kept sparse enough for the grain to stay visible.

Cut the shapes with a cookie cutter, then knock the sharp points back with a damp finger before drying, because a crisp cutter edge on clay reads as machine-made and it chips first anyway. Three inches is the size that holds up at tree distance. A few notes on what actually differs between the two shapes:
- Stars want thickness. At an eighth of an inch the arms snap when a branch shifts.
- Snowflakes want the opposite treatment: fewer cut-outs than you think, since every interior hole is a crack waiting for January.
- Bead above the knot, not below it. Below, it swings against the clay and eventually chips the hole.
A Rolled Terracotta Bead Garland to Pull the Tree Together
Individual ornaments are punctuation and a garland is the sentence, which is why a tree with nine kinds of clay object on it still looks scattered until something horizontal runs through it. Strung terracotta beads on jute do that job in the same way a strand of cranberries and popcorn organises a sparse vintage tree, except this one comes back out of the box intact every year.
Rolling beads that dry round instead of oval

Beads flatten wherever they touch a surface while drying. Thread them onto a bamboo skewer immediately after piercing and rest the skewer across two mugs so nothing contacts a table; rotate once partway through. Six feet of garland is about a hundred beads, which sounds worse than it is, and irregular sizing helps rather than hurts.
Embossed Hearts With the Year Stamped on the Back
Terracotta hearts with a pressed border on the front and a date stamped into the back are the ornament people keep, and they cost about eleven cents of clay. Use metal letter stamps if you have them, a ballpoint pen if you do not, and accept the uneven spacing that comes with hand-stamping.

The vintage precedent is worth a look before you design yours: sets of stamped Portuguese terracotta ornaments from the mid-century still circulate on resale sites, red ribbon through the top, the tallest piece around three inches, and the shapes are simple to the point of blunt. Santa, a bell, a heart, a rocking horse. If you want the same object in a different material, the cork reindeer worth making are the ones that skip the googly eyes entirely.

Skip the sealer on all of these. Matte varnish dulls the colour and gloss varnish is what makes air-dry clay look like a moulded resin ornament from a discount bin. Bare clay is the finish.
If you are making more than one kind, start with the pot shards, because they set the exact colour everything else has to live next to. No bag of air-dry clay matches a weathered pot precisely, and it is better to learn that before you have stamped thirty medallions in a shade that fights the shards.
None of this survives outdoors through a freeze-thaw cycle unless it has been kiln-fired, and the pierced lanterns are the first casualty, since every hole is a place for water to sit and expand. Treat them as indoor pieces.
Community studios will often fire other people's work for a shelf fee, which turns the air-dry pieces into real ceramic at cone 04, but I could not find pricing consistent enough to quote here. It varies by studio and by how much shelf space your batch takes, so ask before you plan a tree's worth around it.
Related Posts
- Air Dry Clay Ornaments With Pressed Fern and Leaf Imprints
- 11 DIY Cork Reindeer Christmas Ornaments for a Rustic Tree
- 13 Birdseed Ornaments for an Outdoor Christmas Tree the Birds Will Actually Eat
- 25 Earthy Christmas Decor Ideas for a Warm, Natural Home
- How to Build a Pallet Wood Christmas Tree for Your Porch
- Rustic Driftwood Christmas Tree Ideas for Cabins